MADE - TO - MEASURE
At Selfa, we create custom wedding dresses that reflect your unique personality and style. Each dress is handmade to fit your body perfectly and enhance your figure. To help you get started, we've provided easy-to-follow measuring instructions below.
Don't settle for a generic gown - let's make your wedding day unforgettable.
Before you start measuring, please keep in mind the following important tips to ensure the best results:
CHECKLIST & TIPS
✔ Take all measurements in centimeters.
✔ Follow the example photos provided and take pictures of each required measurement with the tape on your body. Avoid taking close-up photos that obscure the measuring process, as these pictures may be needed to verify the accuracy of your measurements.
✔ Make sure to hold the tape measure straight and without any twists, vertically, horizontally, or parallel to the floor as required.
✔ Take three full-body photos from the front, back, and side, holding the camera parallel to your body.
✔ Wear tight-fitting clothing such as leggings and a tank top, or simply your undergarments, to ensure precise measurements. If you wear a supportive padded bra, please let us know the thickness of the padding.
✔ If you plan to wear supportive undergarments such as butt and hip pads, bodysuit shapewear, or a bra, please wear them when measuring.
✔ Wear your wedding shoes or high heels, or at least a pair of shoes with the same height.
✔ Ideally, have someone assist you to ensure the most accurate measurements possible. Relax your arms at your sides instead of holding up the tape measure.
✔ Do not pull the tape measure too tightly; it should fit as loosely around your body as possible without falling.
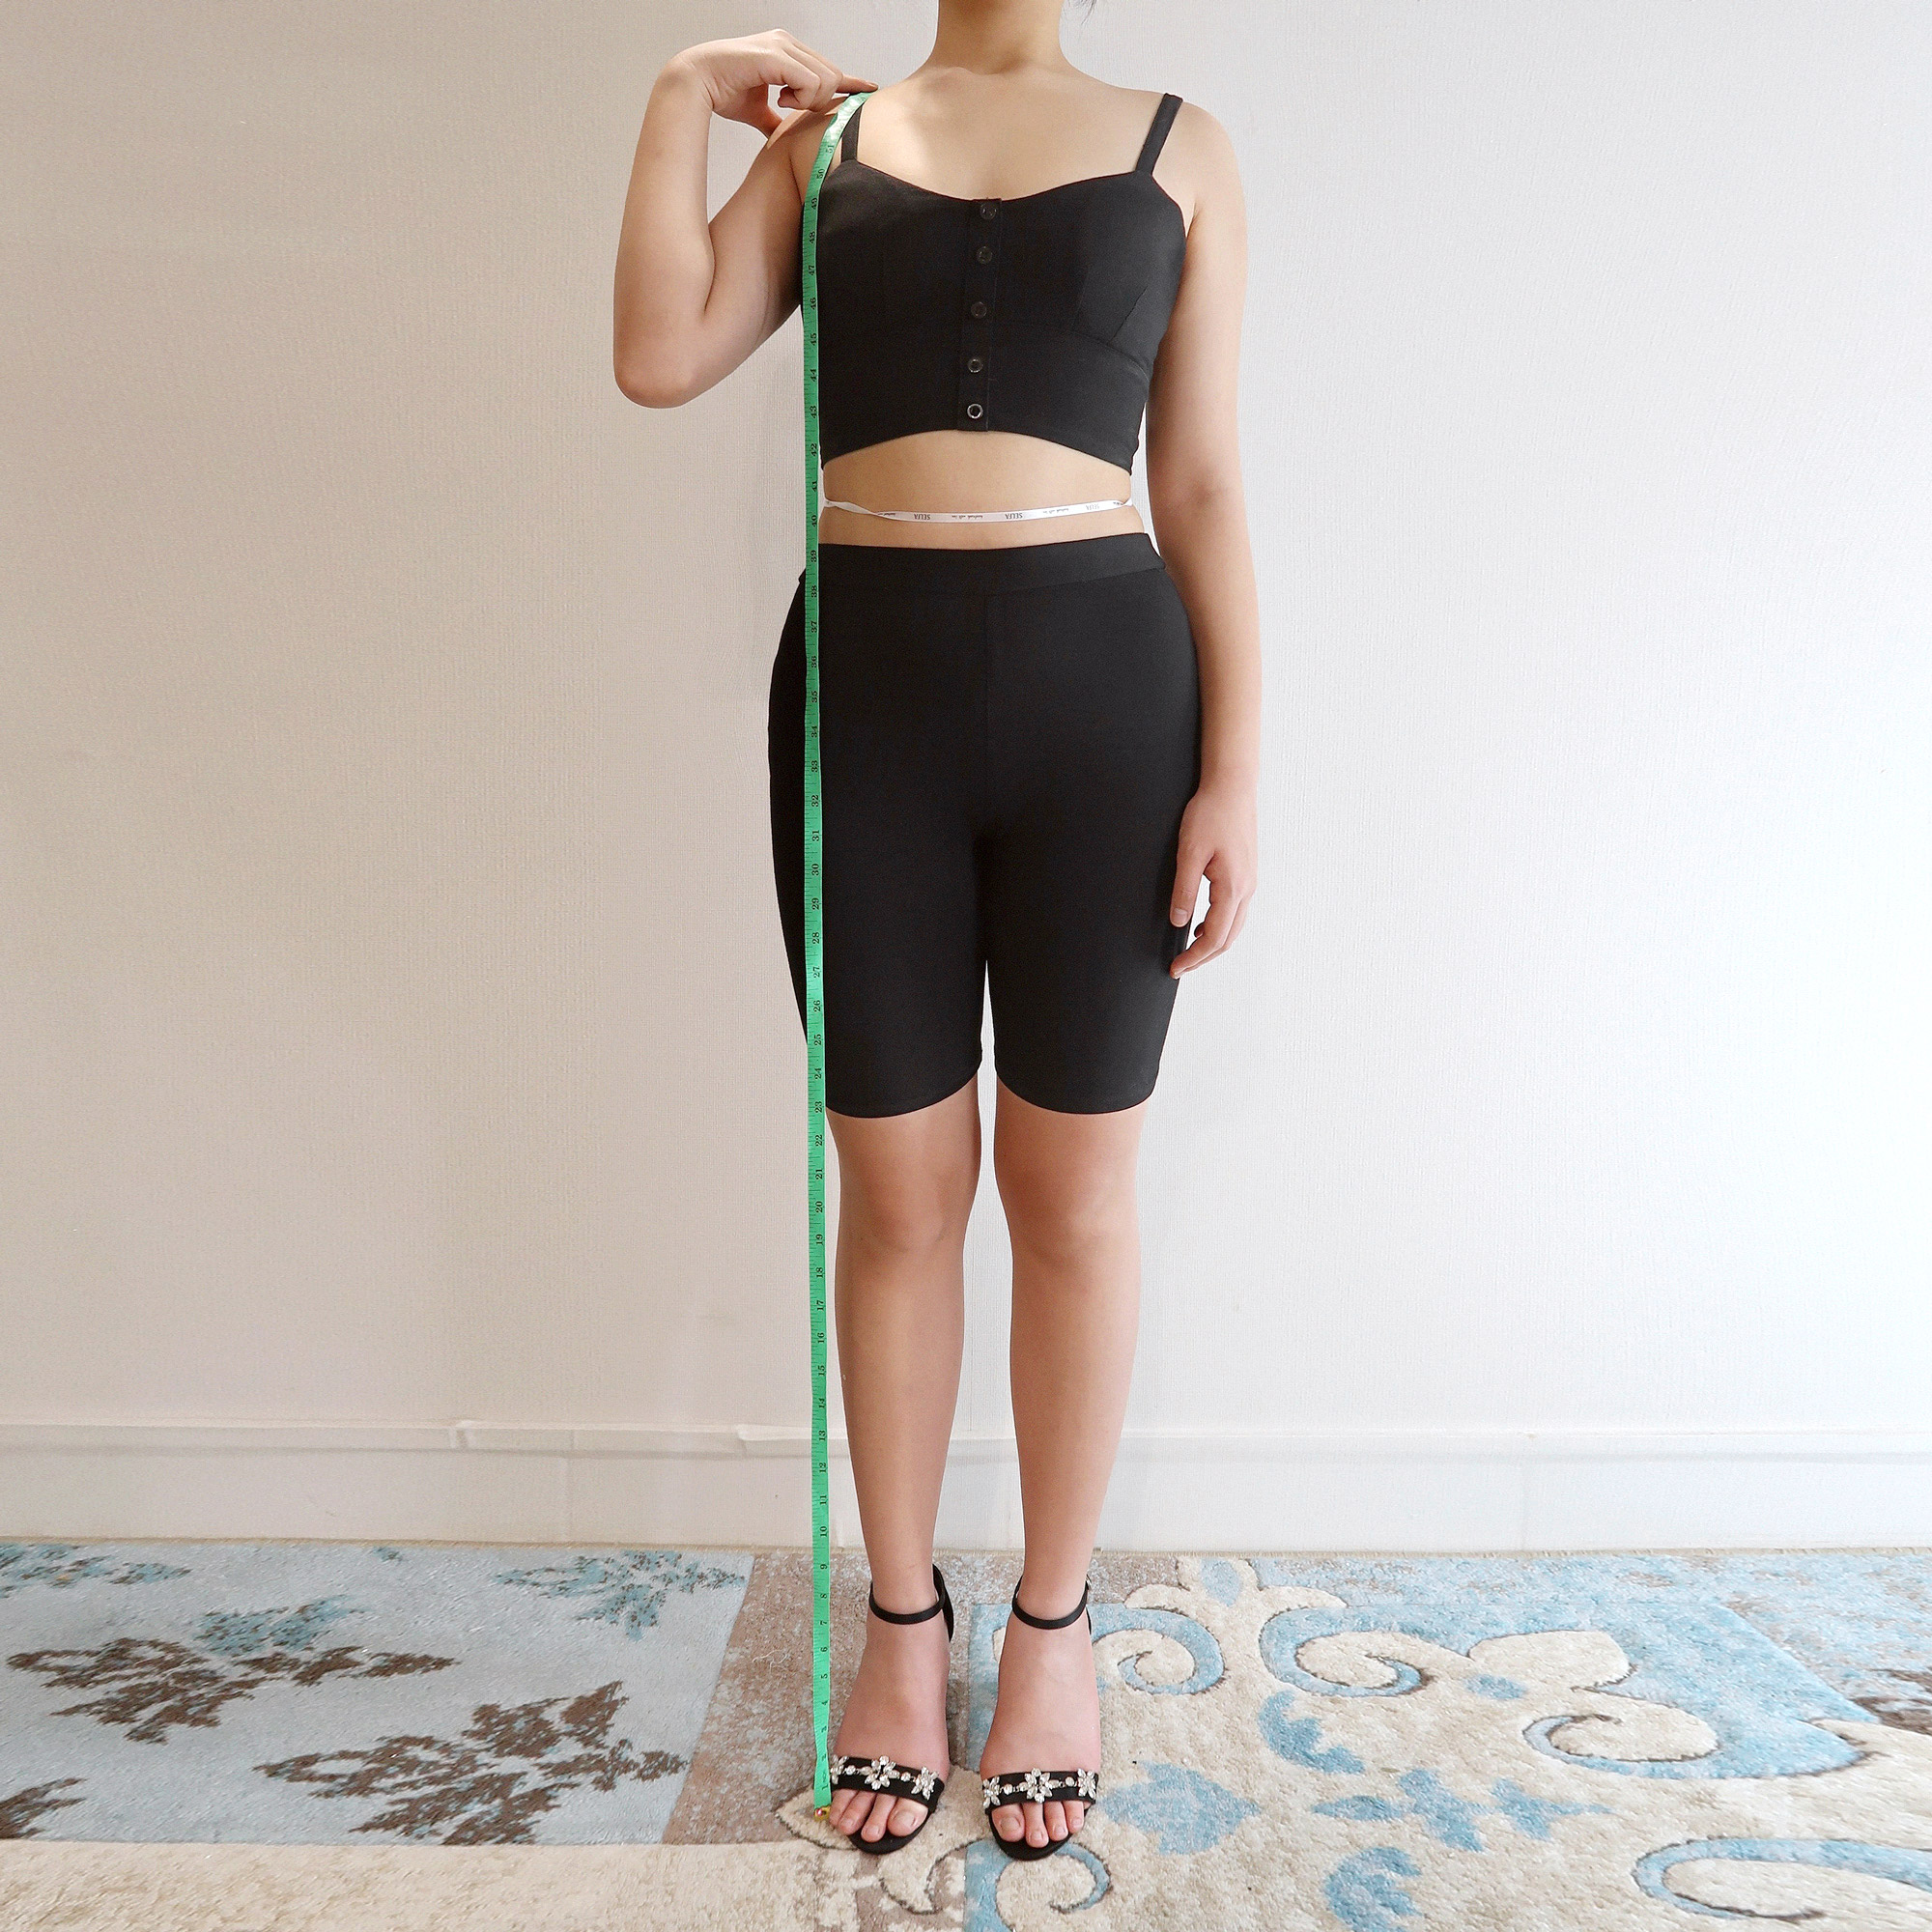
1. Shoulder to floor
Stand upright and measure from the midpoint of your shoulder straight down to the floor or desired hemline. Tip: Wear your wedding shoes/heels while measuring to ensure accuracy.
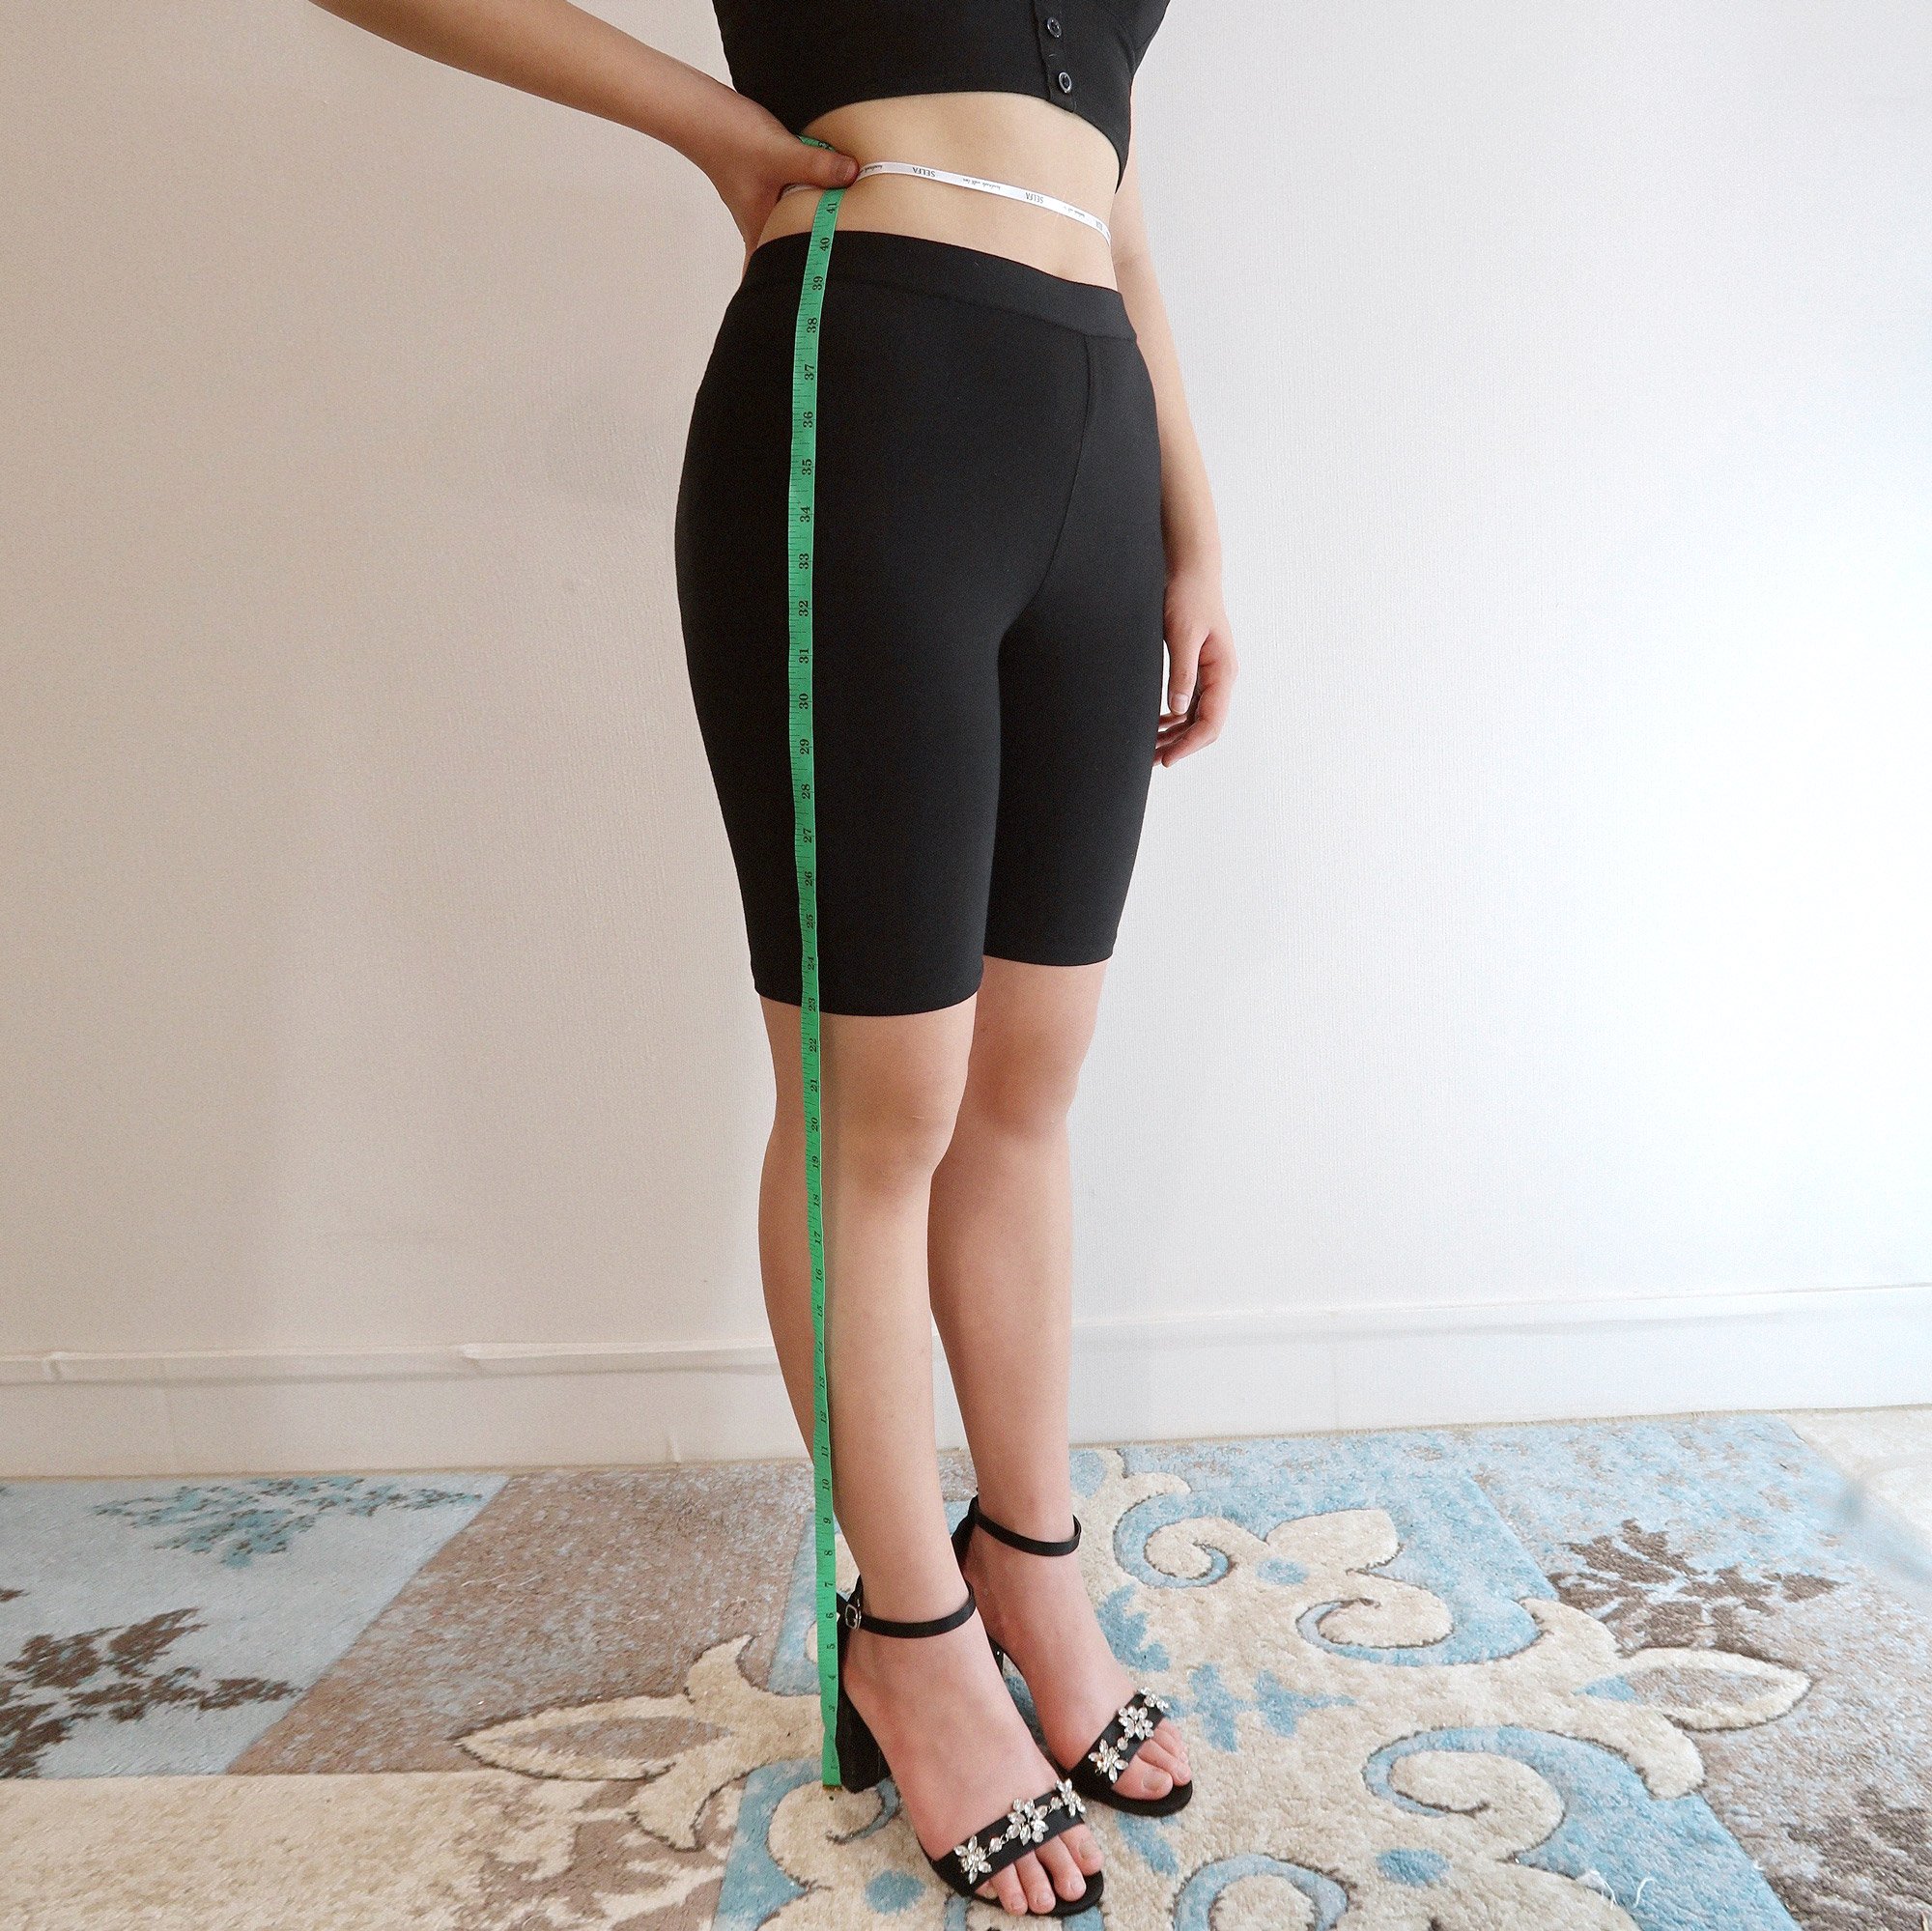
2. Waist to floor
Begin by finding your natural waistline using a thin strip or ribbon. Then, measure from the waistline straight down to the floor. It's recommended to measure from the side of your body for accuracy.
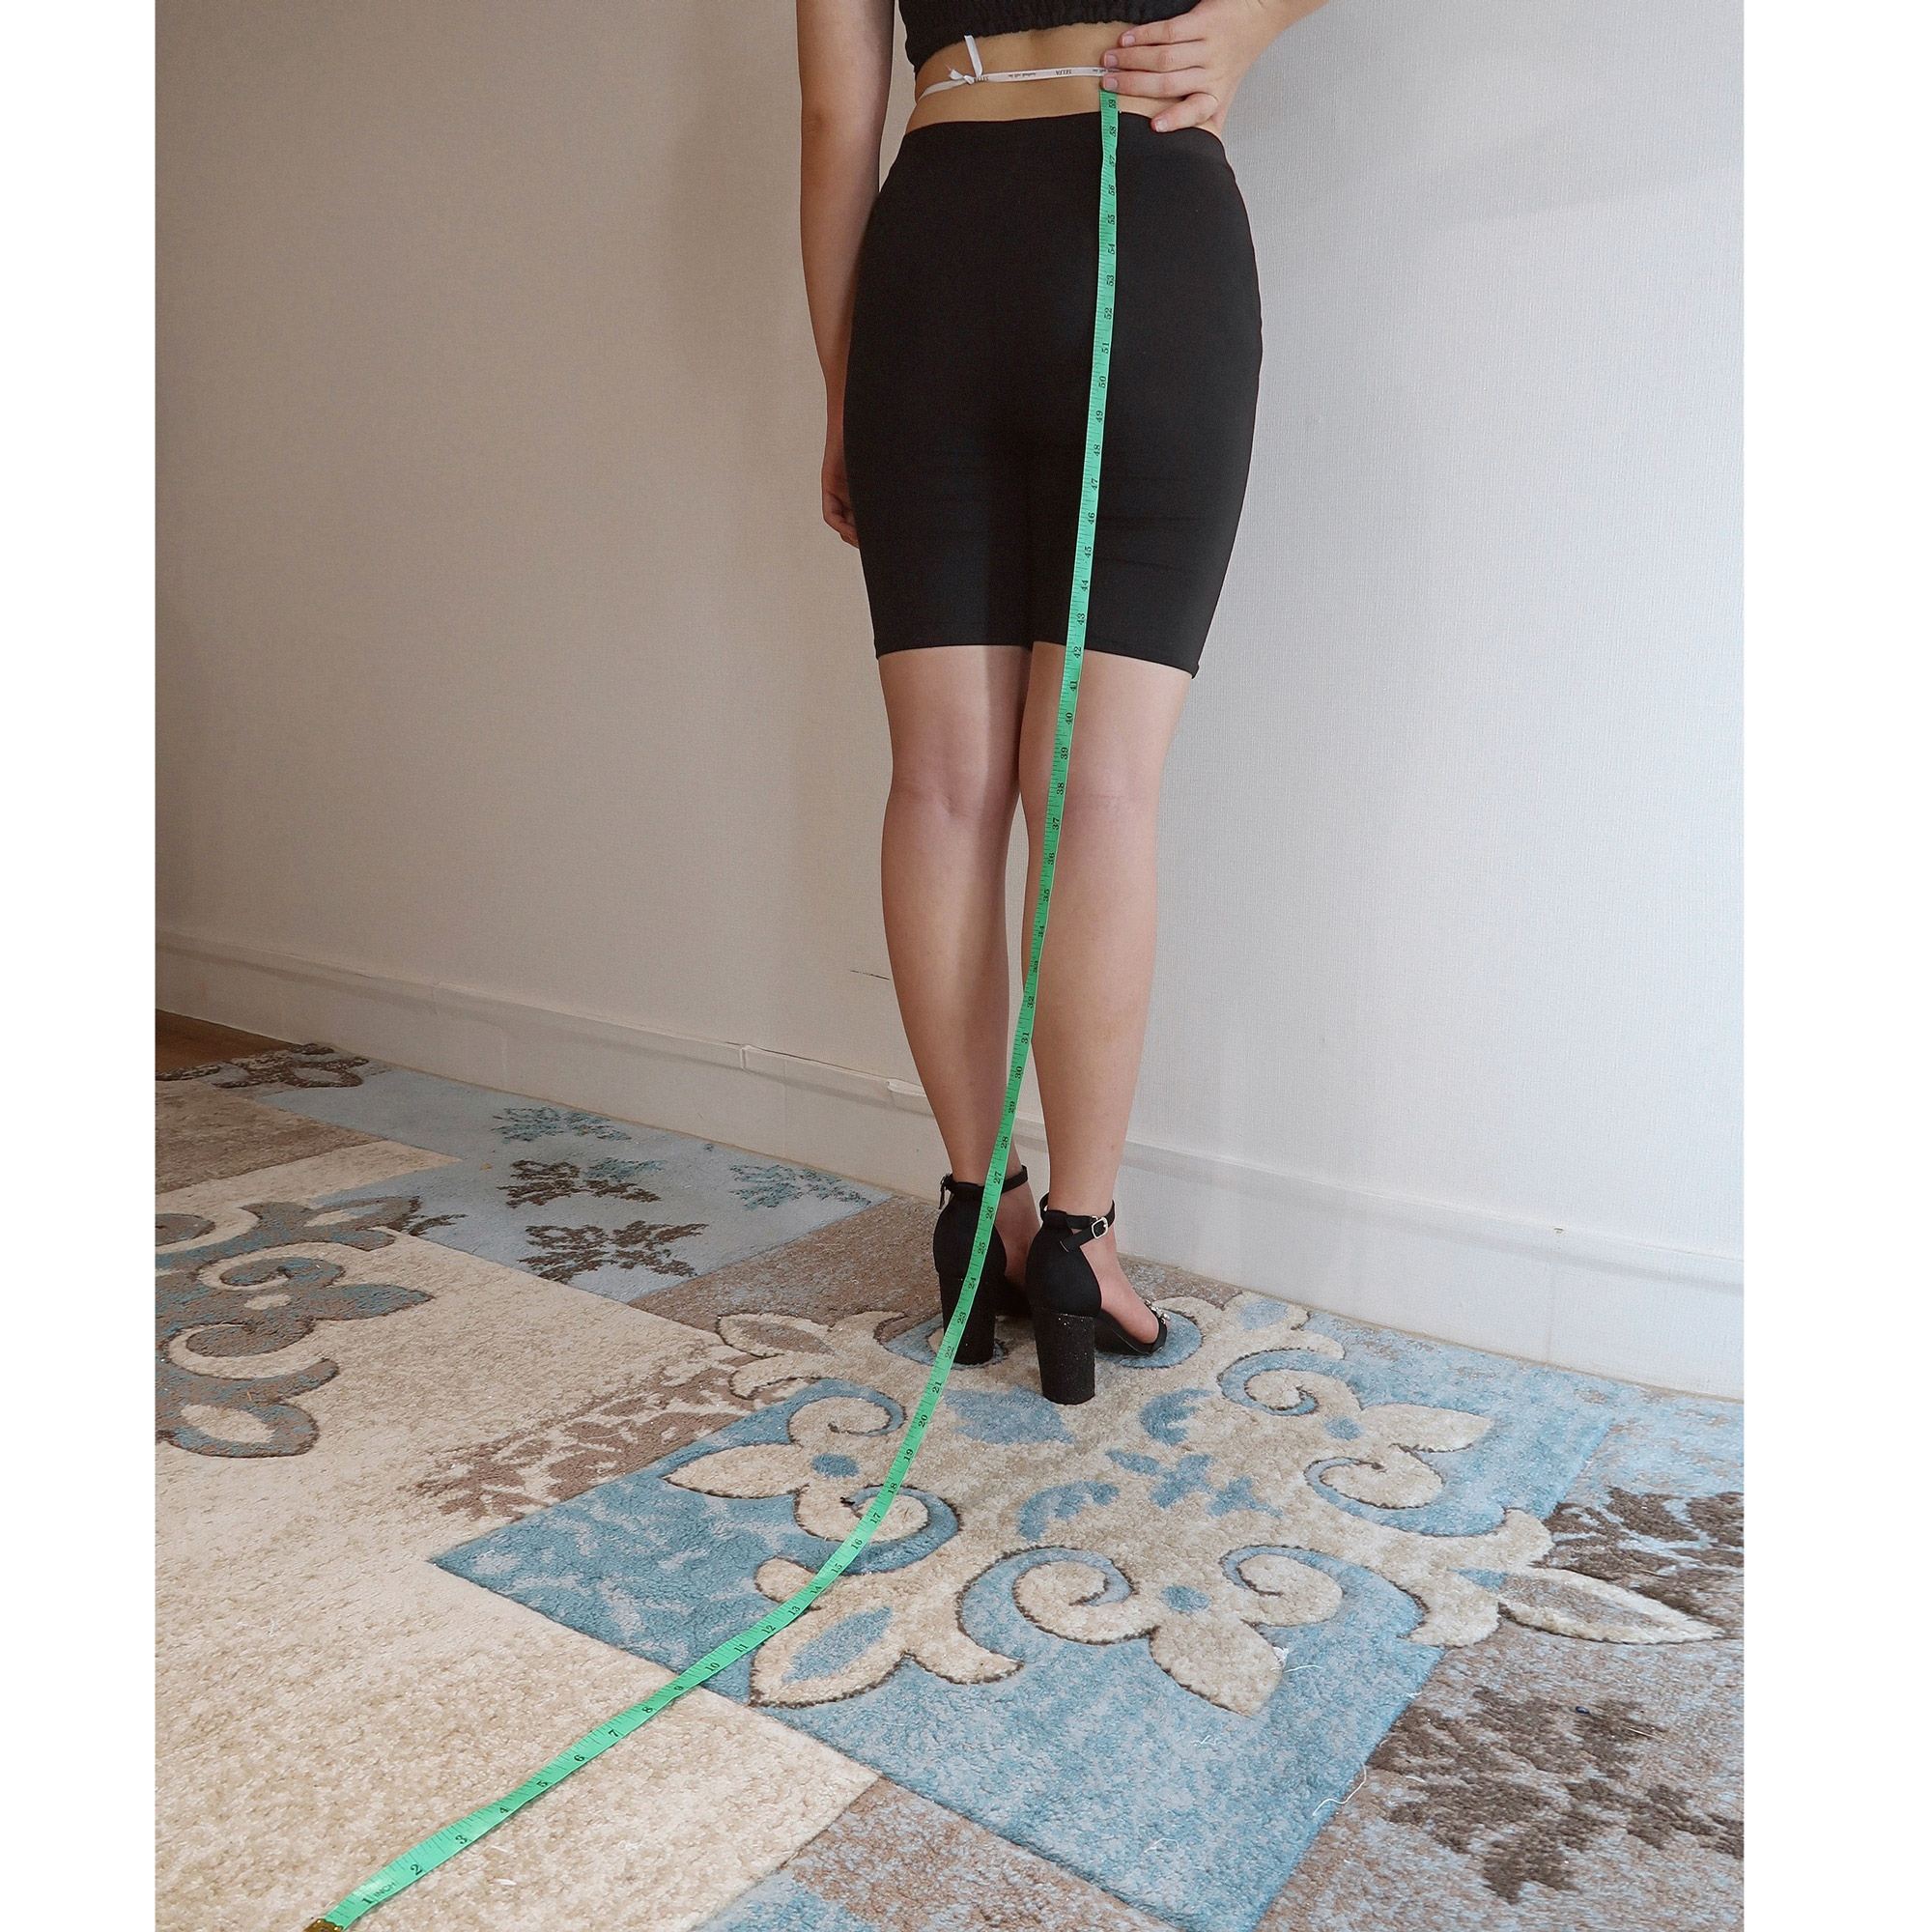
3. Train length
If you require a specific length for the dress train, measure from the waistline to where you want the train to end on the floor. If you want the train to be the original design length, skip this.
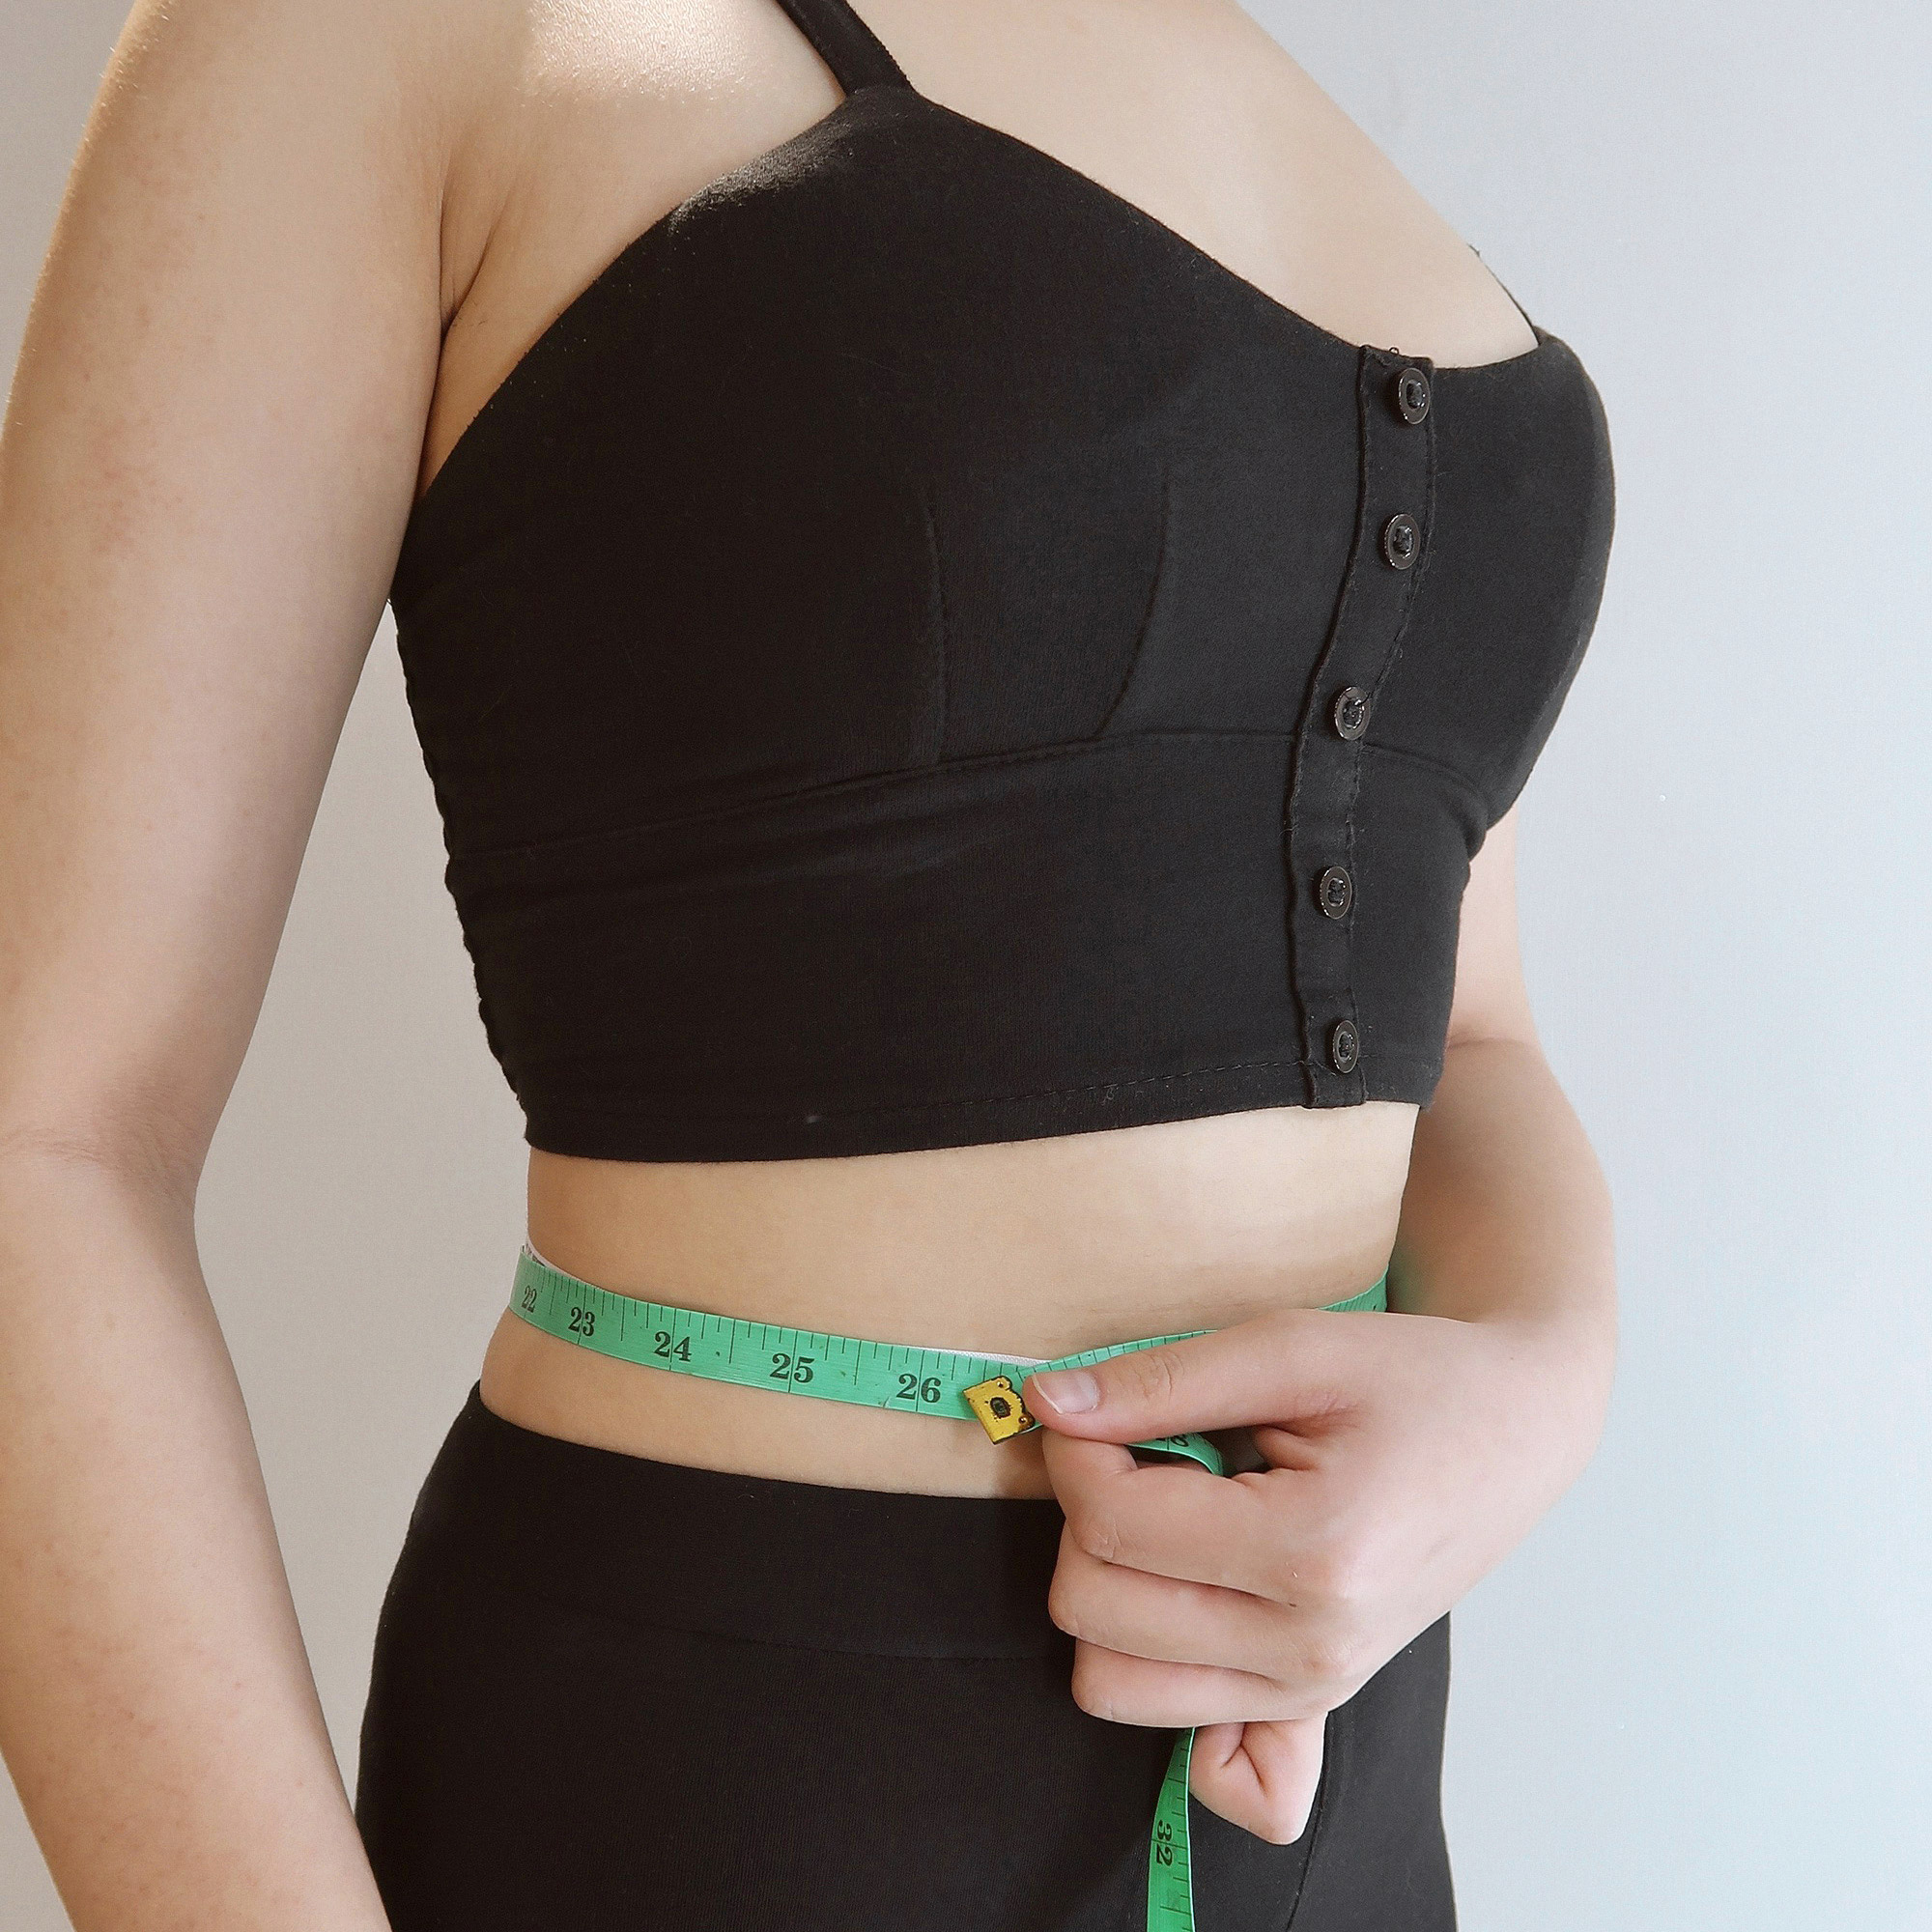
4. Waist
Define your waistline by wrapping a thin strip or ribbon around the smallest part of your natural waist and then measure closely around the ribbon. Place the tape on top of the ribbon. And do not pull in your stomach or breathe out while measuring.
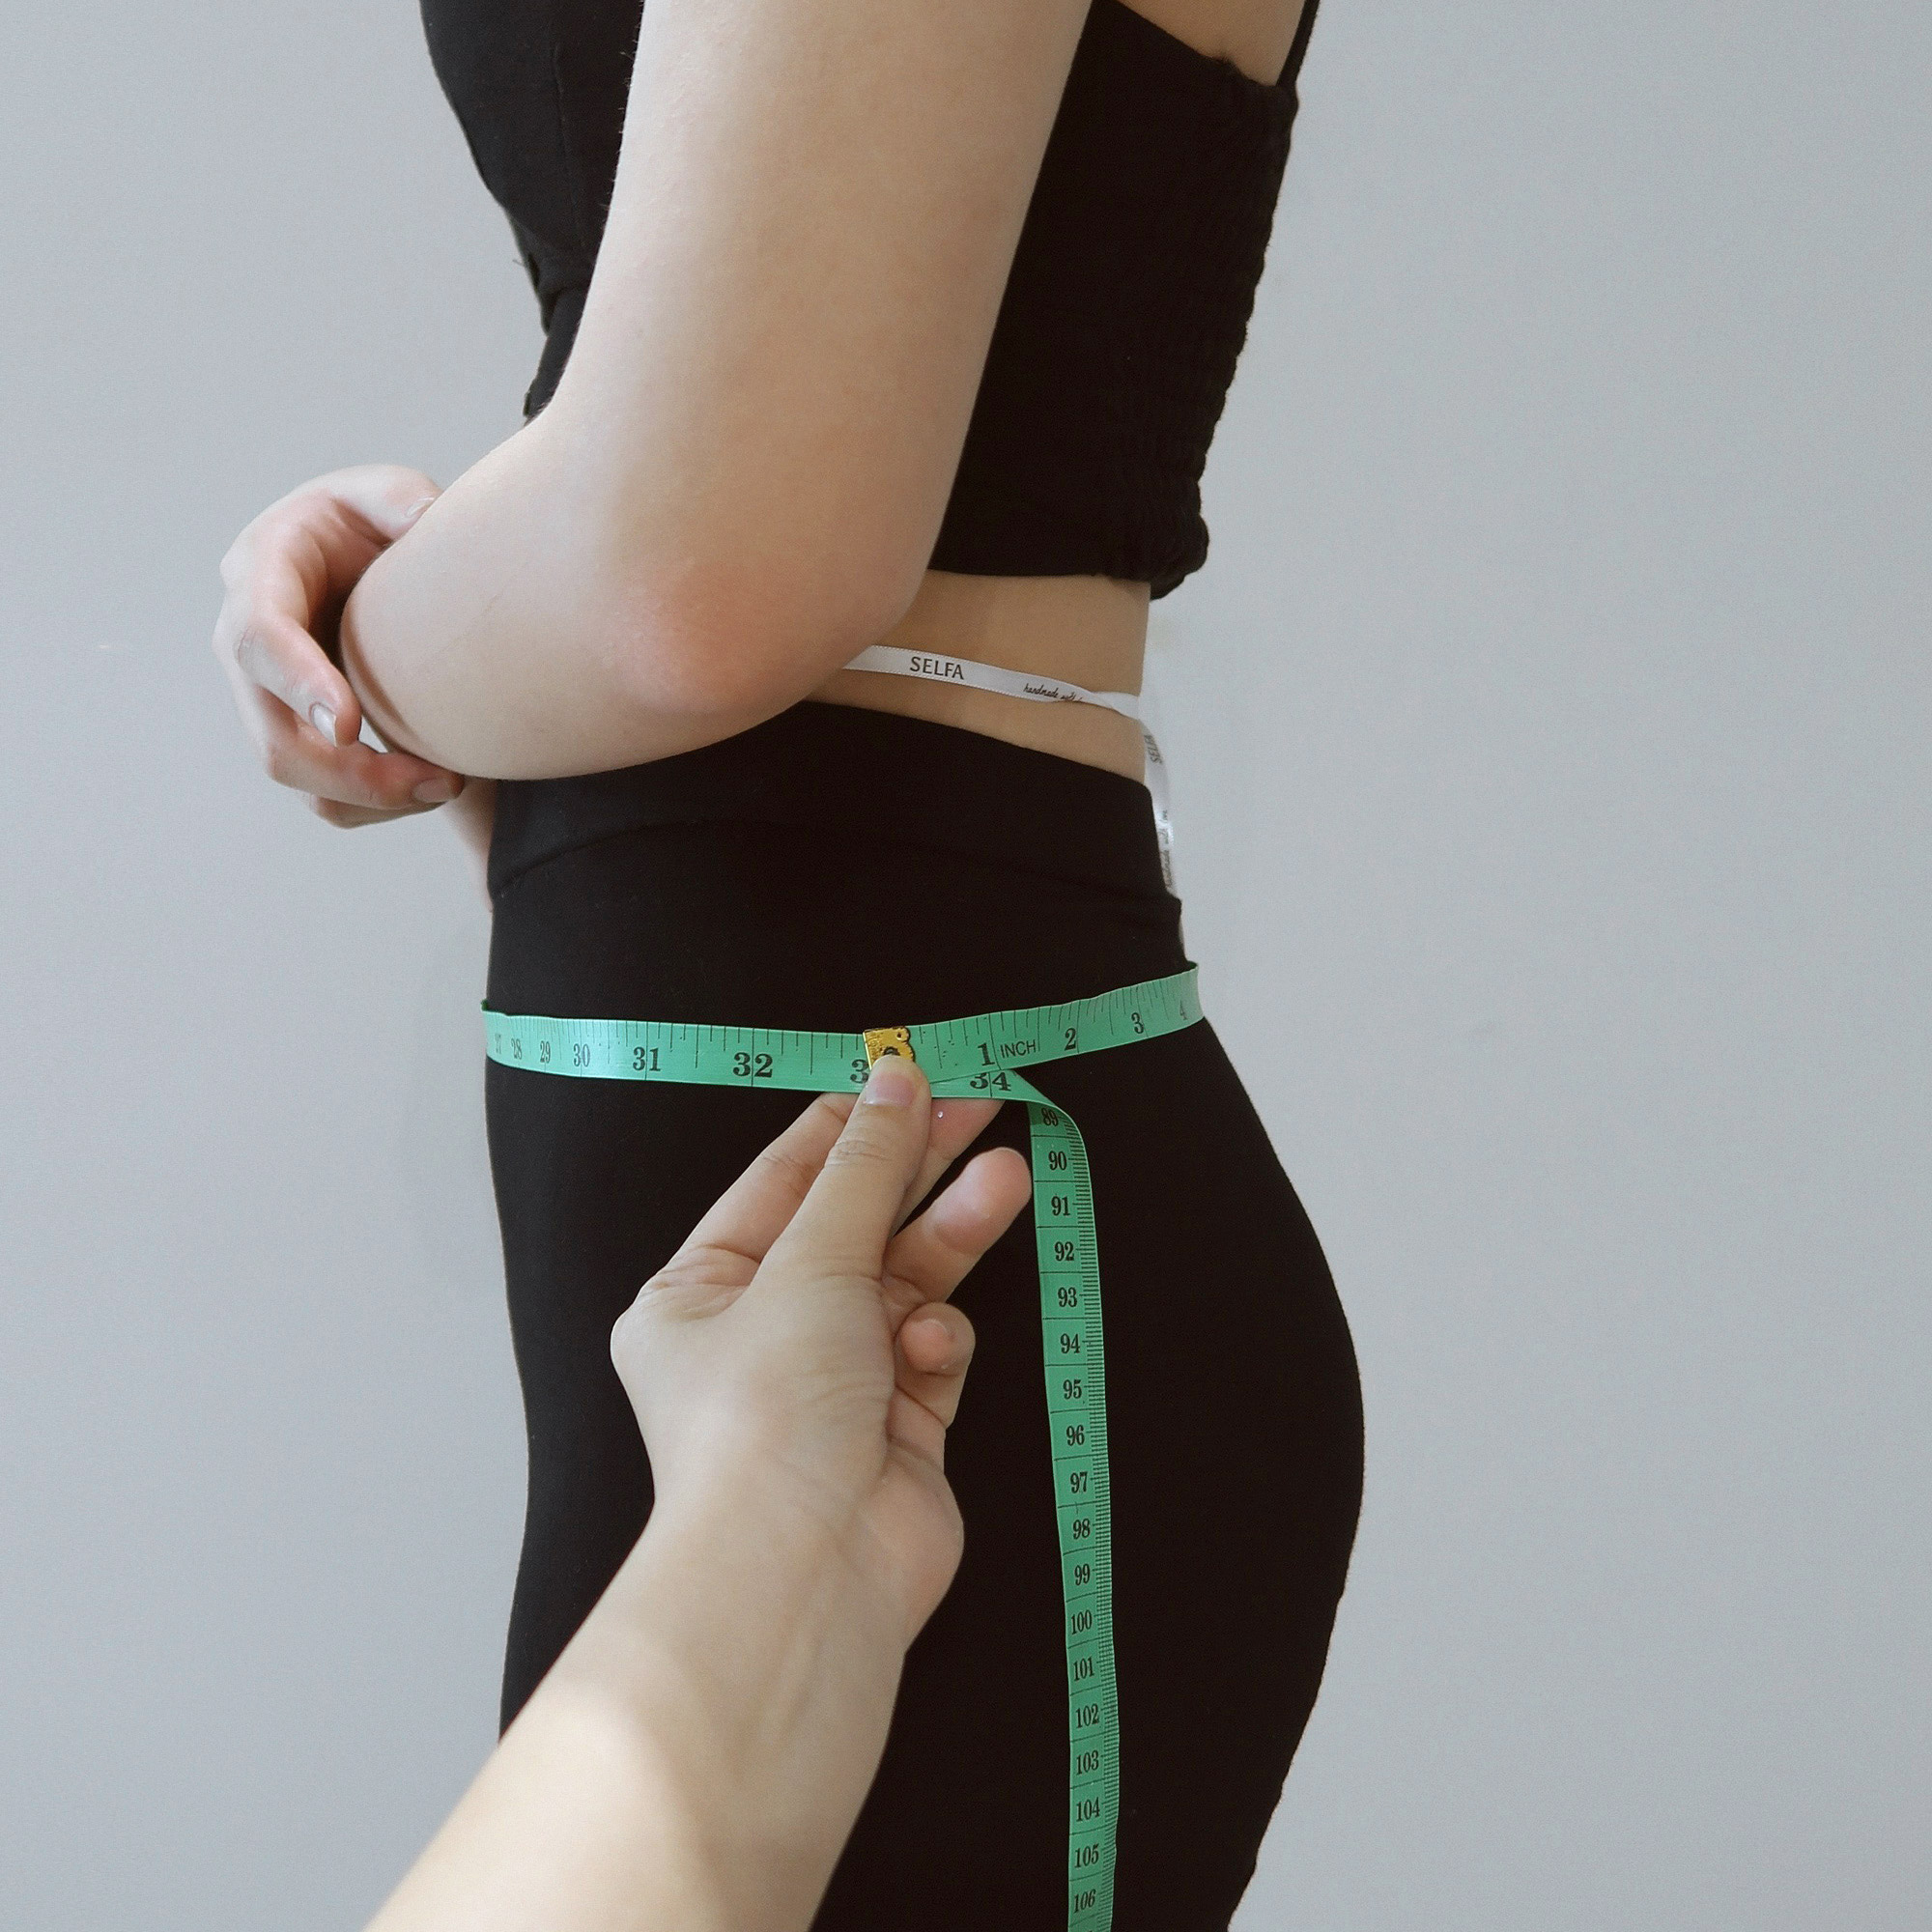
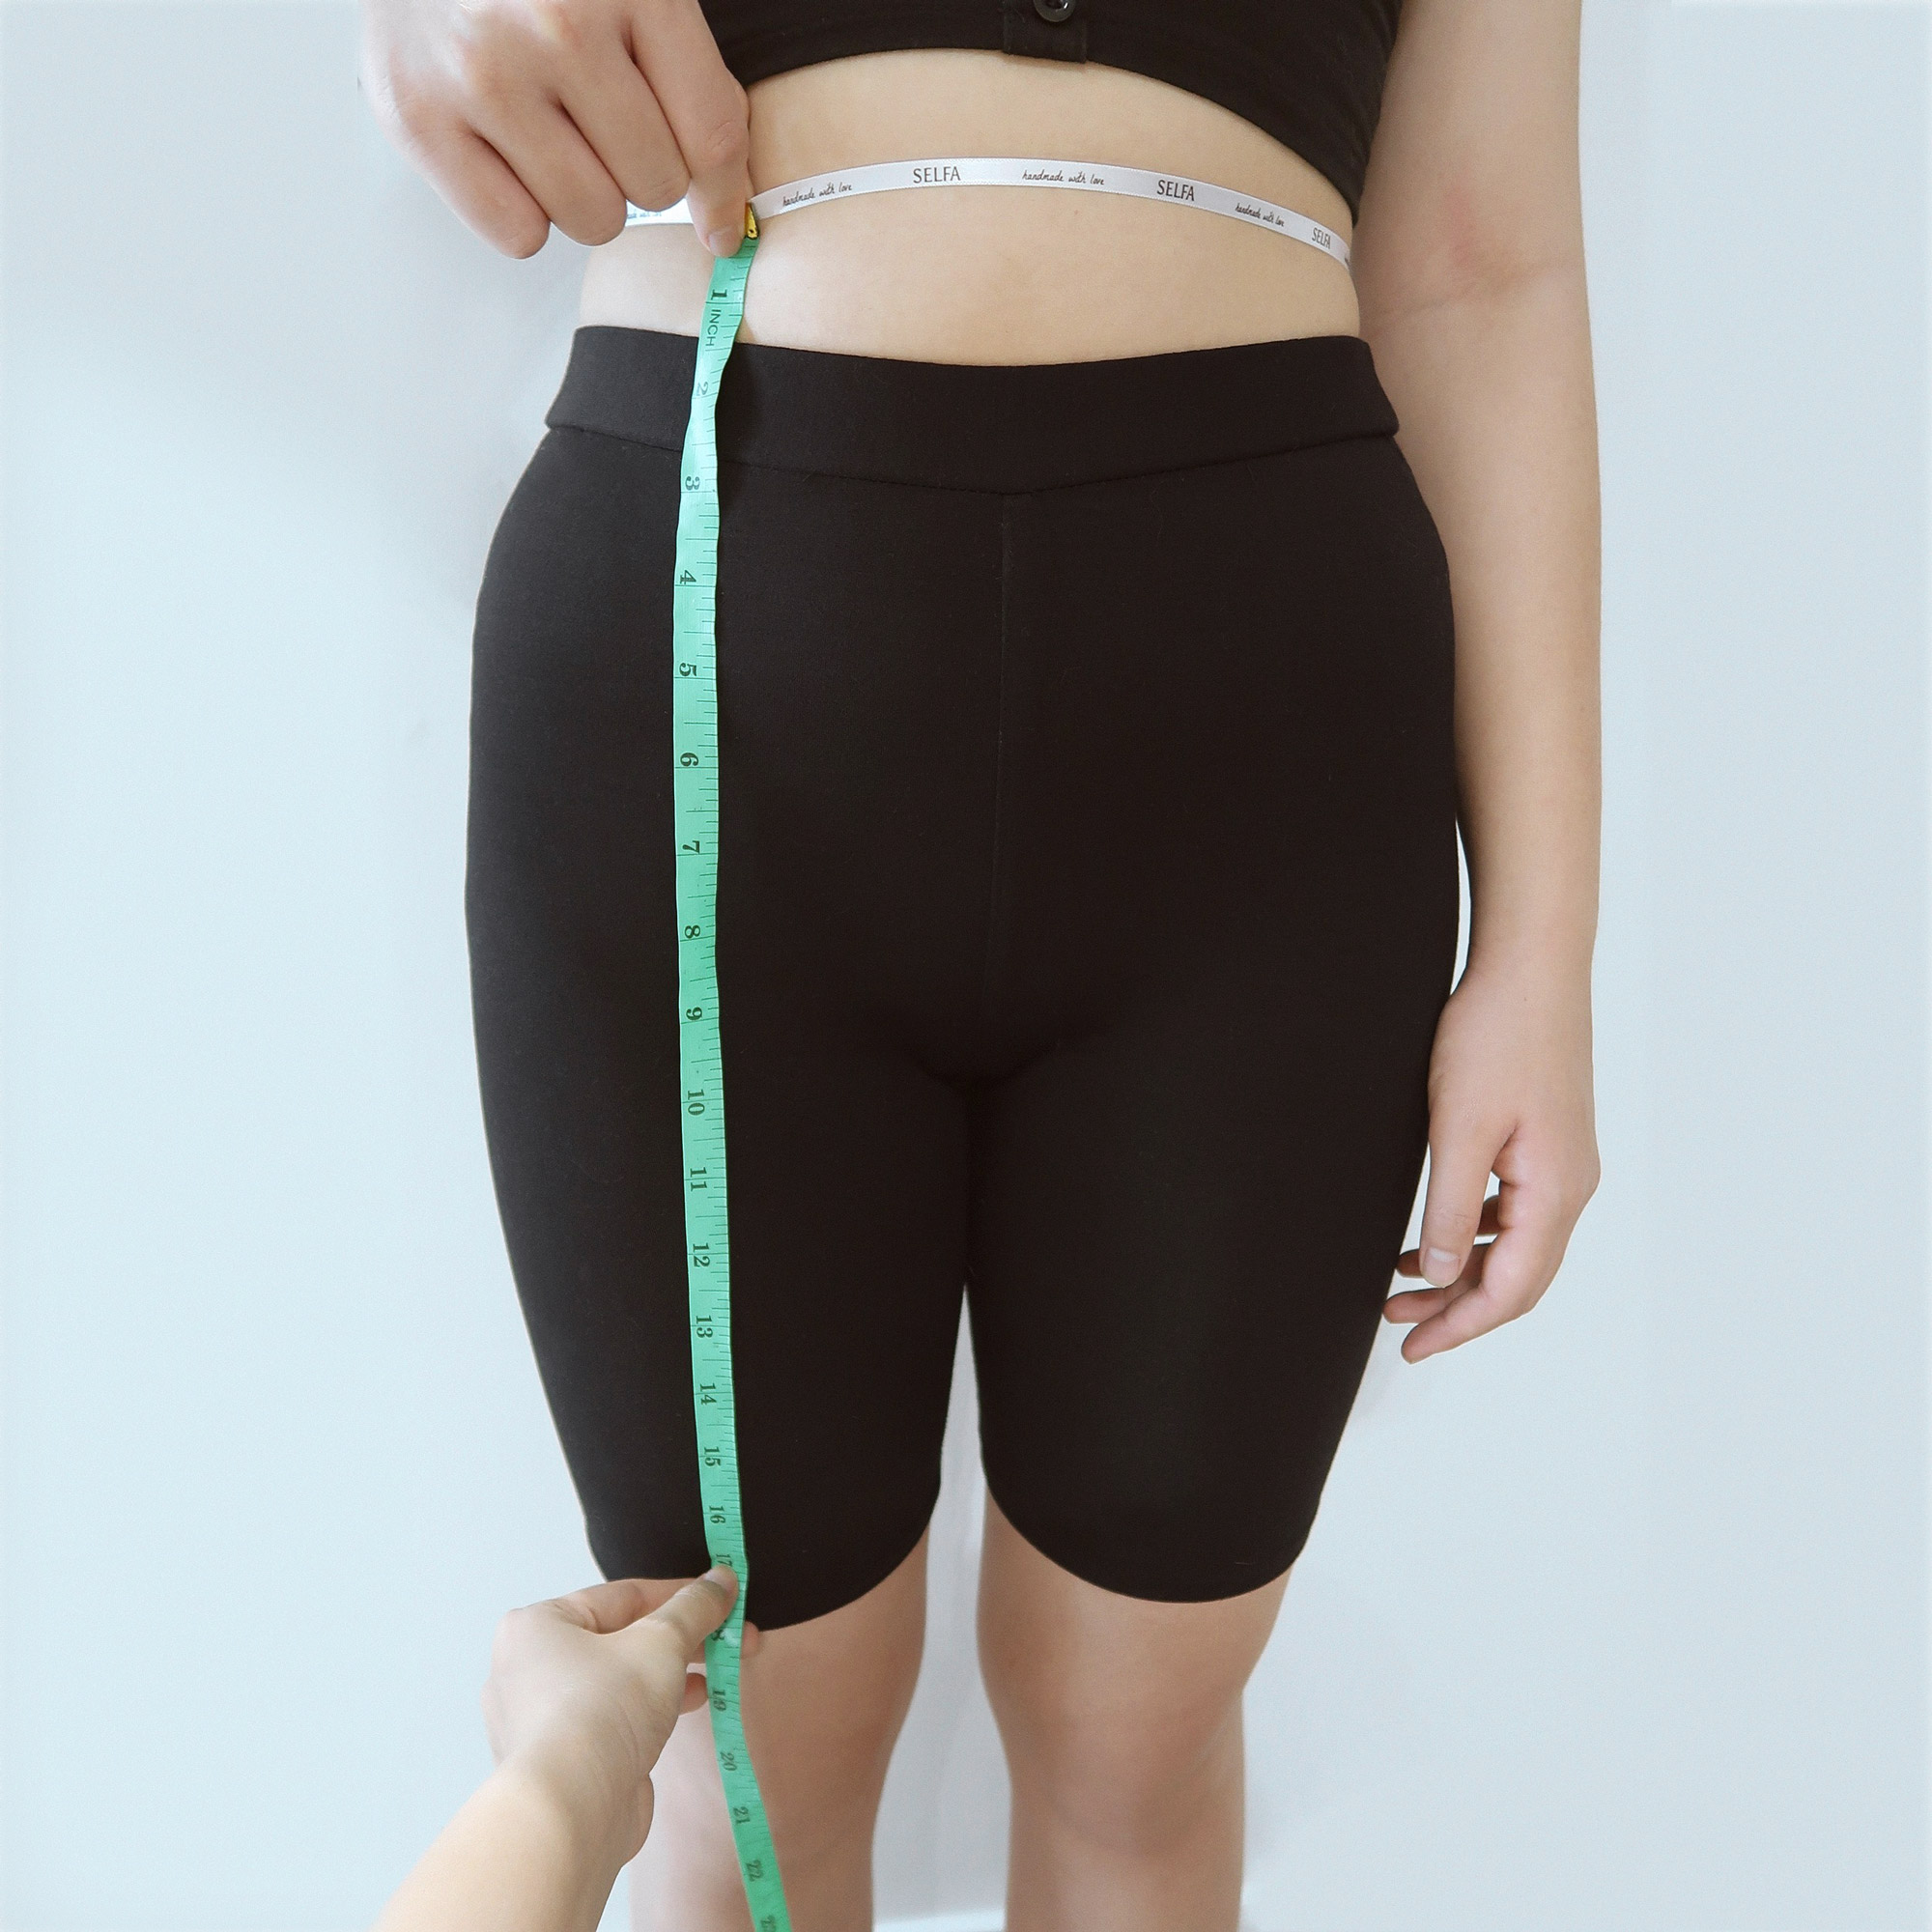
5. High hips
Measure the circumference around your hip bones, making sure that there is enough space for a finger to fit comfortably between your body and the tape measure.
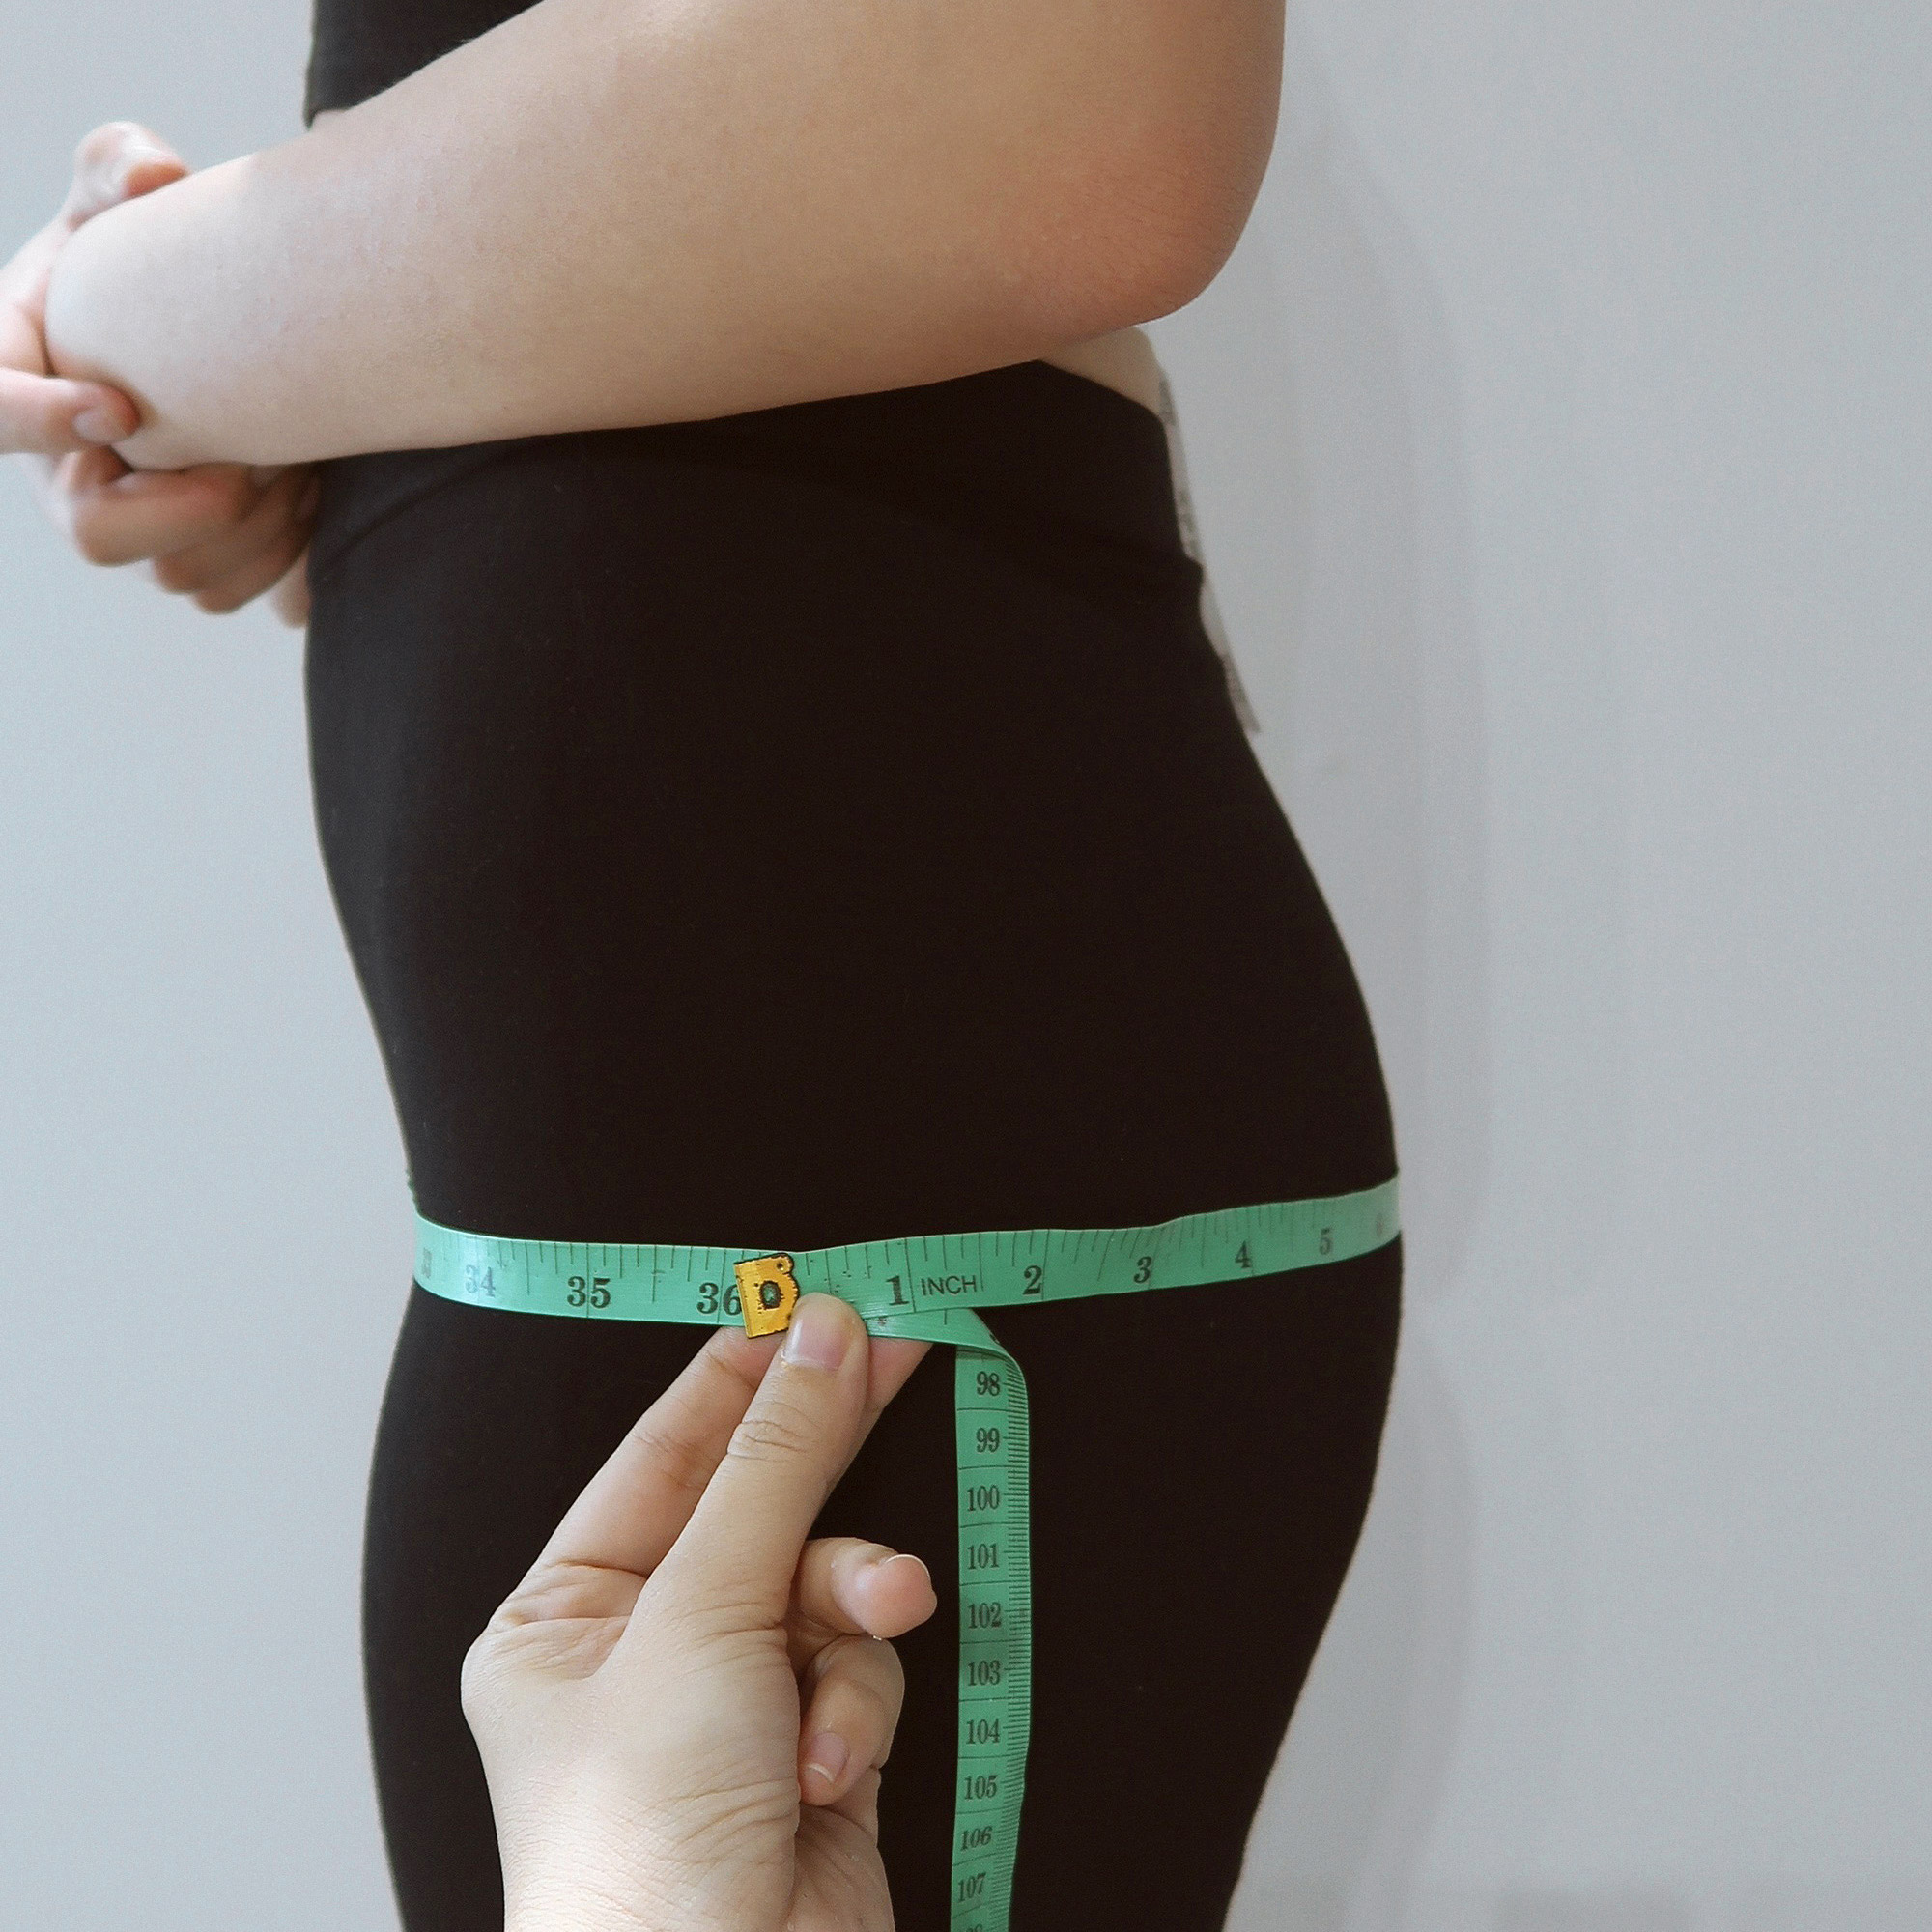
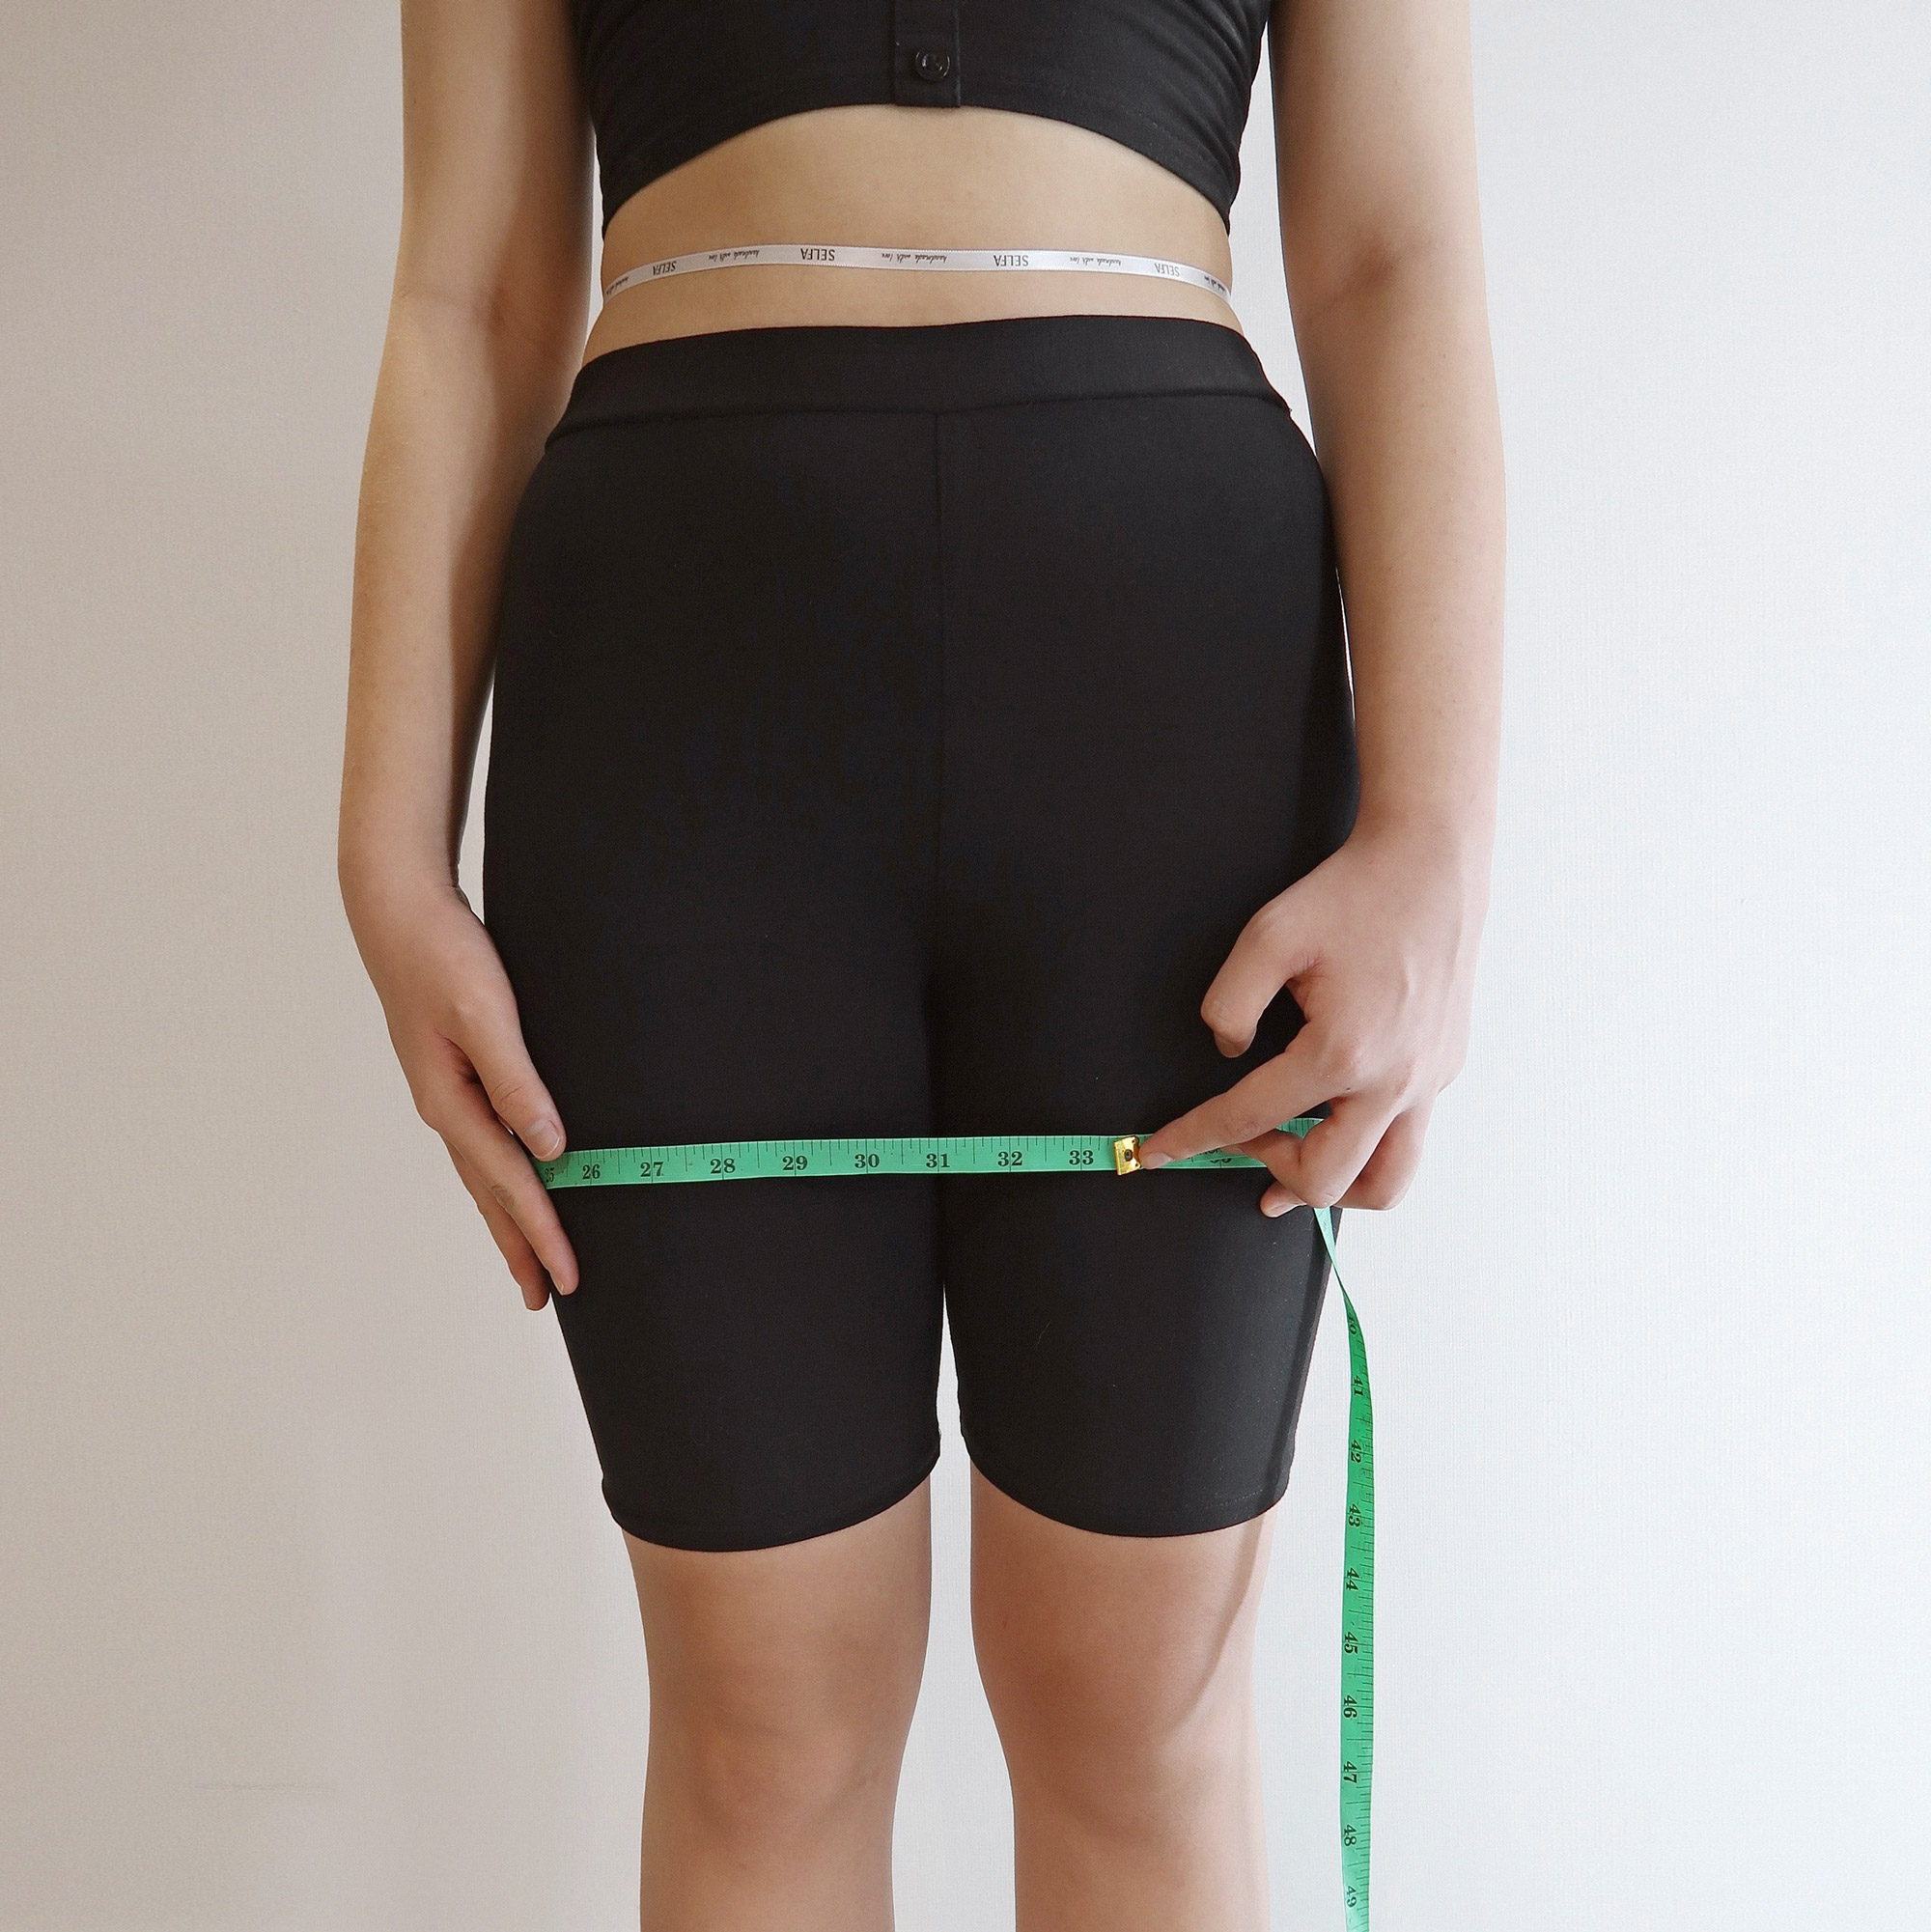
6. Hips
Hold the measuring tape parallel to the floor and wrap it around the widest part of your hips, which is typically below your hip bones and across the fullest part of your buttocks.
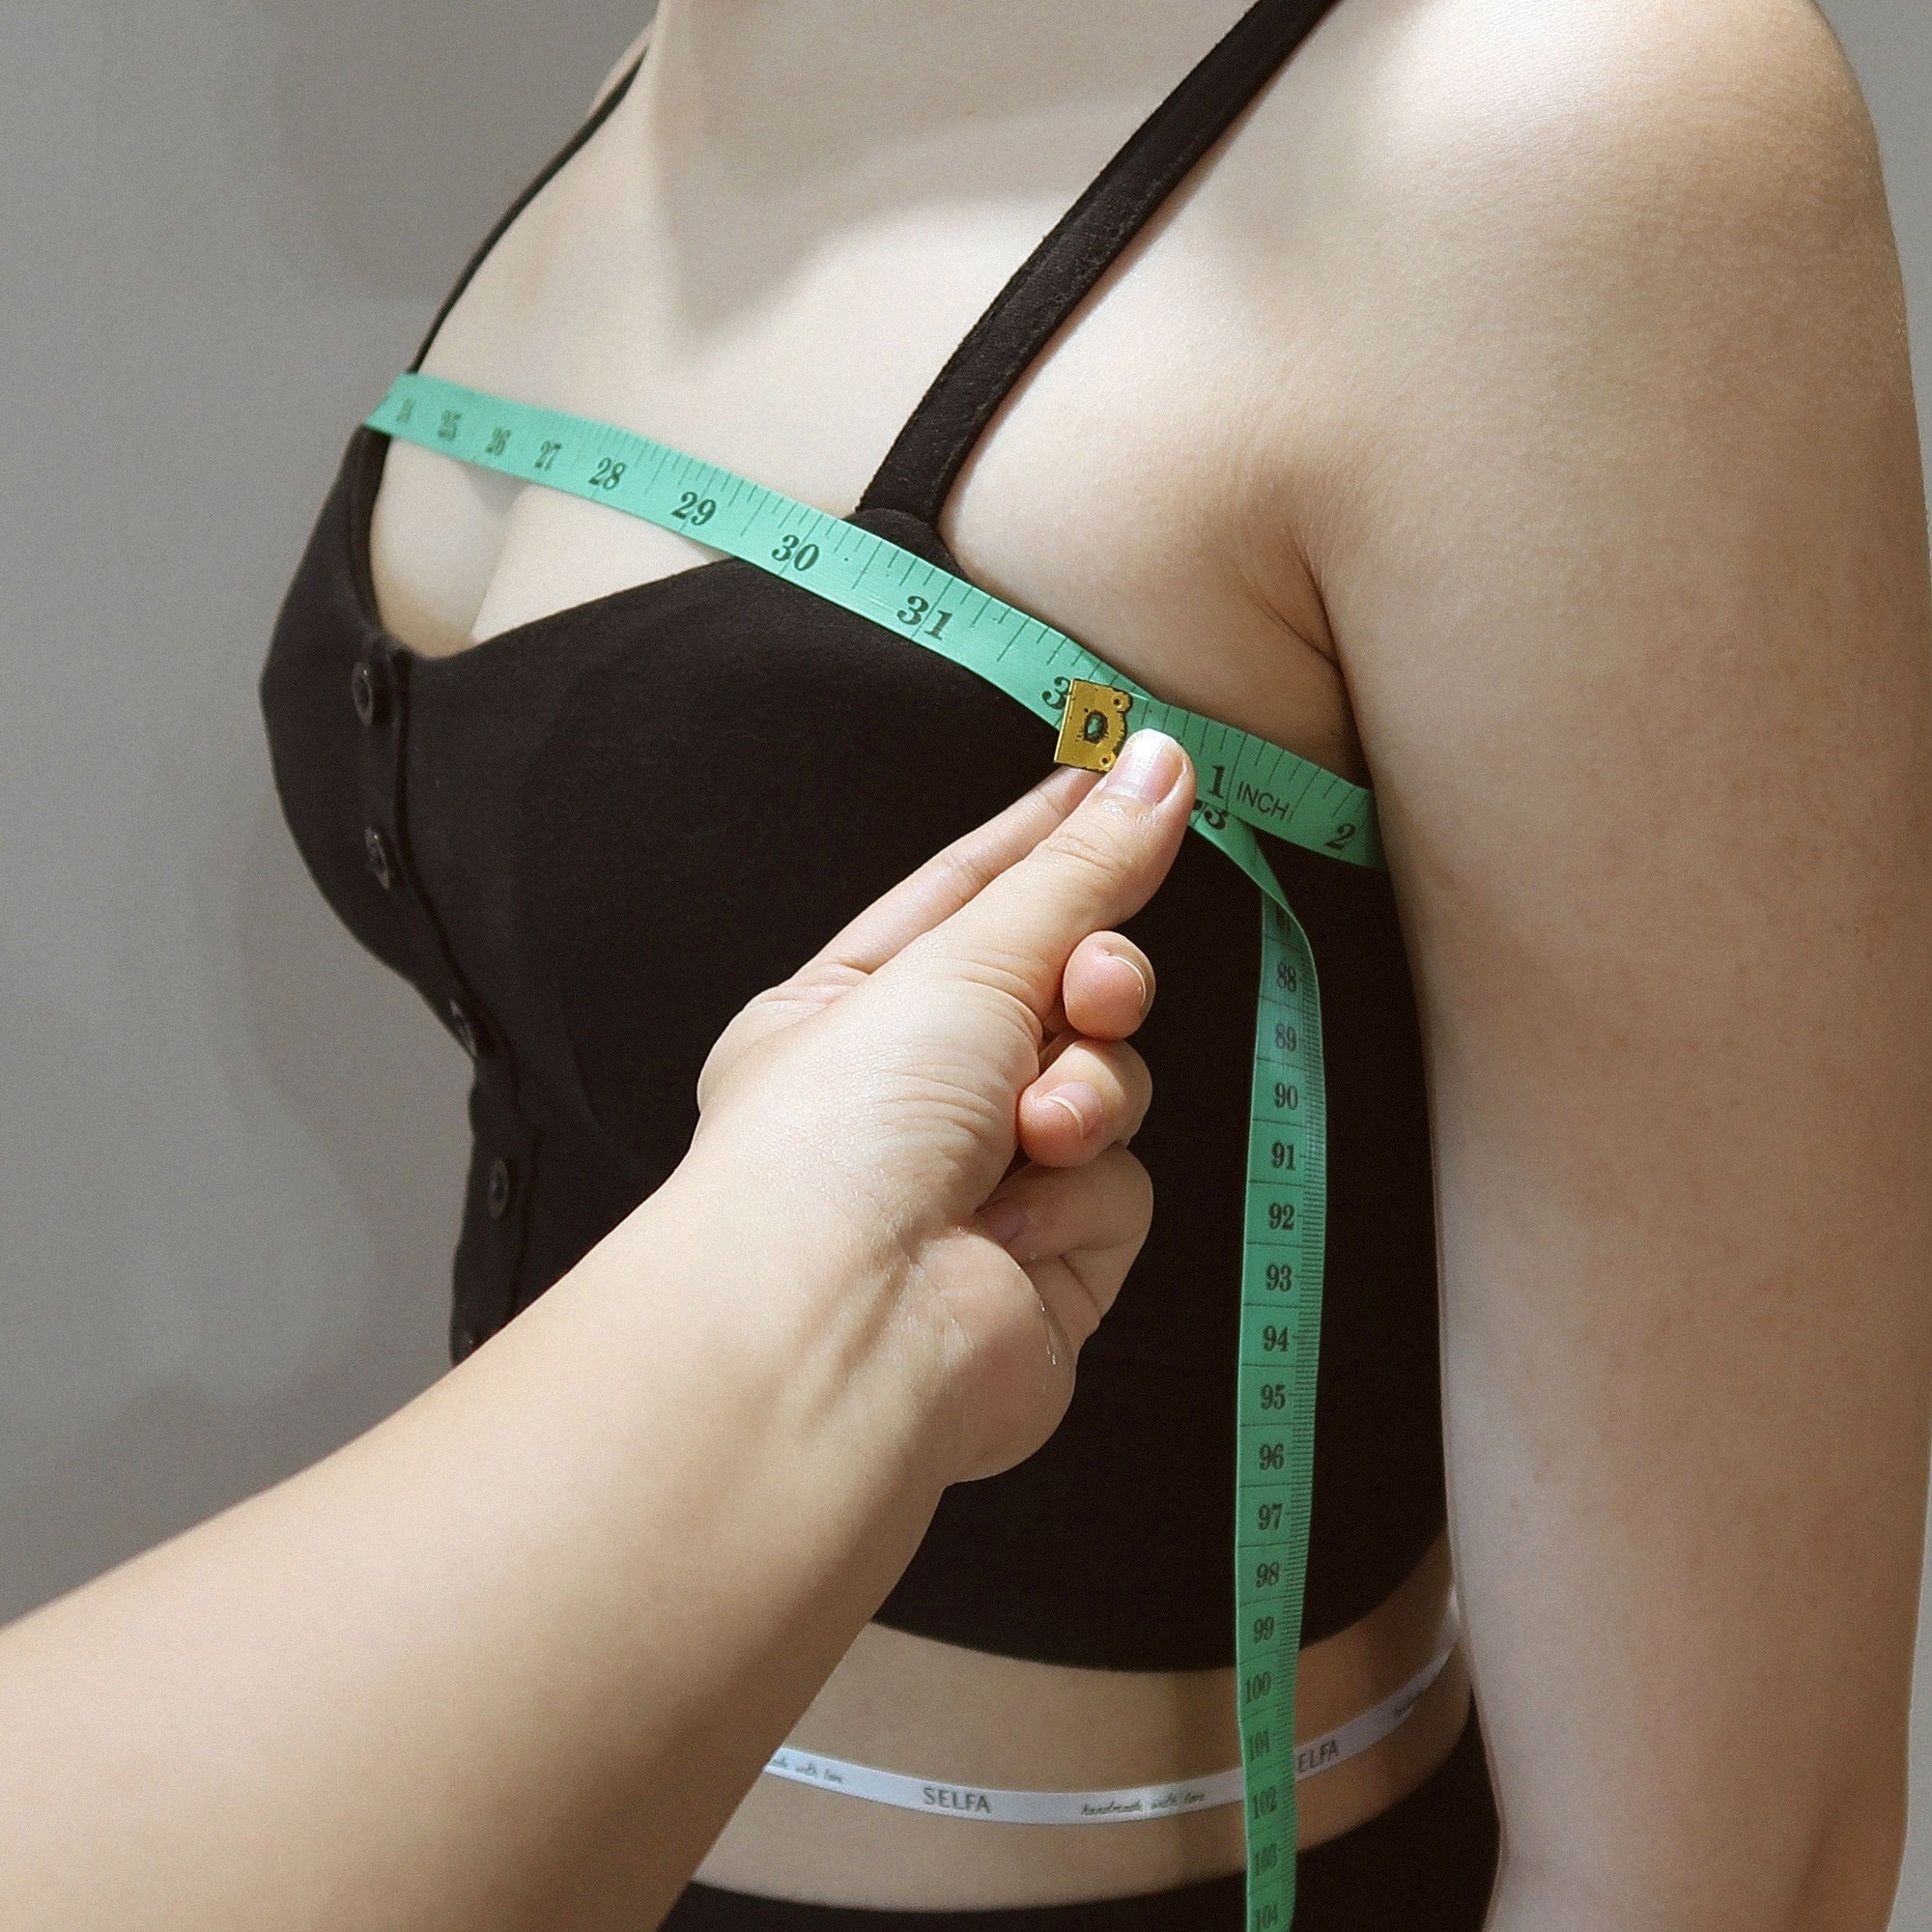
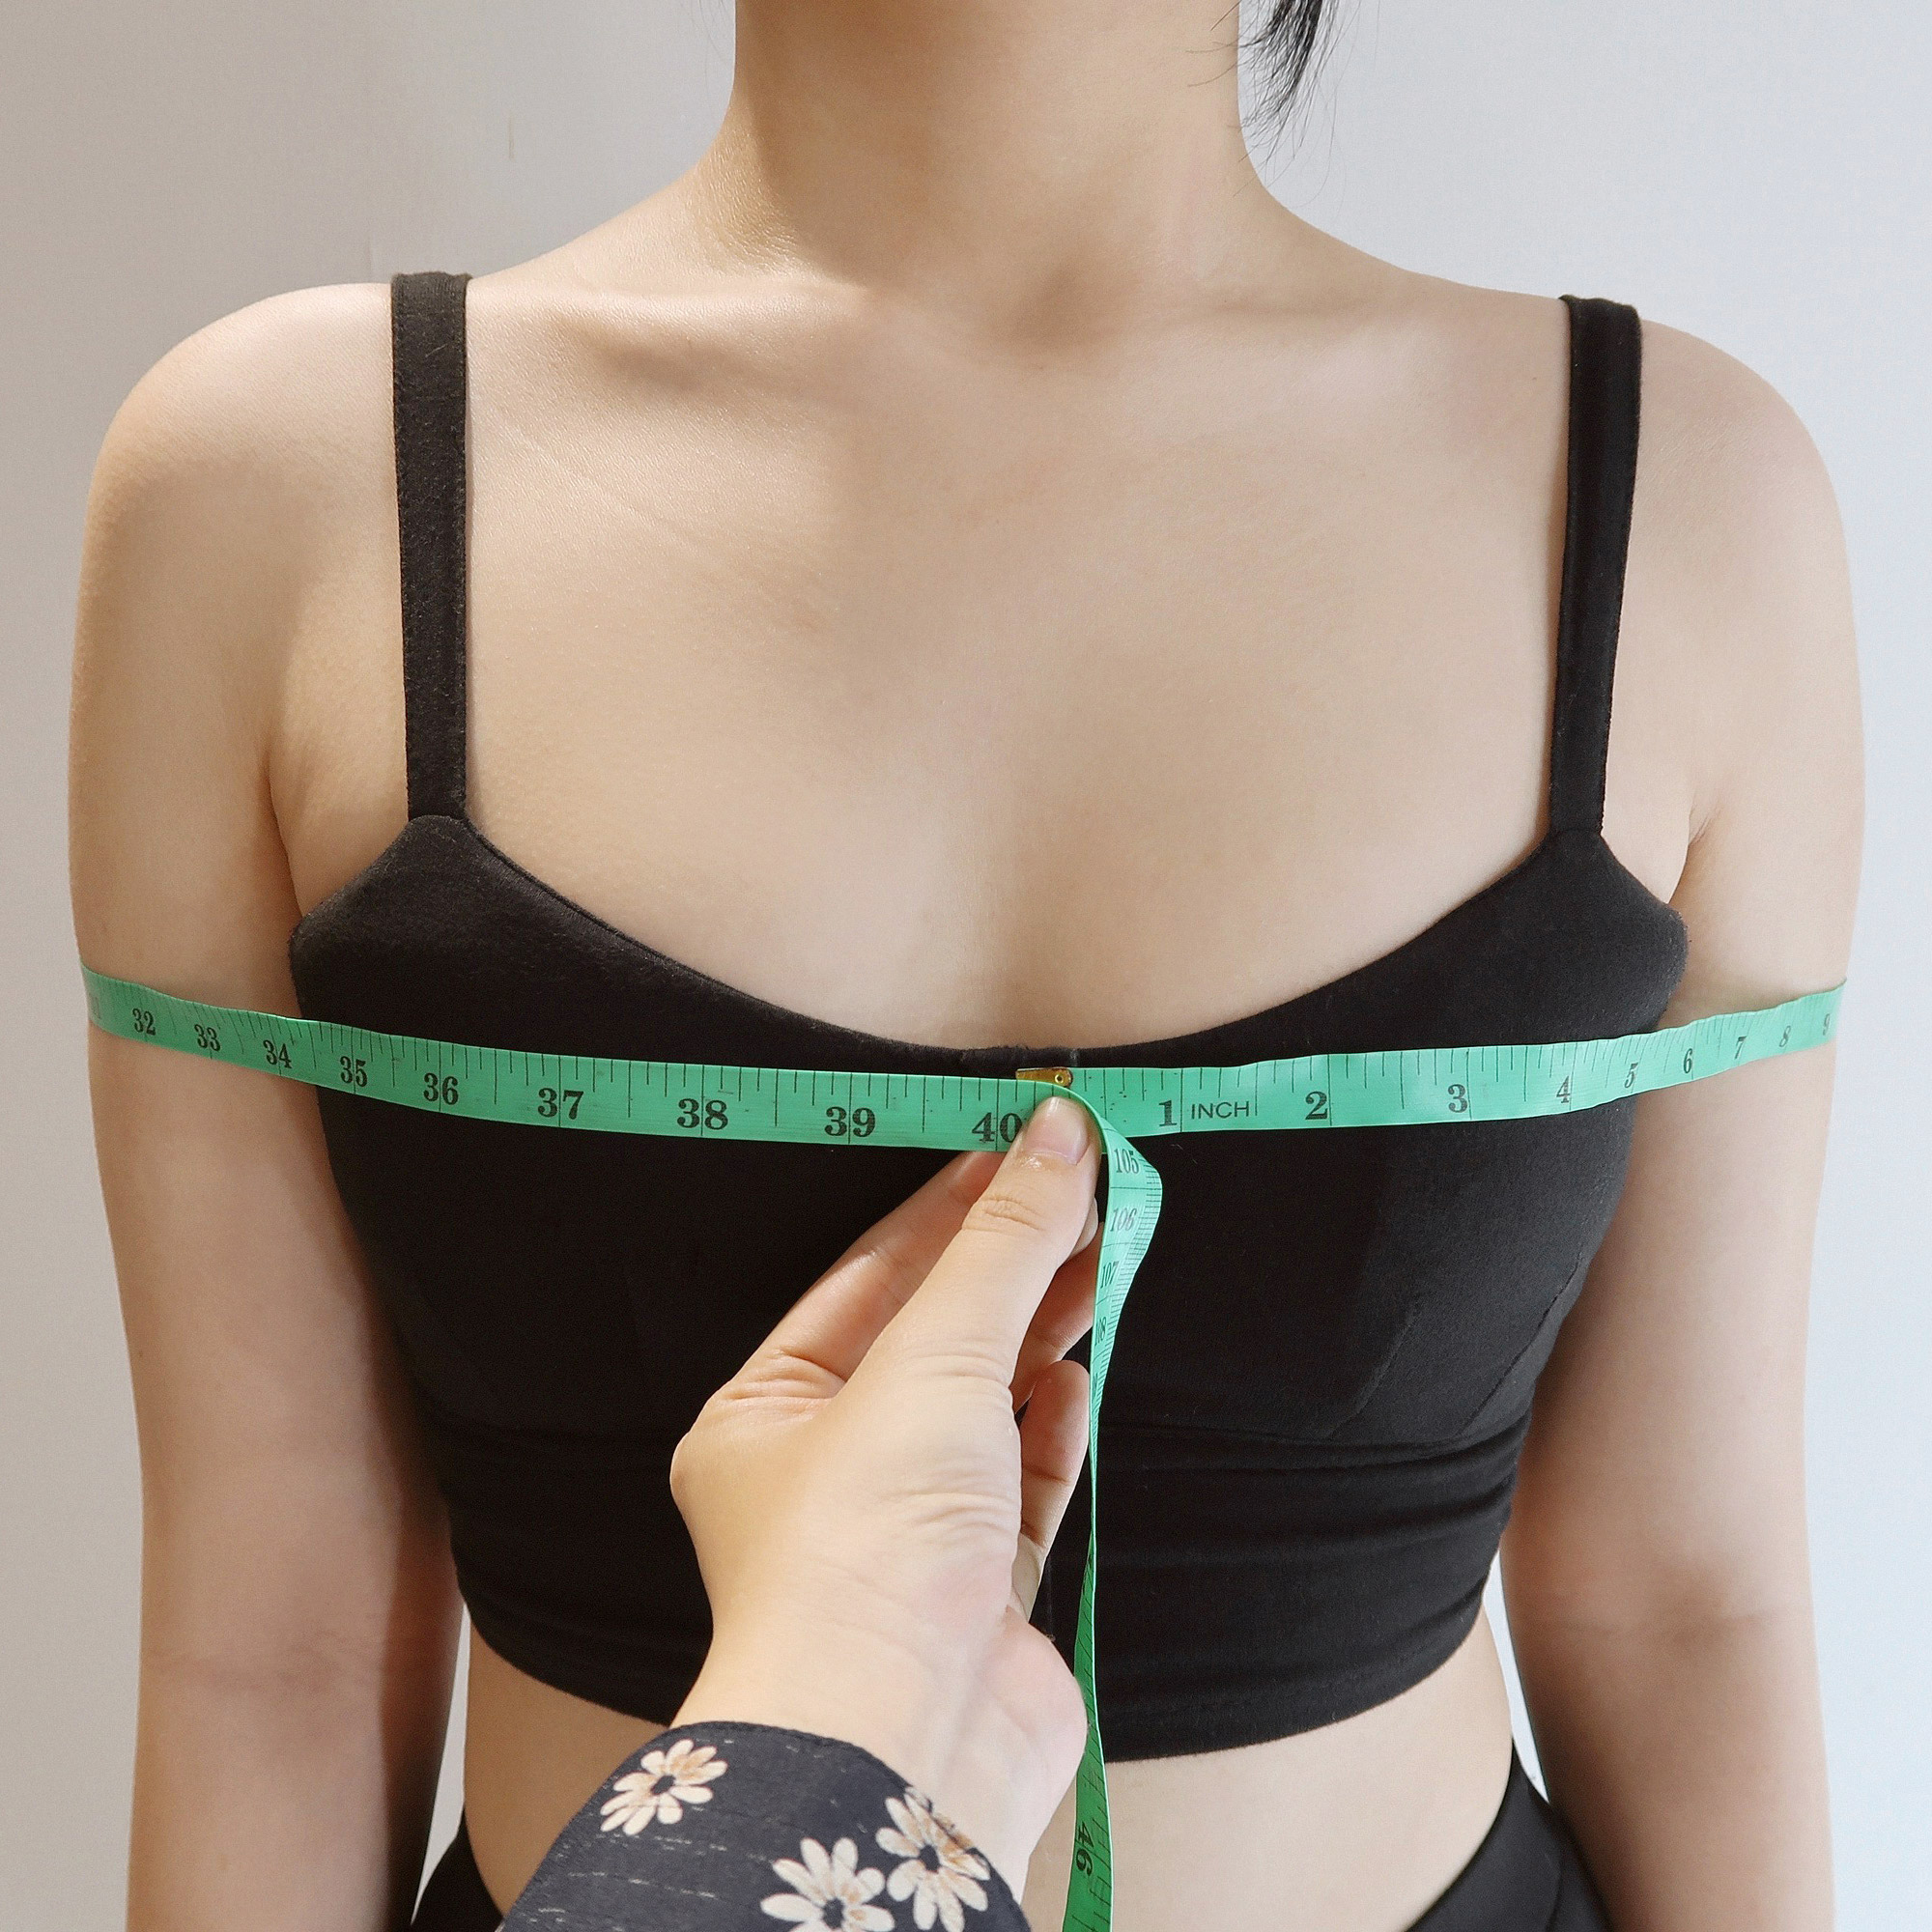
7A. Upper bust
Hold the tape measure around your ribcage and pull it up to under your armpits and above your bust. The tape measure should form a loop that is parallel to the floor or slightly angled up in the front.
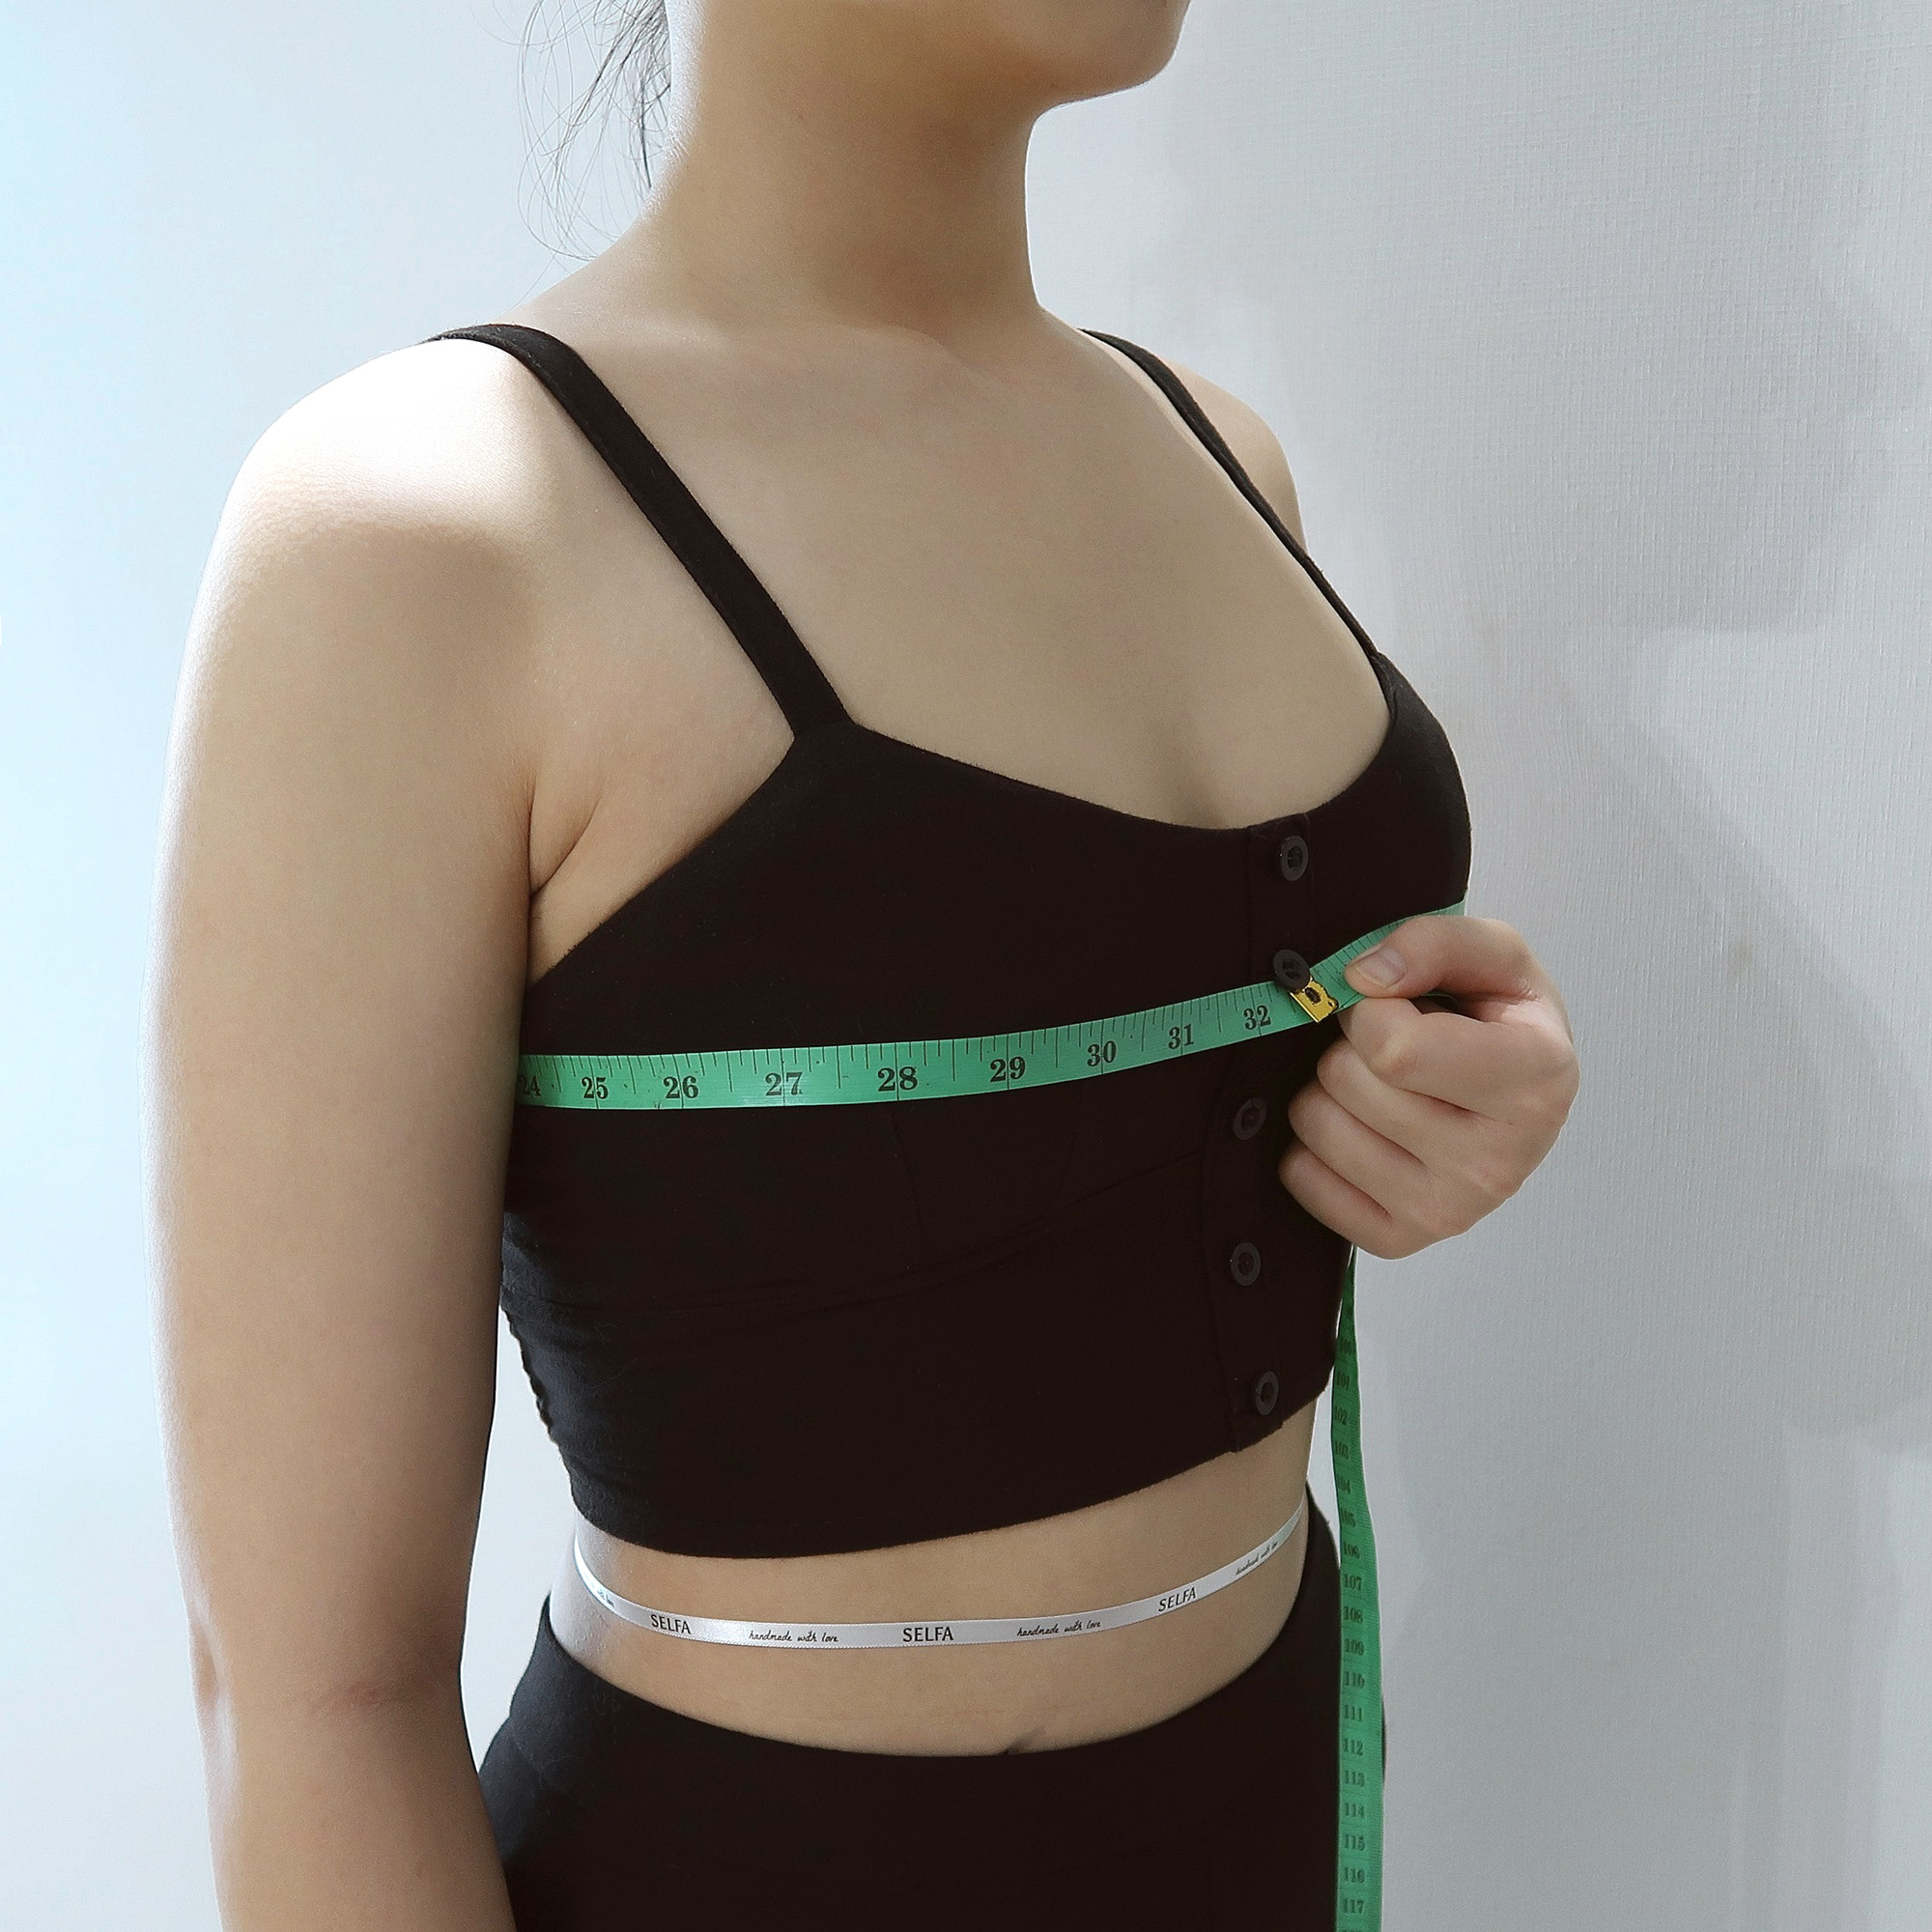
7B. Bust
Wrap the measuring tape around the fullest part of your bust, positioning it across your nipples with your arms down and relaxed. If you plan to wear a bra with your dress, make sure to wear it while measuring.
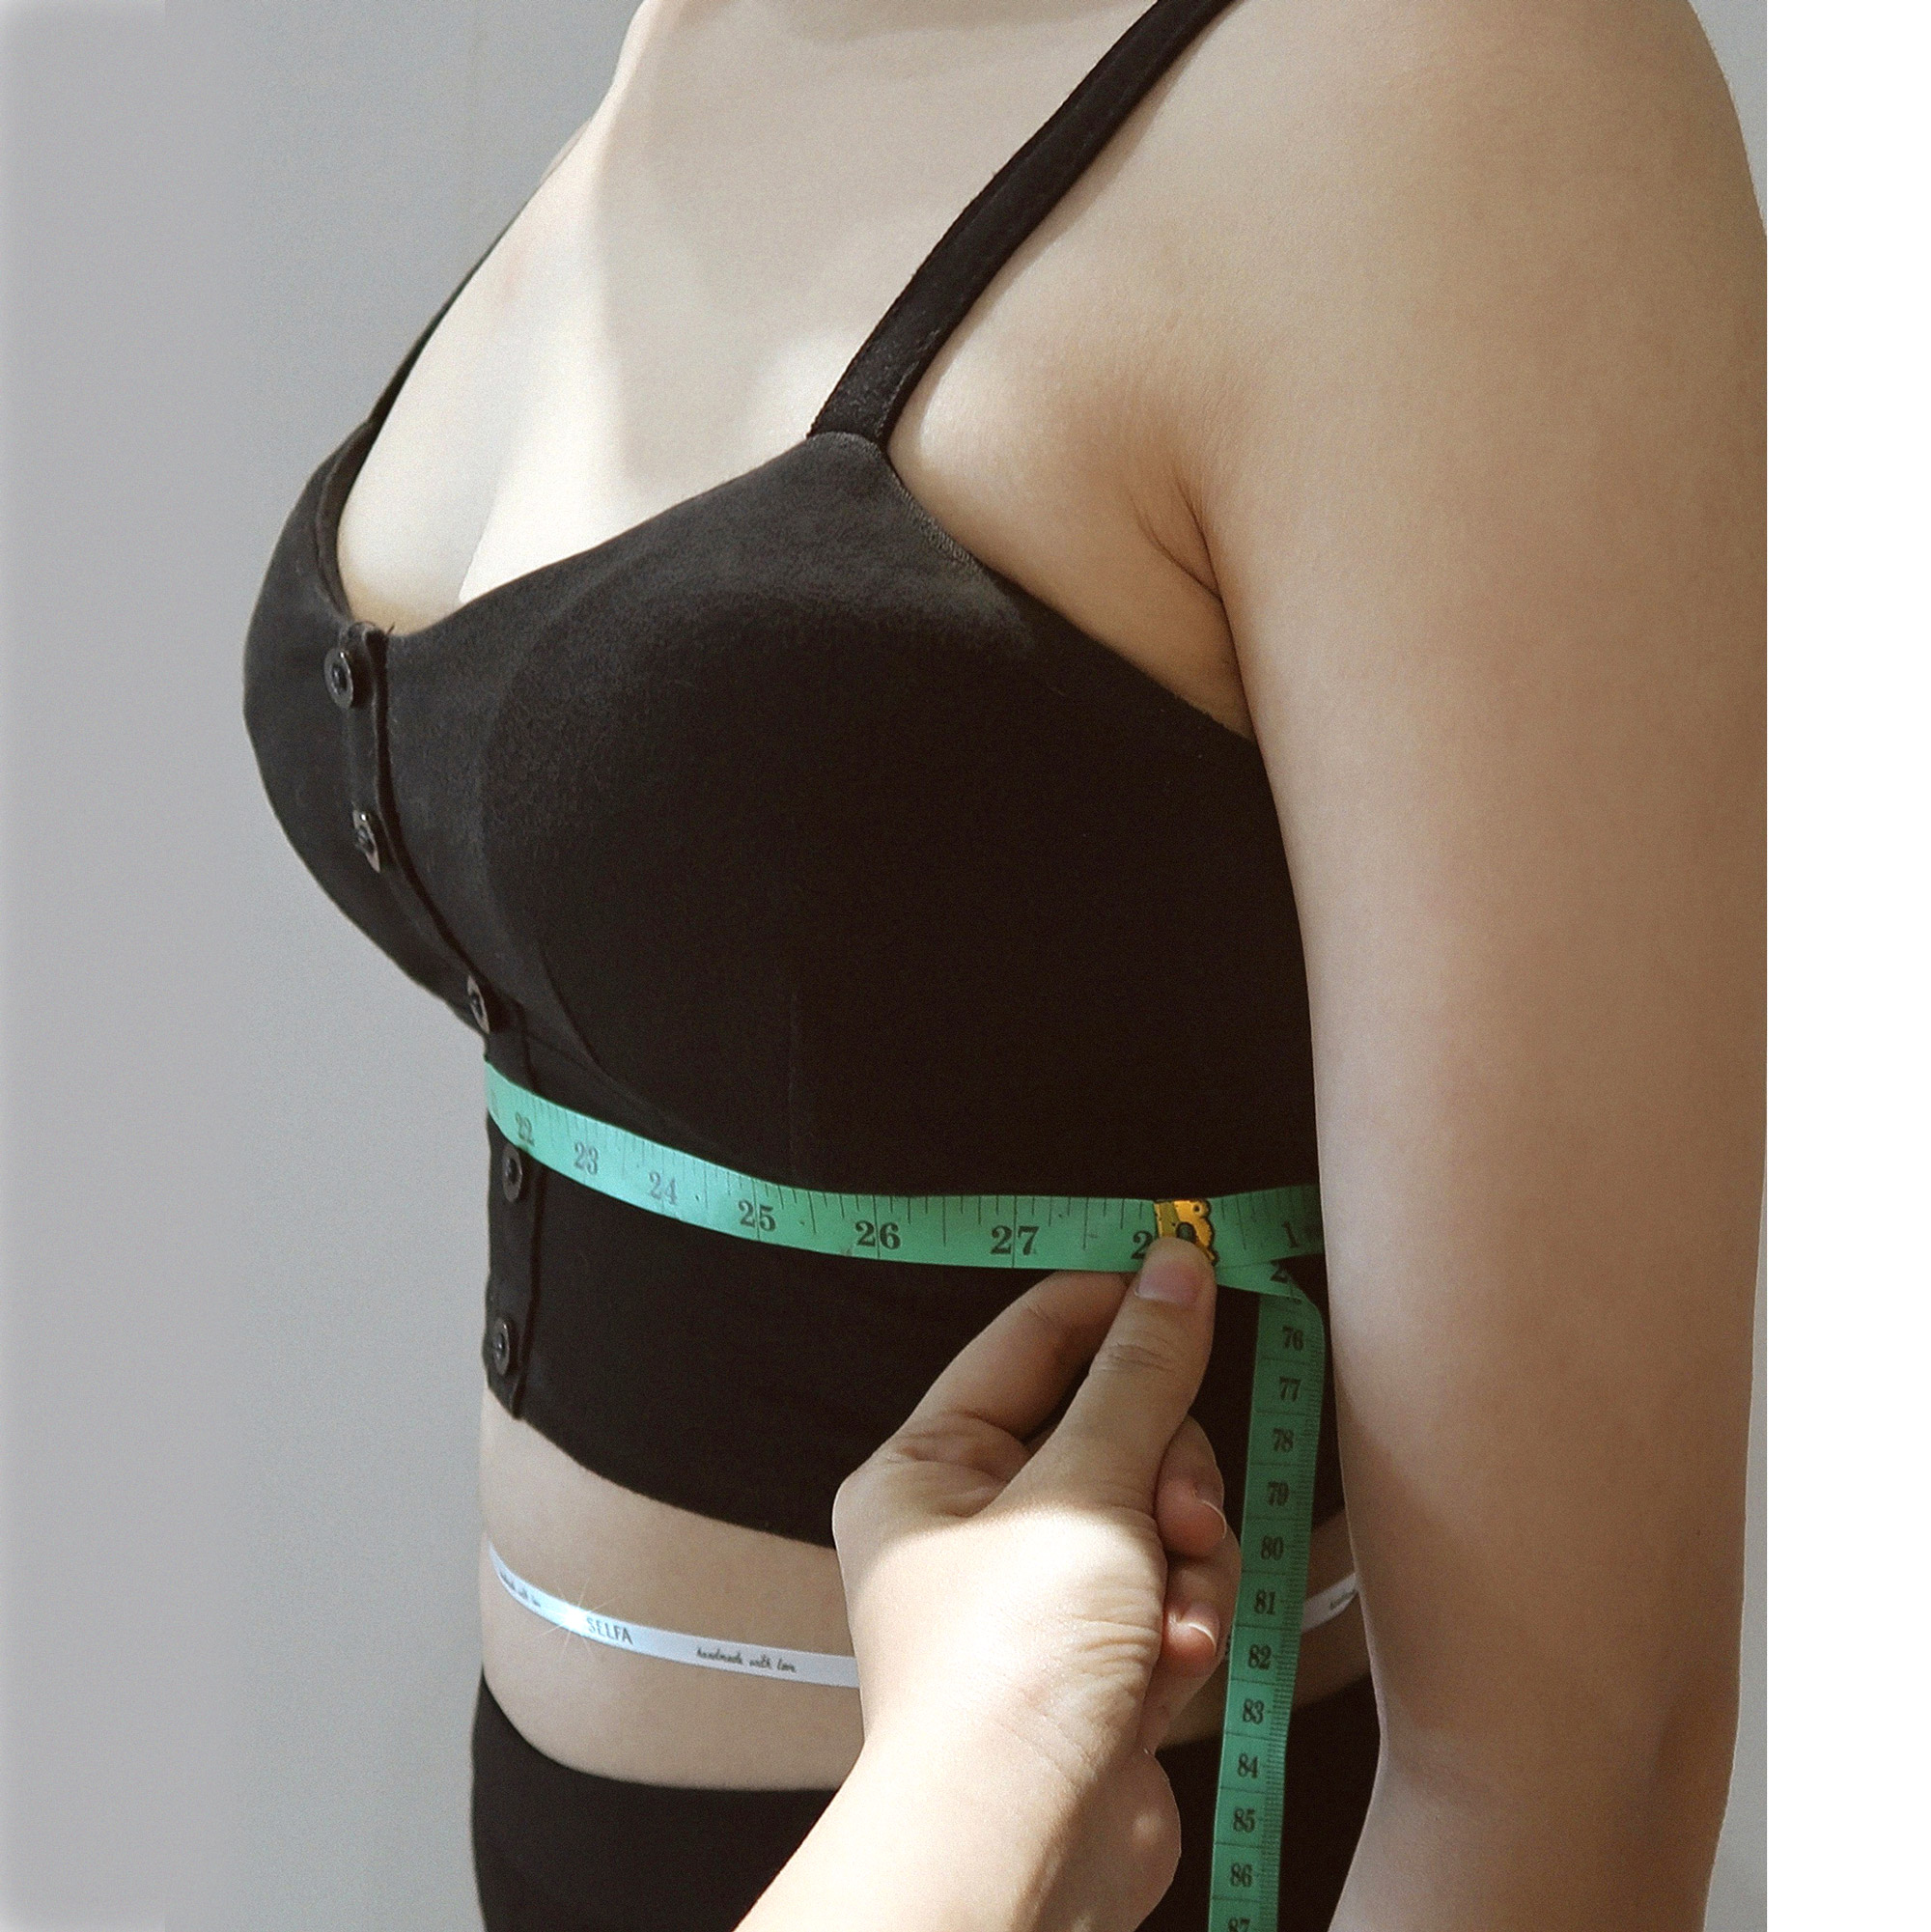
7C. Lower bust
Measure the circumference around your body directly under your bust, where your bra's band sits.
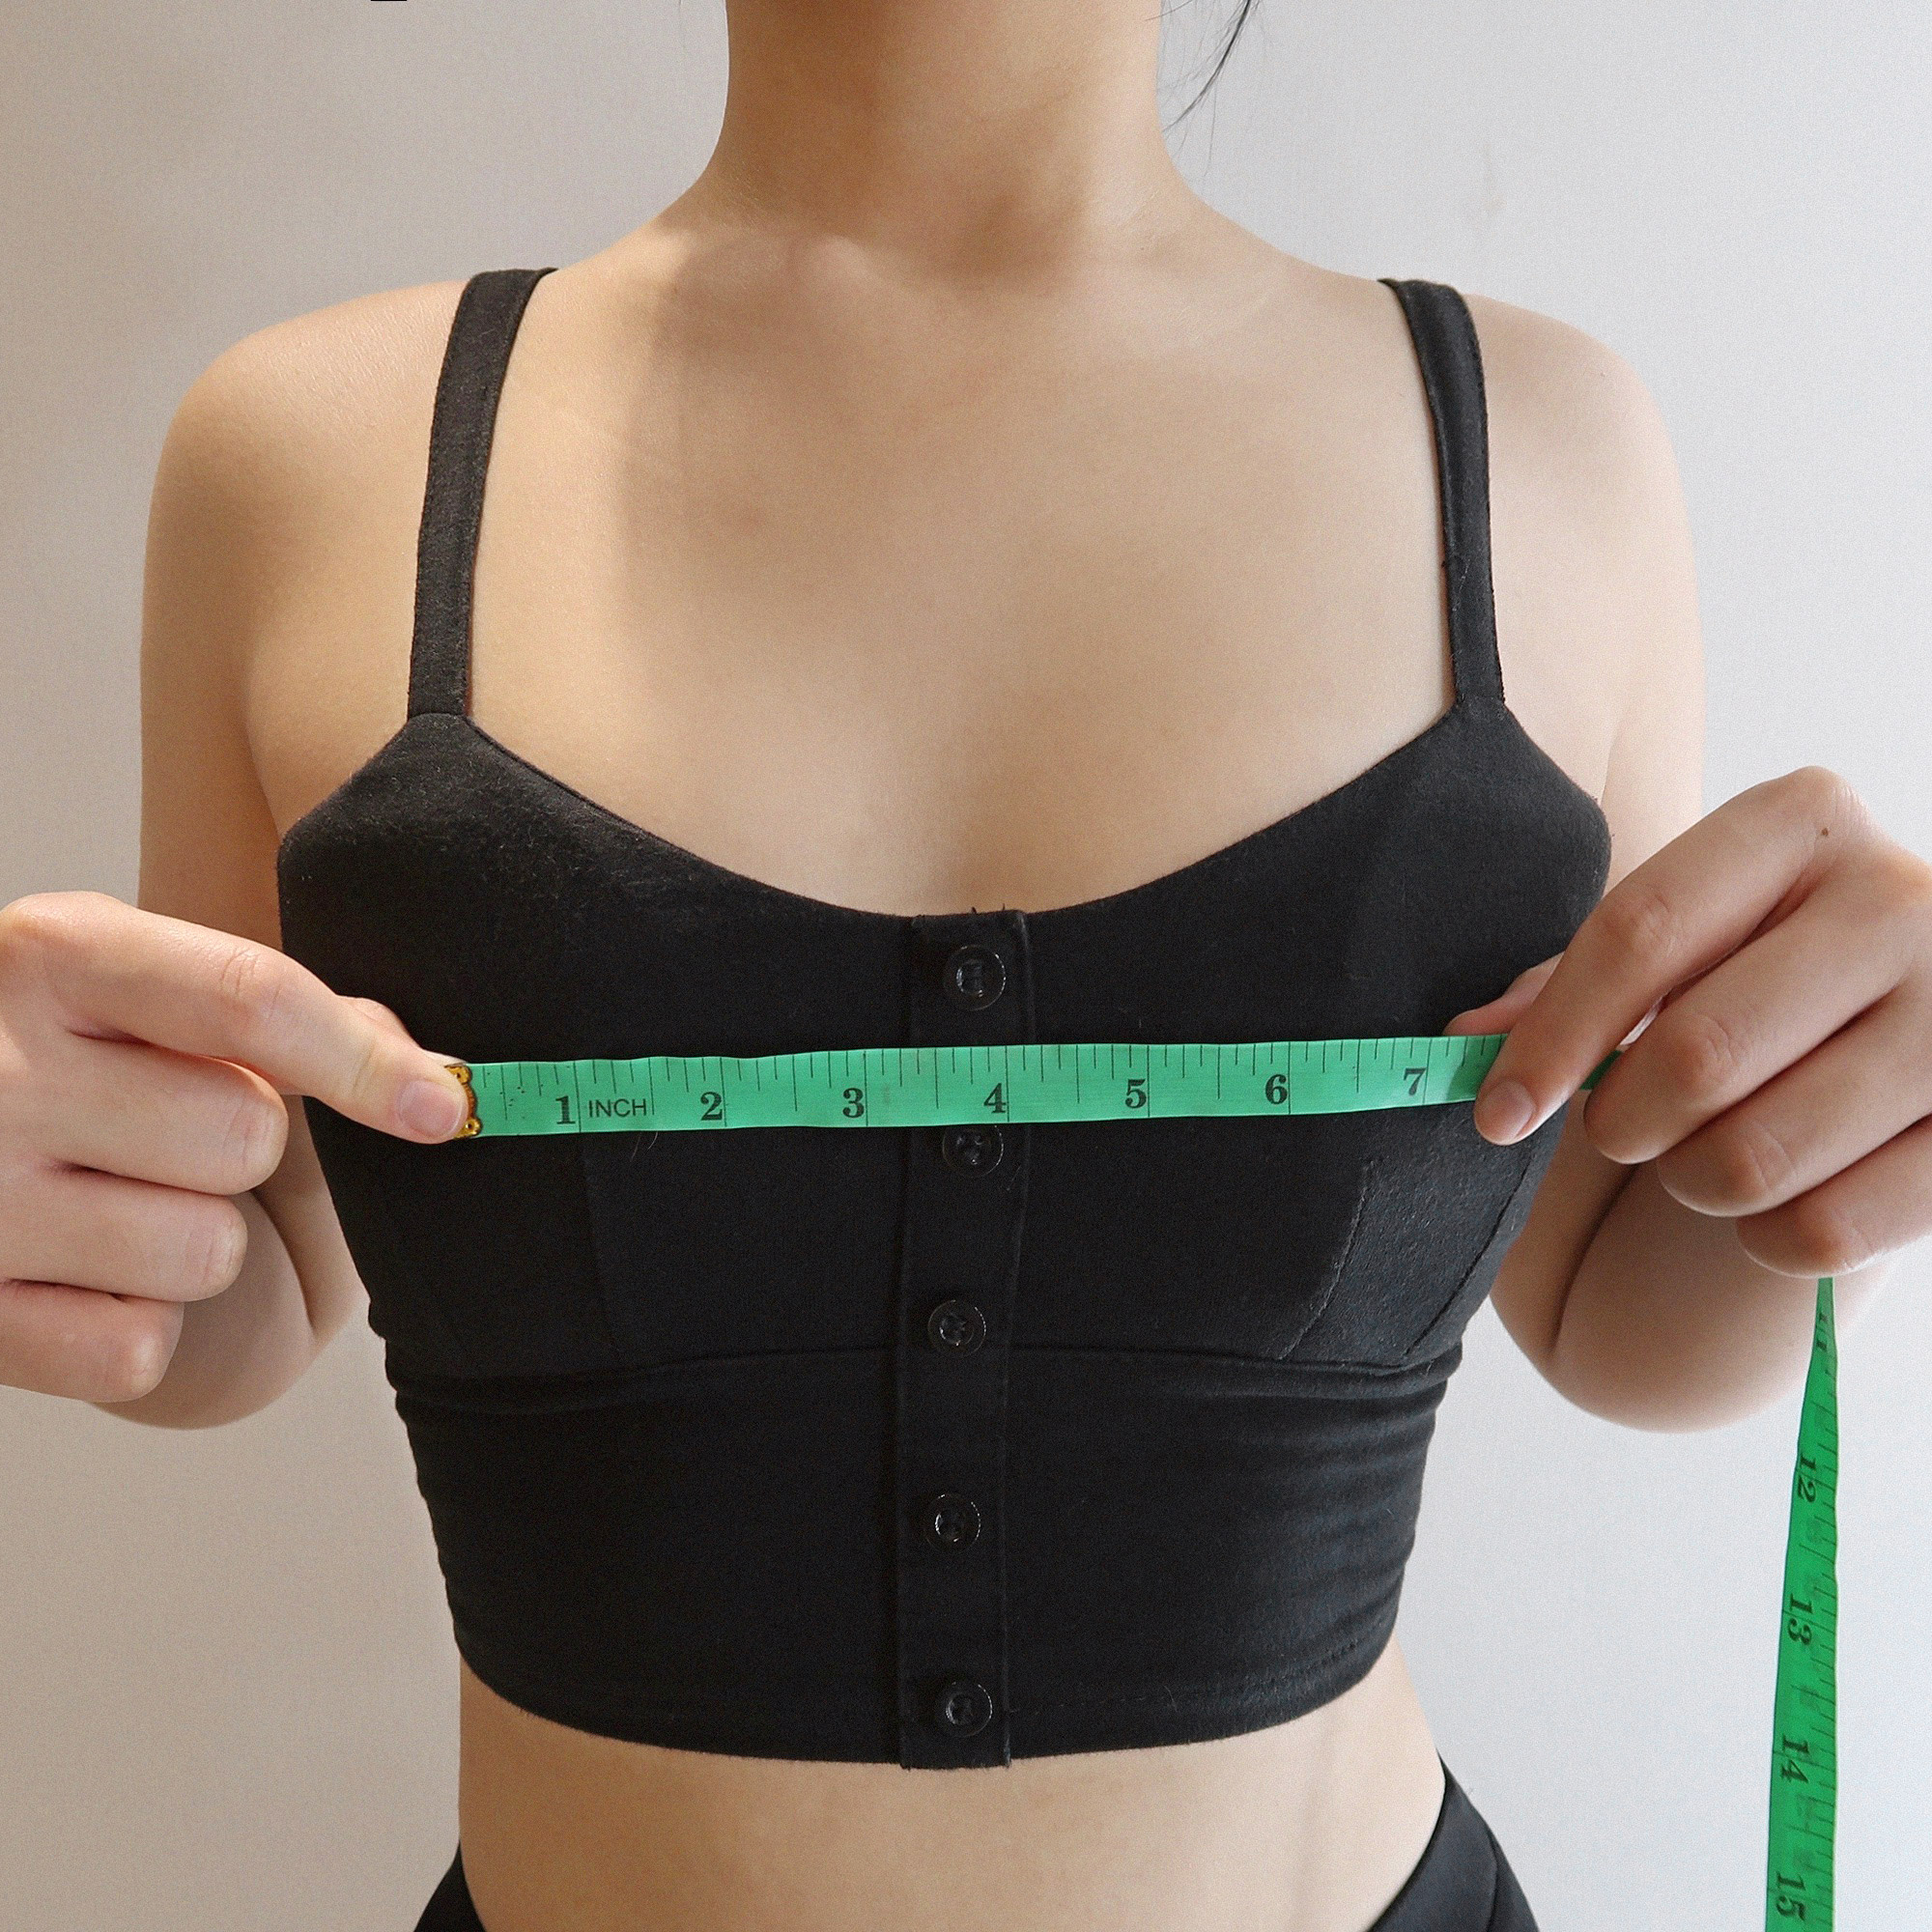
8. Bust distance
Measure from one bust point (nipple) to the other.

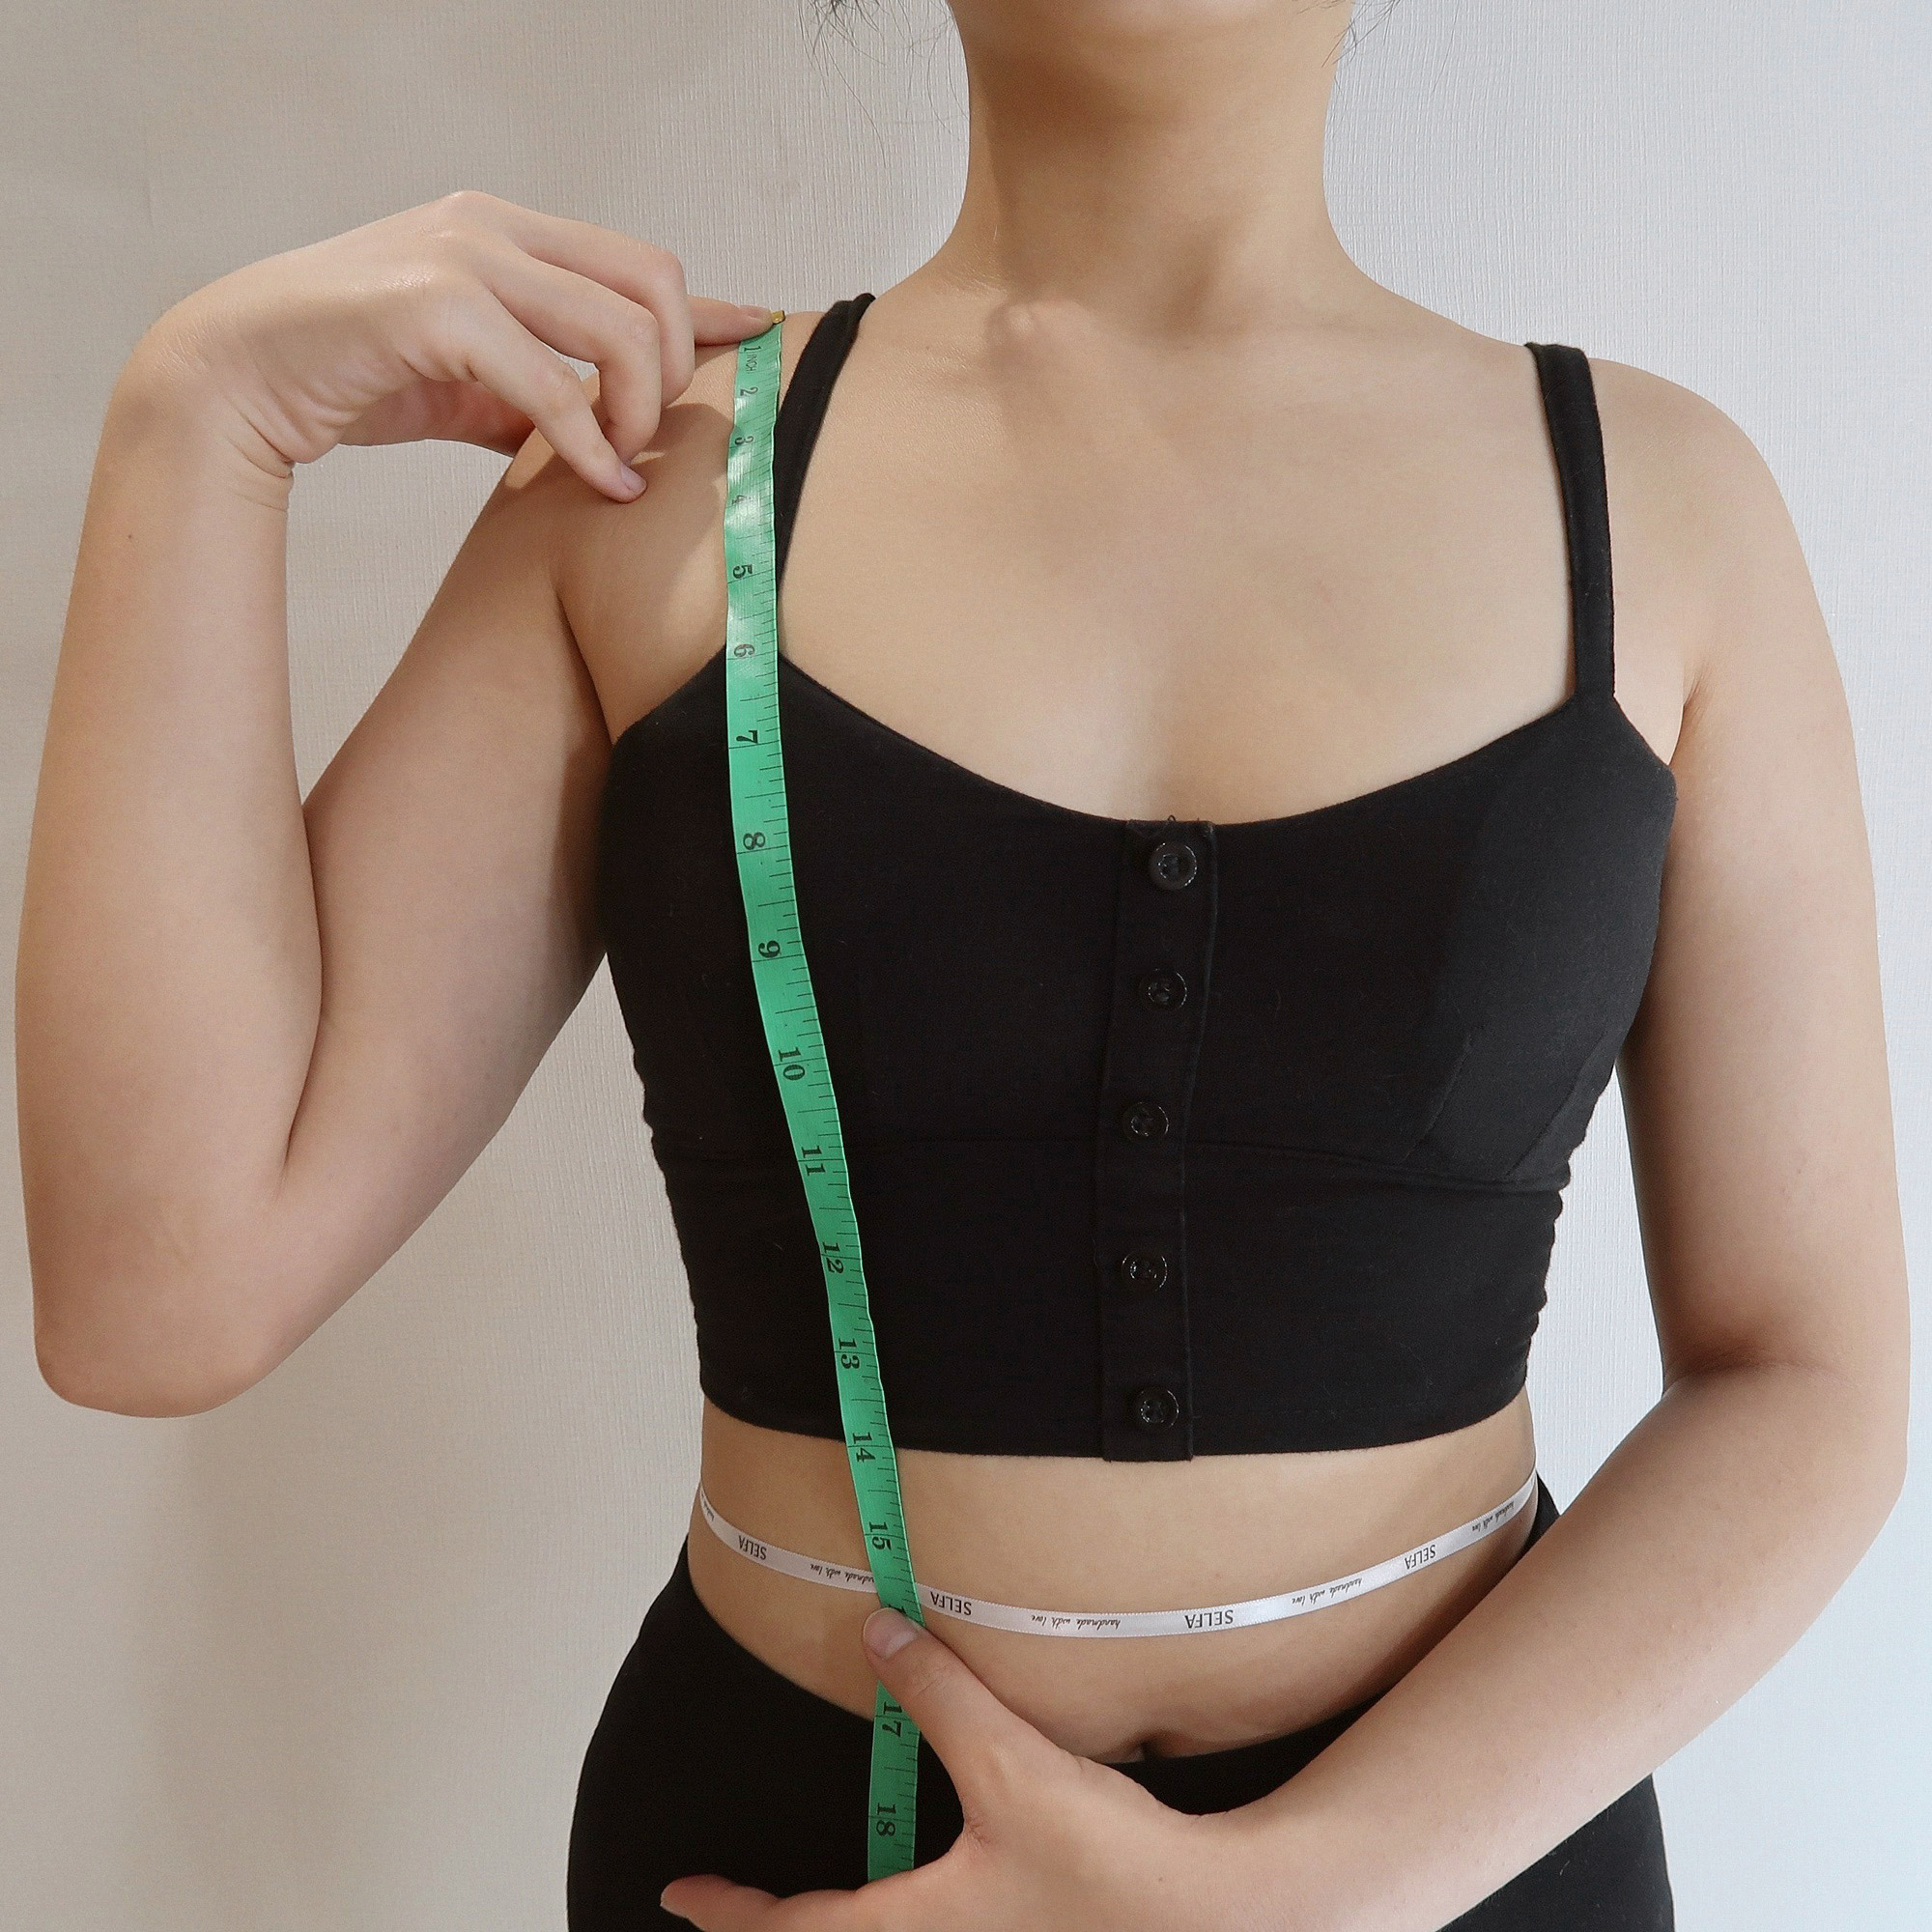
9. Shoulder to bust
Measure vertically from the midpoint of your shoulder, where your bra strap naturally sits, down to your bust point.
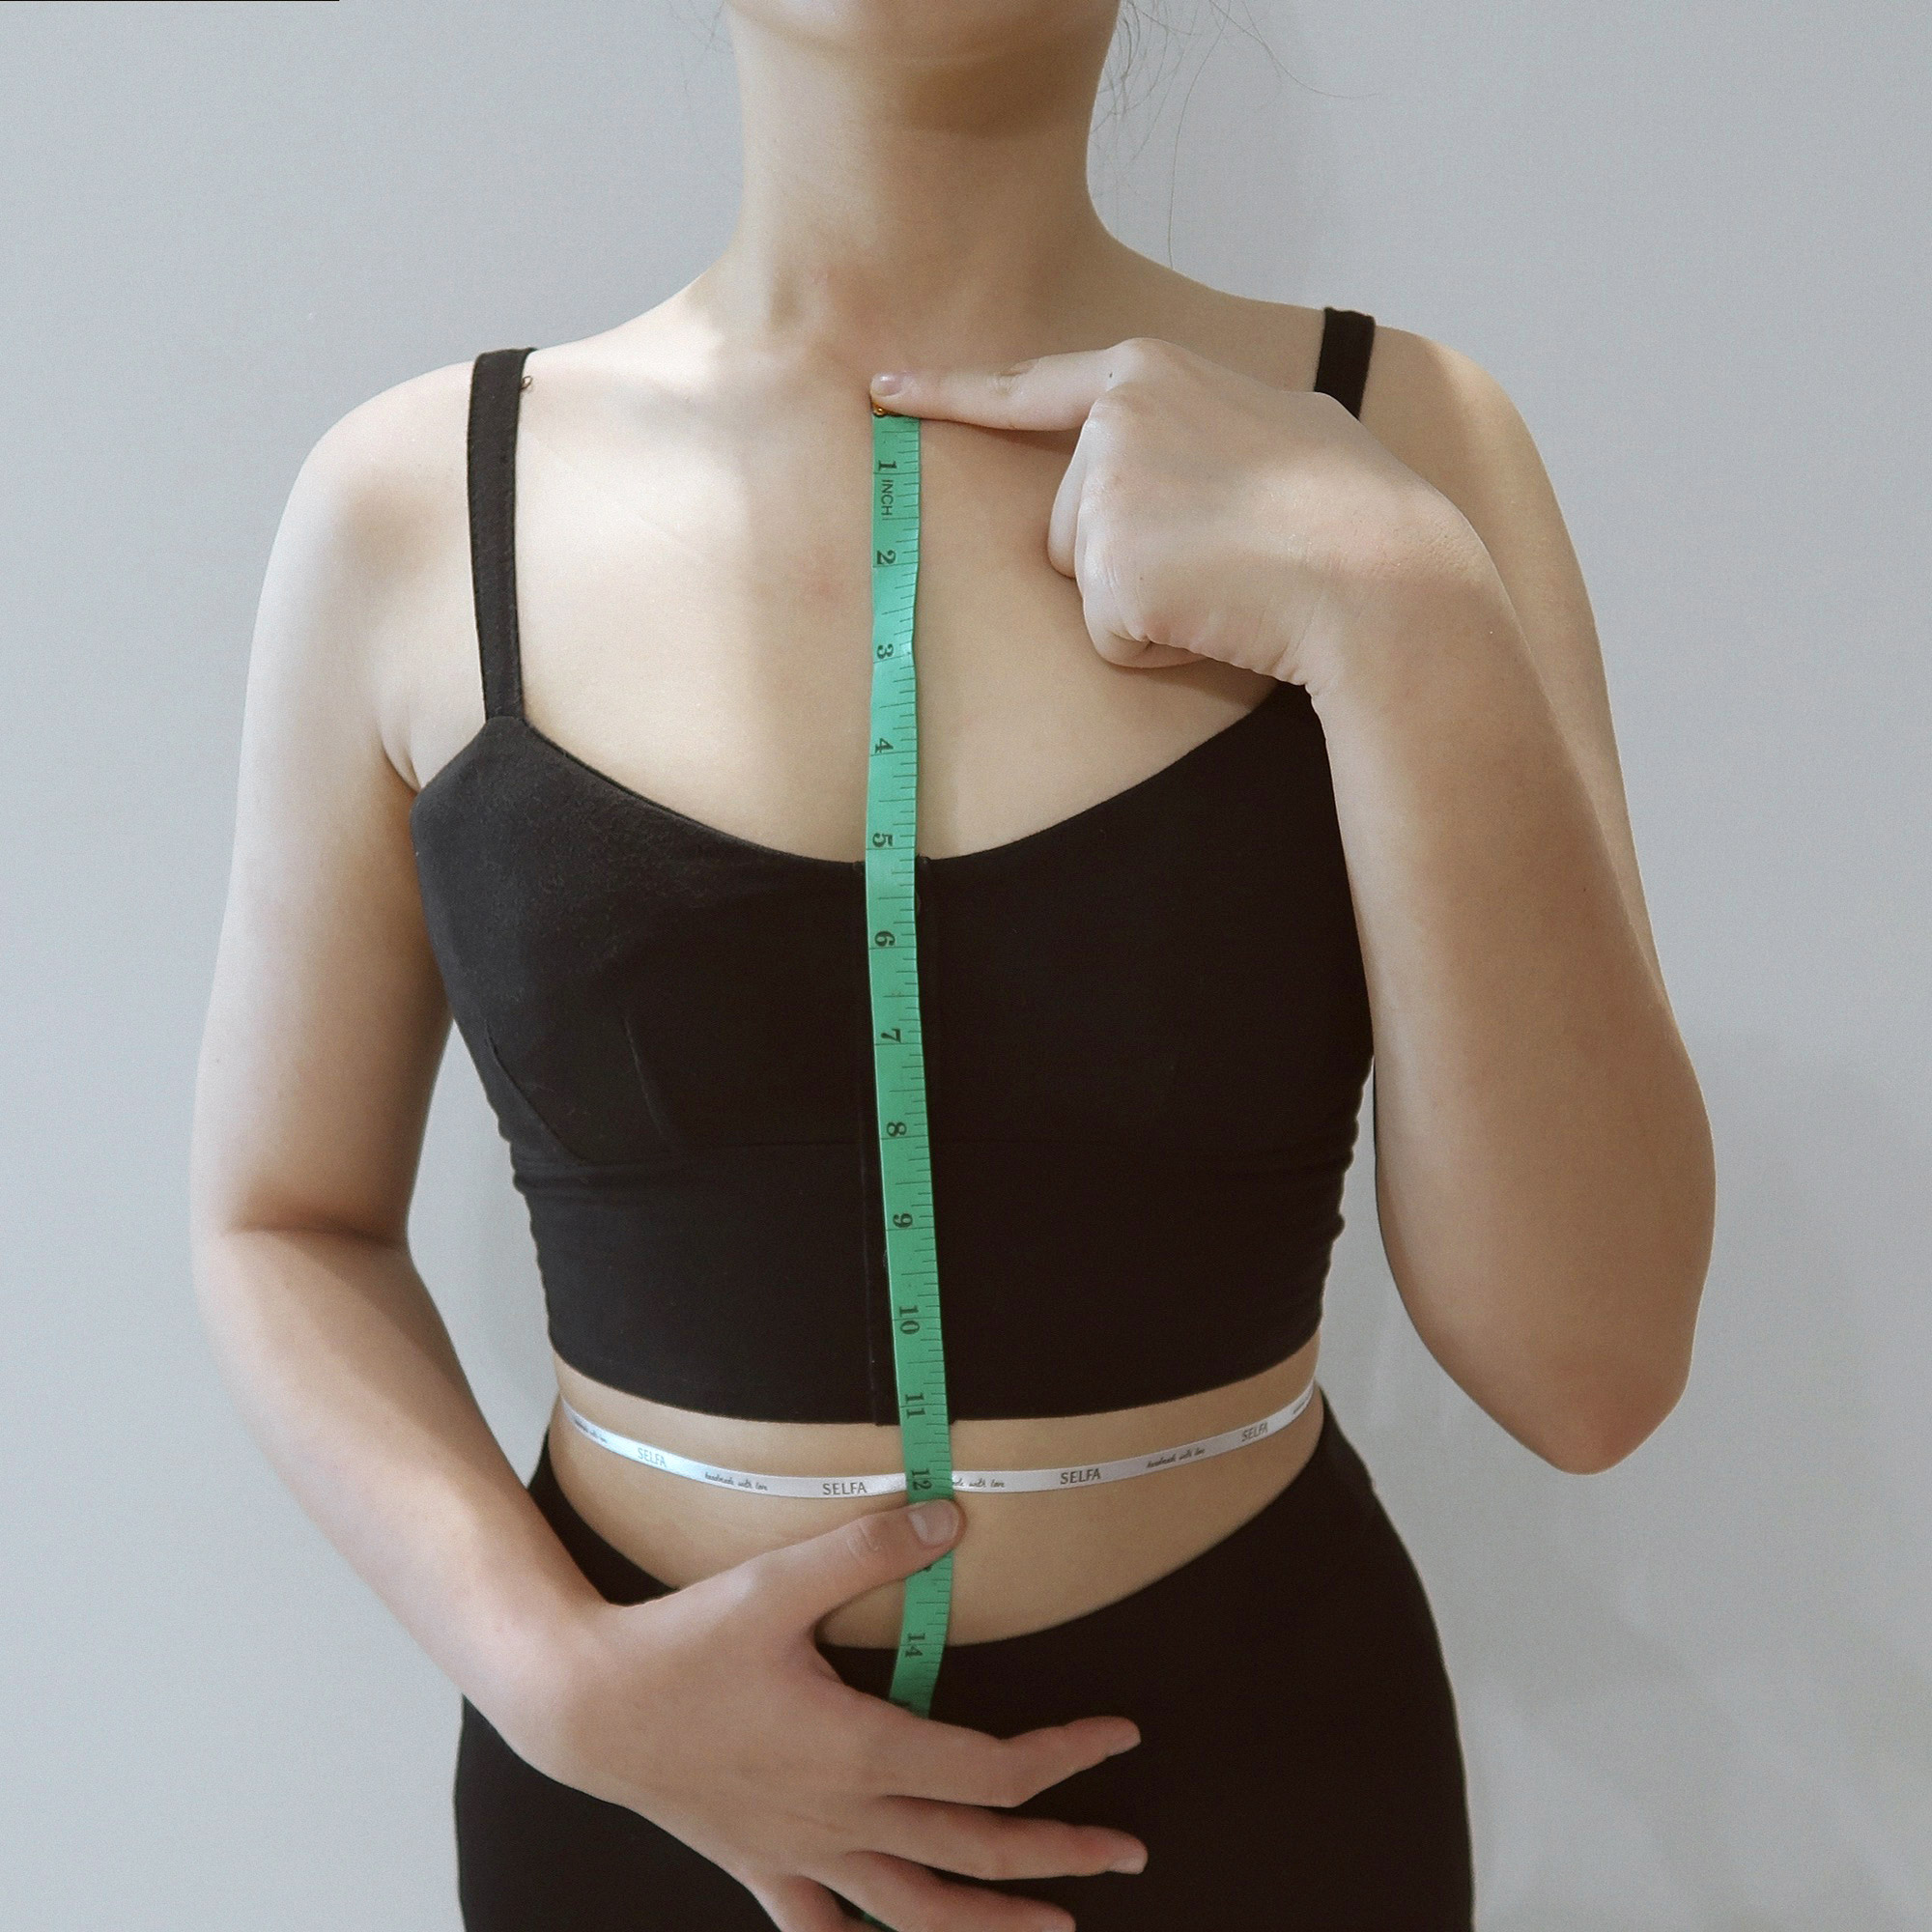
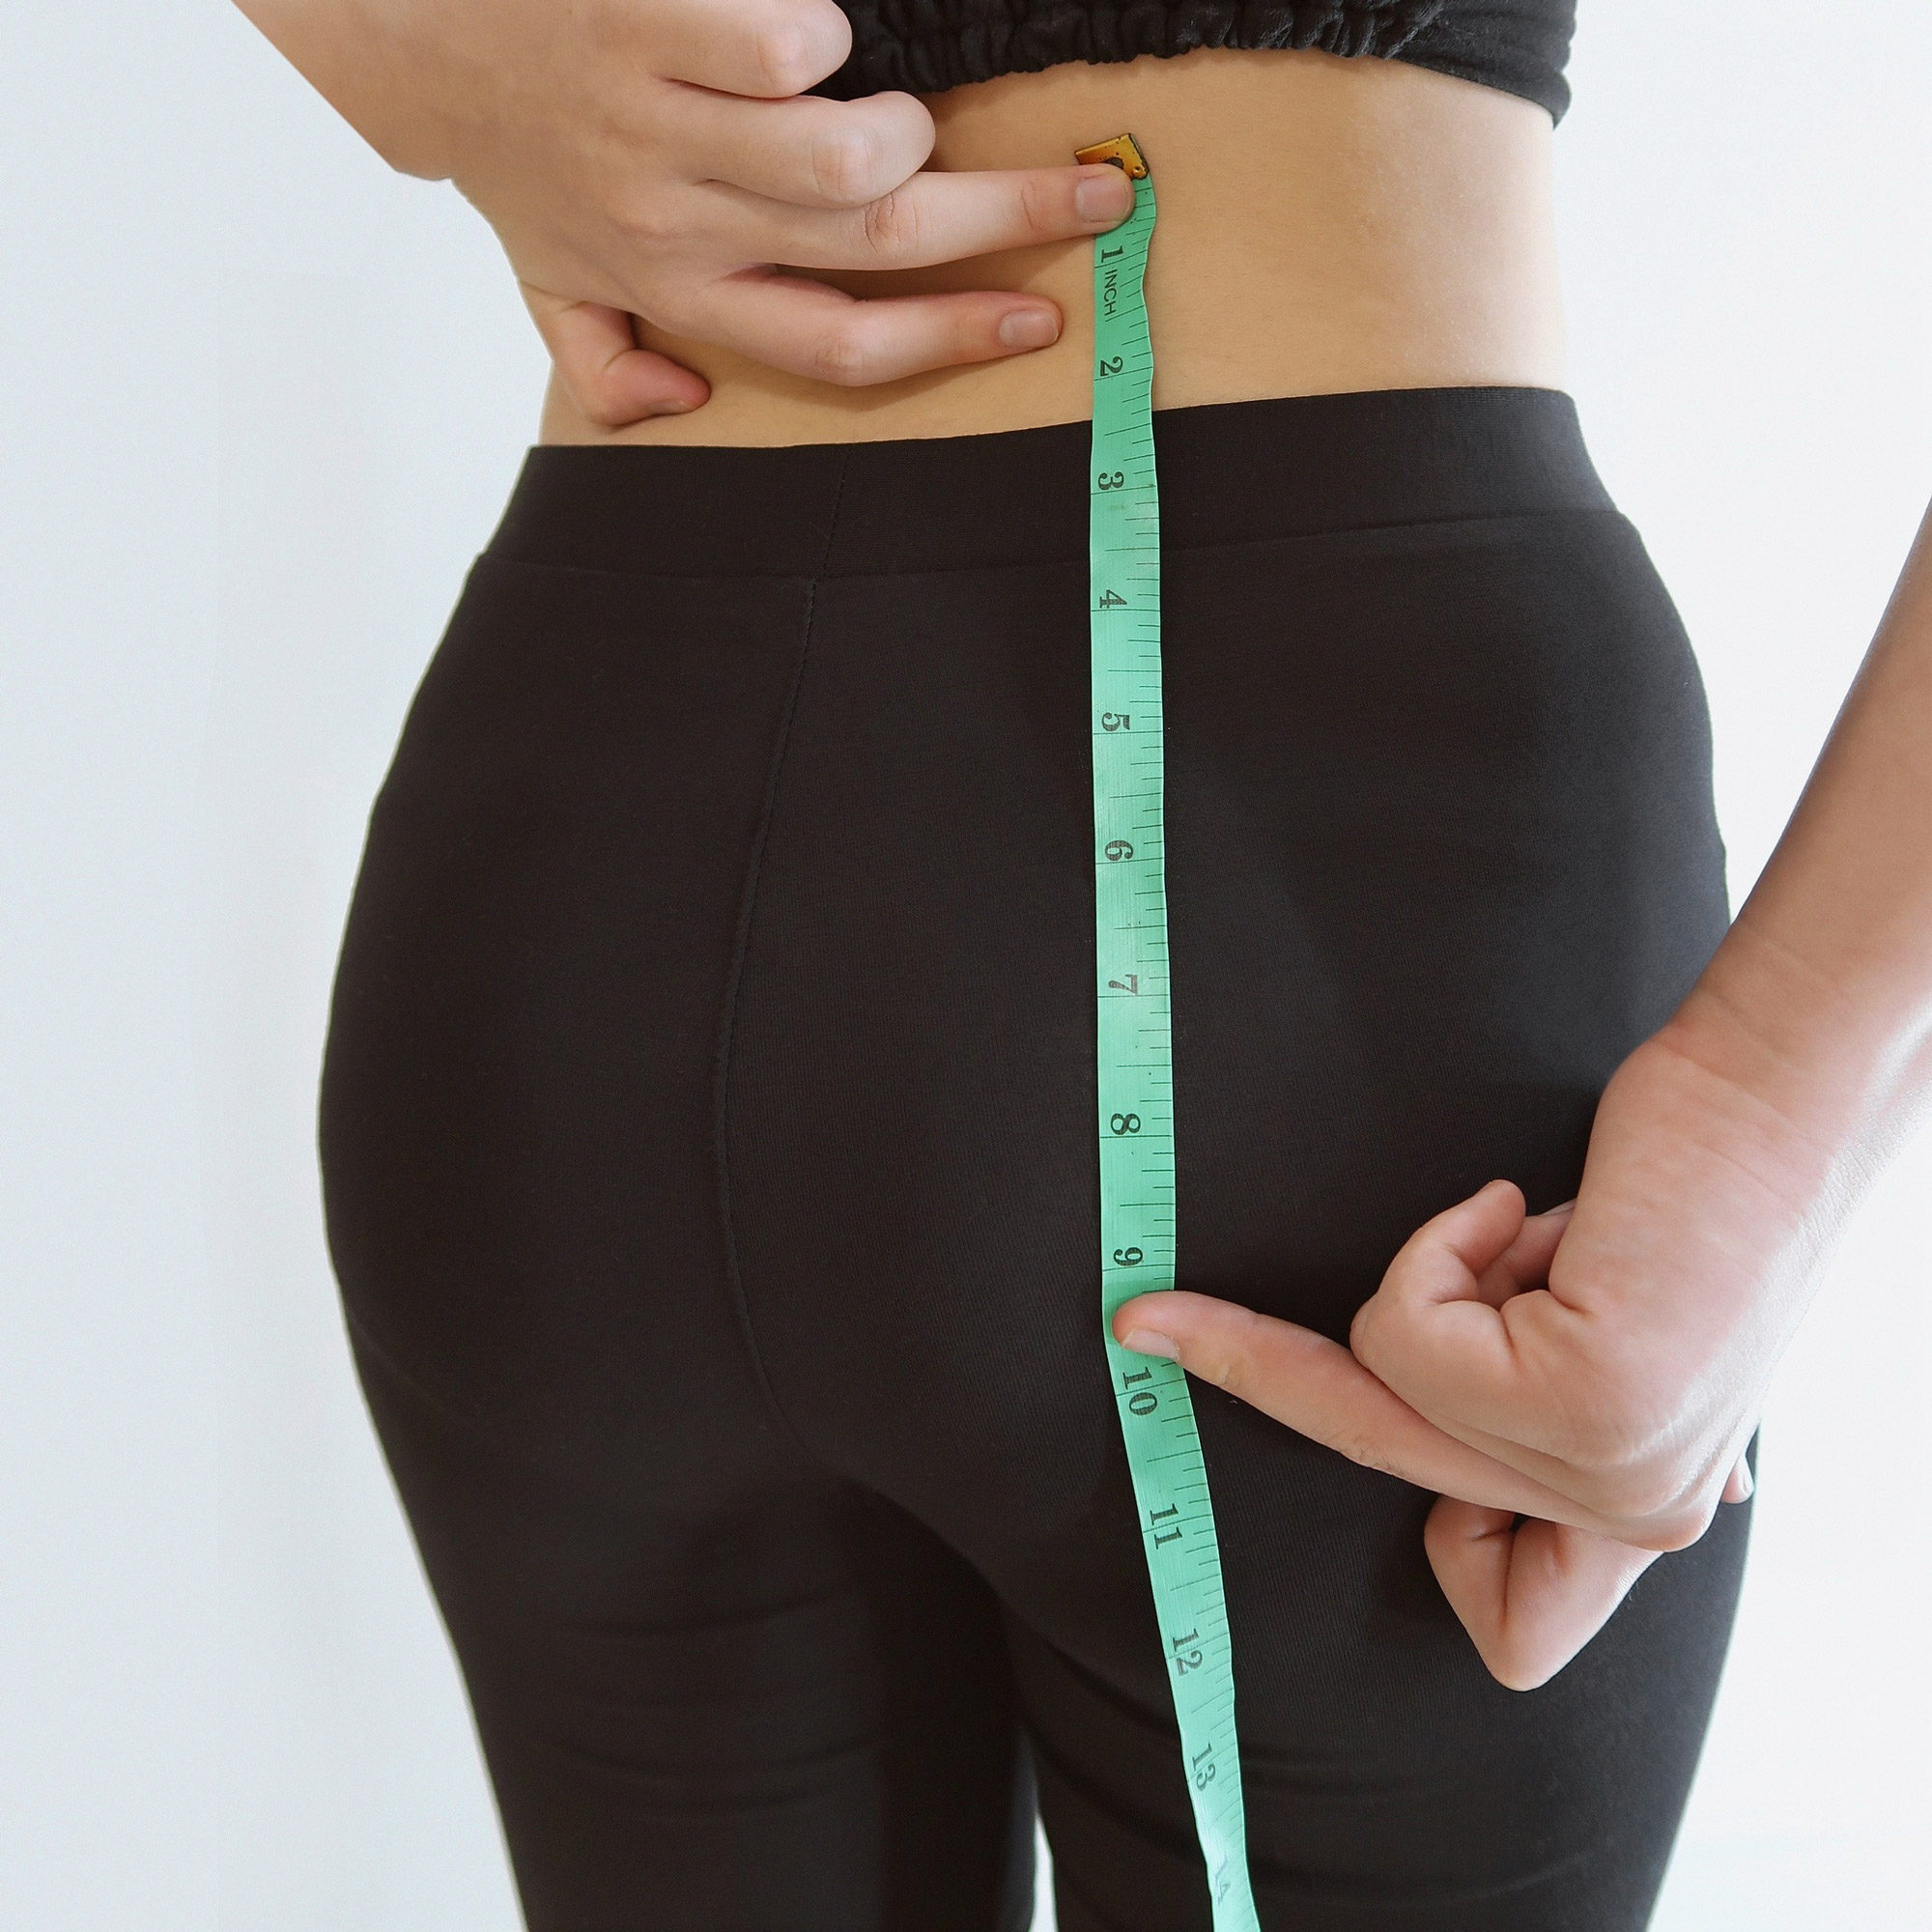
10. Hollow to waist
Measure from the centre of your neck (hollow) straight down the defined waistline.
11A. Shoulder to waist front
Measure vertically from the midpoint of your shoulder, passing through the bust point (nipple), and ending at the defined waistline.

11B. Shoulder to waist back
Measure vertically from the top of your shoulder, passing through the shoulder blade, and ending at the defined waistline.
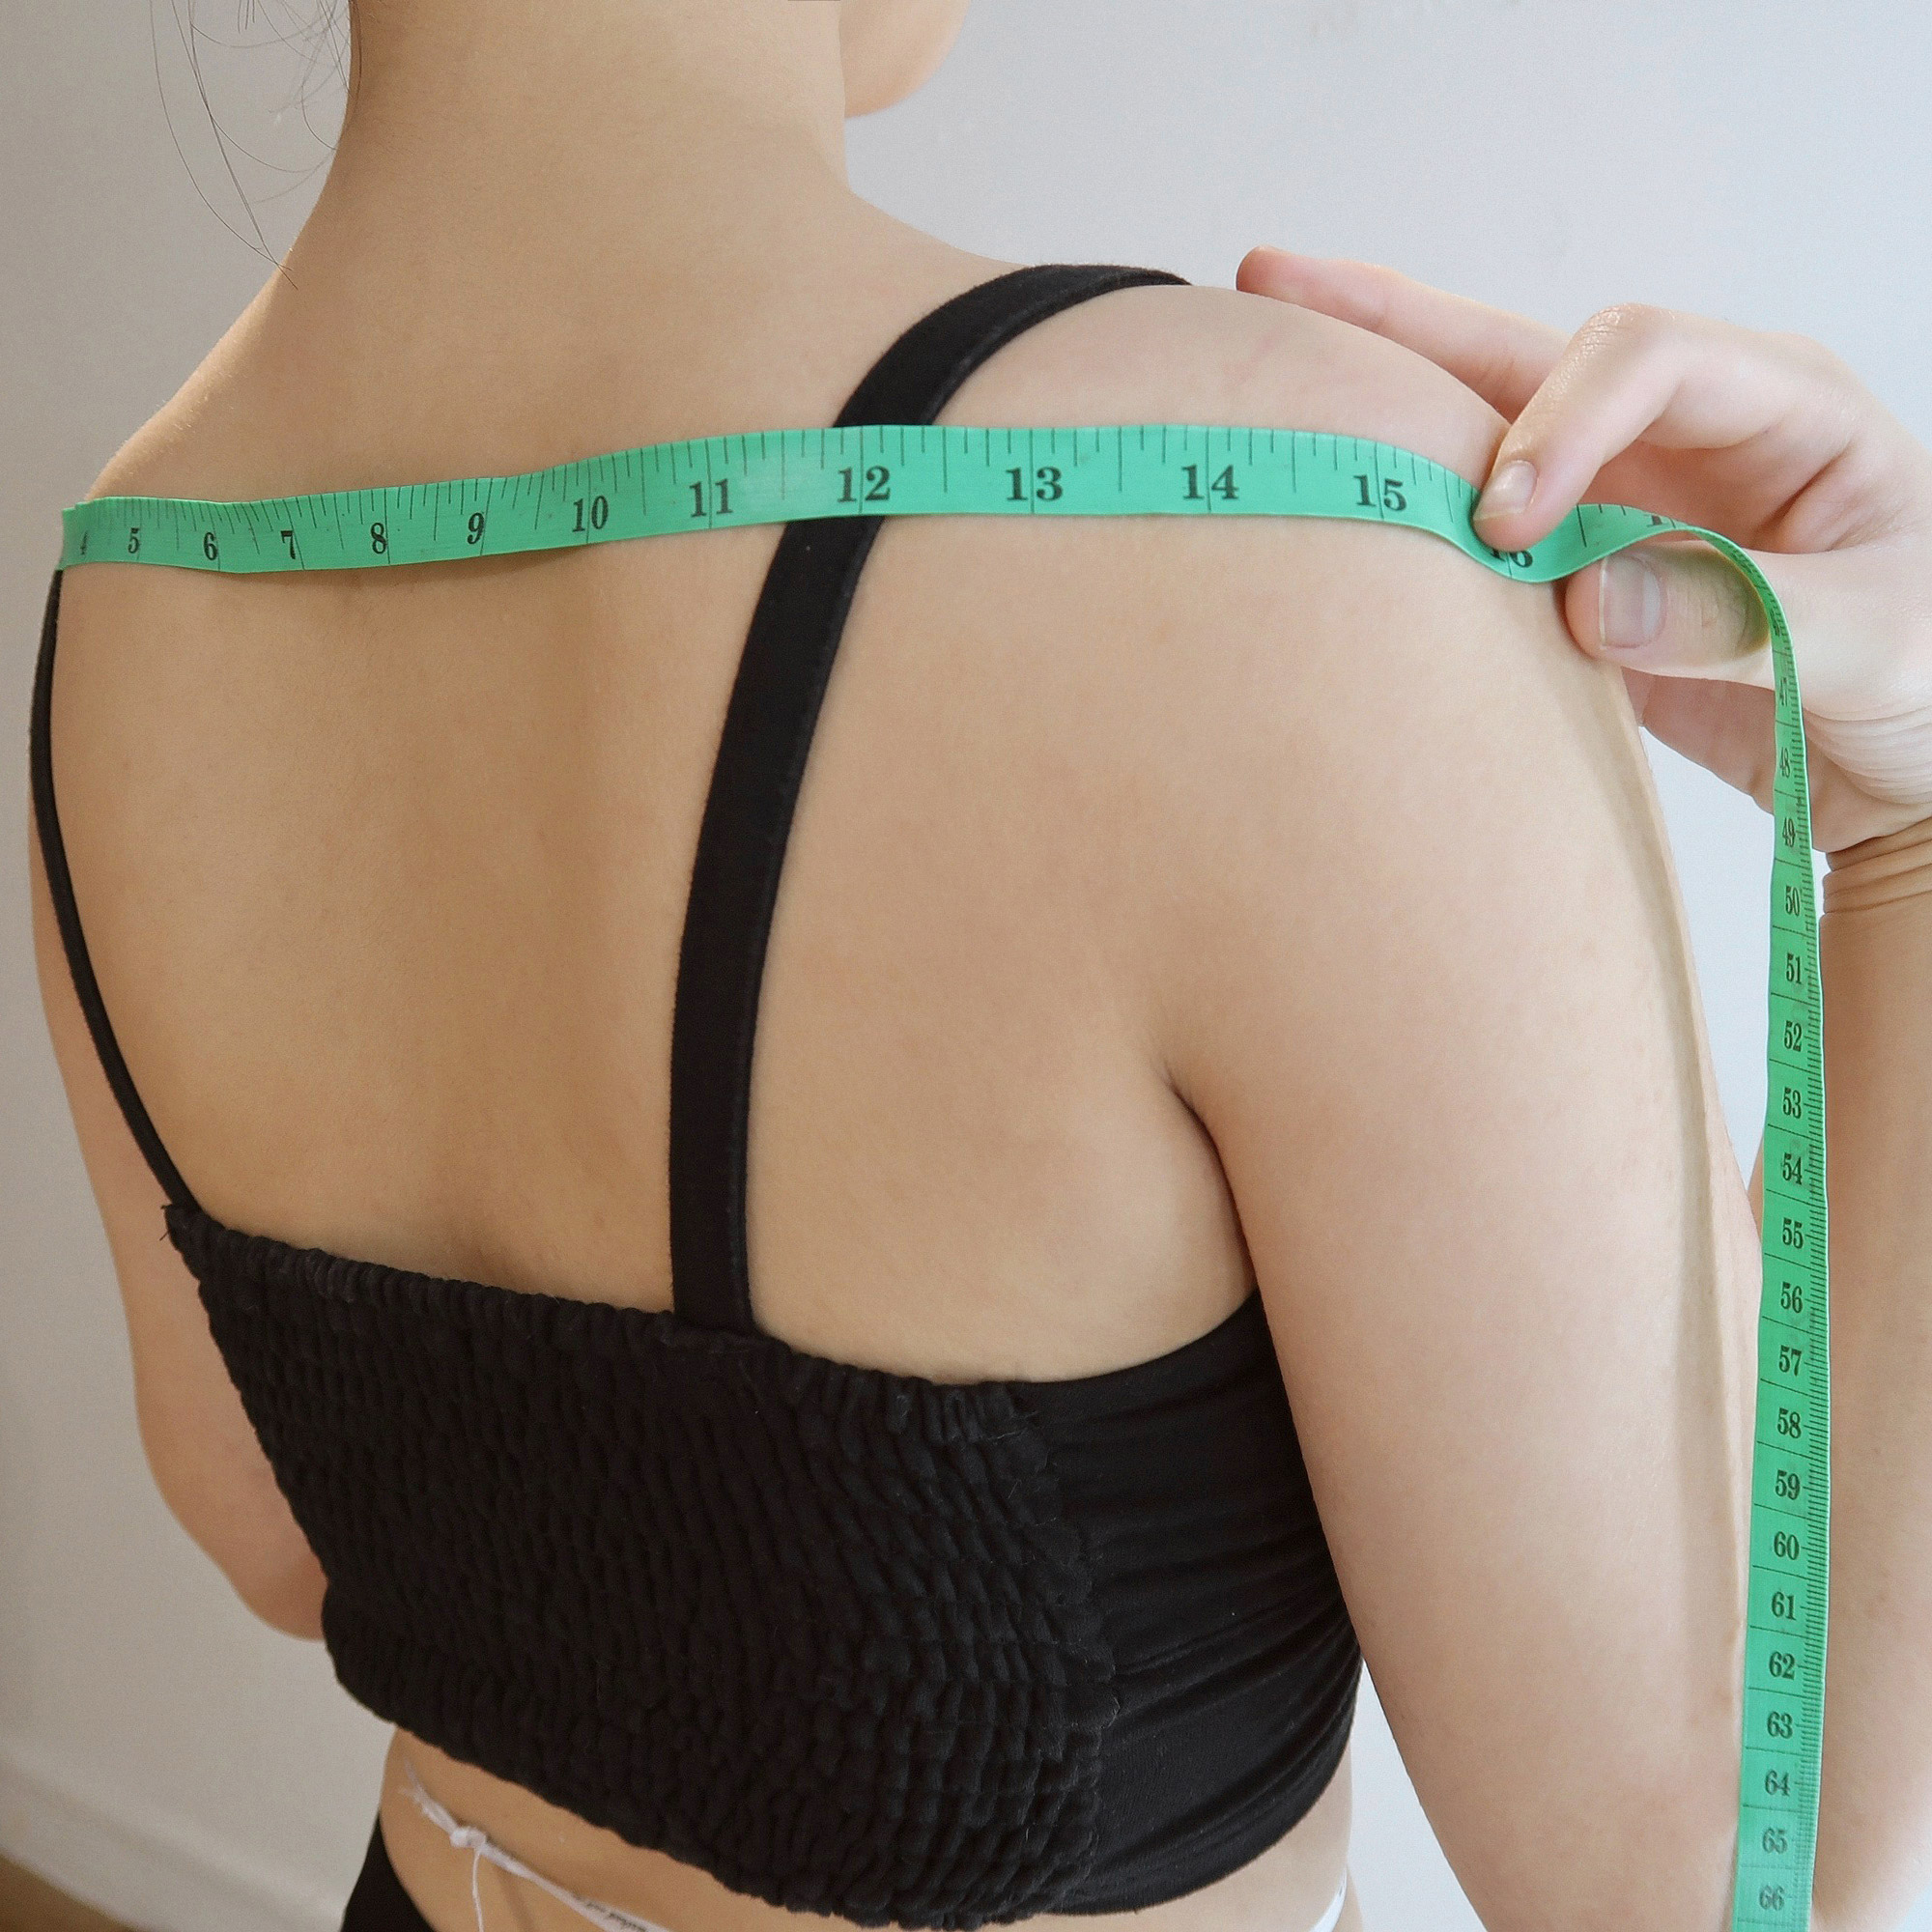
12. Shoulder width
Place the measuring tape at the tip of one shoulder and stretch it across the top of your back, above the shoulder blade and close to the end of your neck, to the tip of the other shoulder. Keep the tape parallel to the floor.
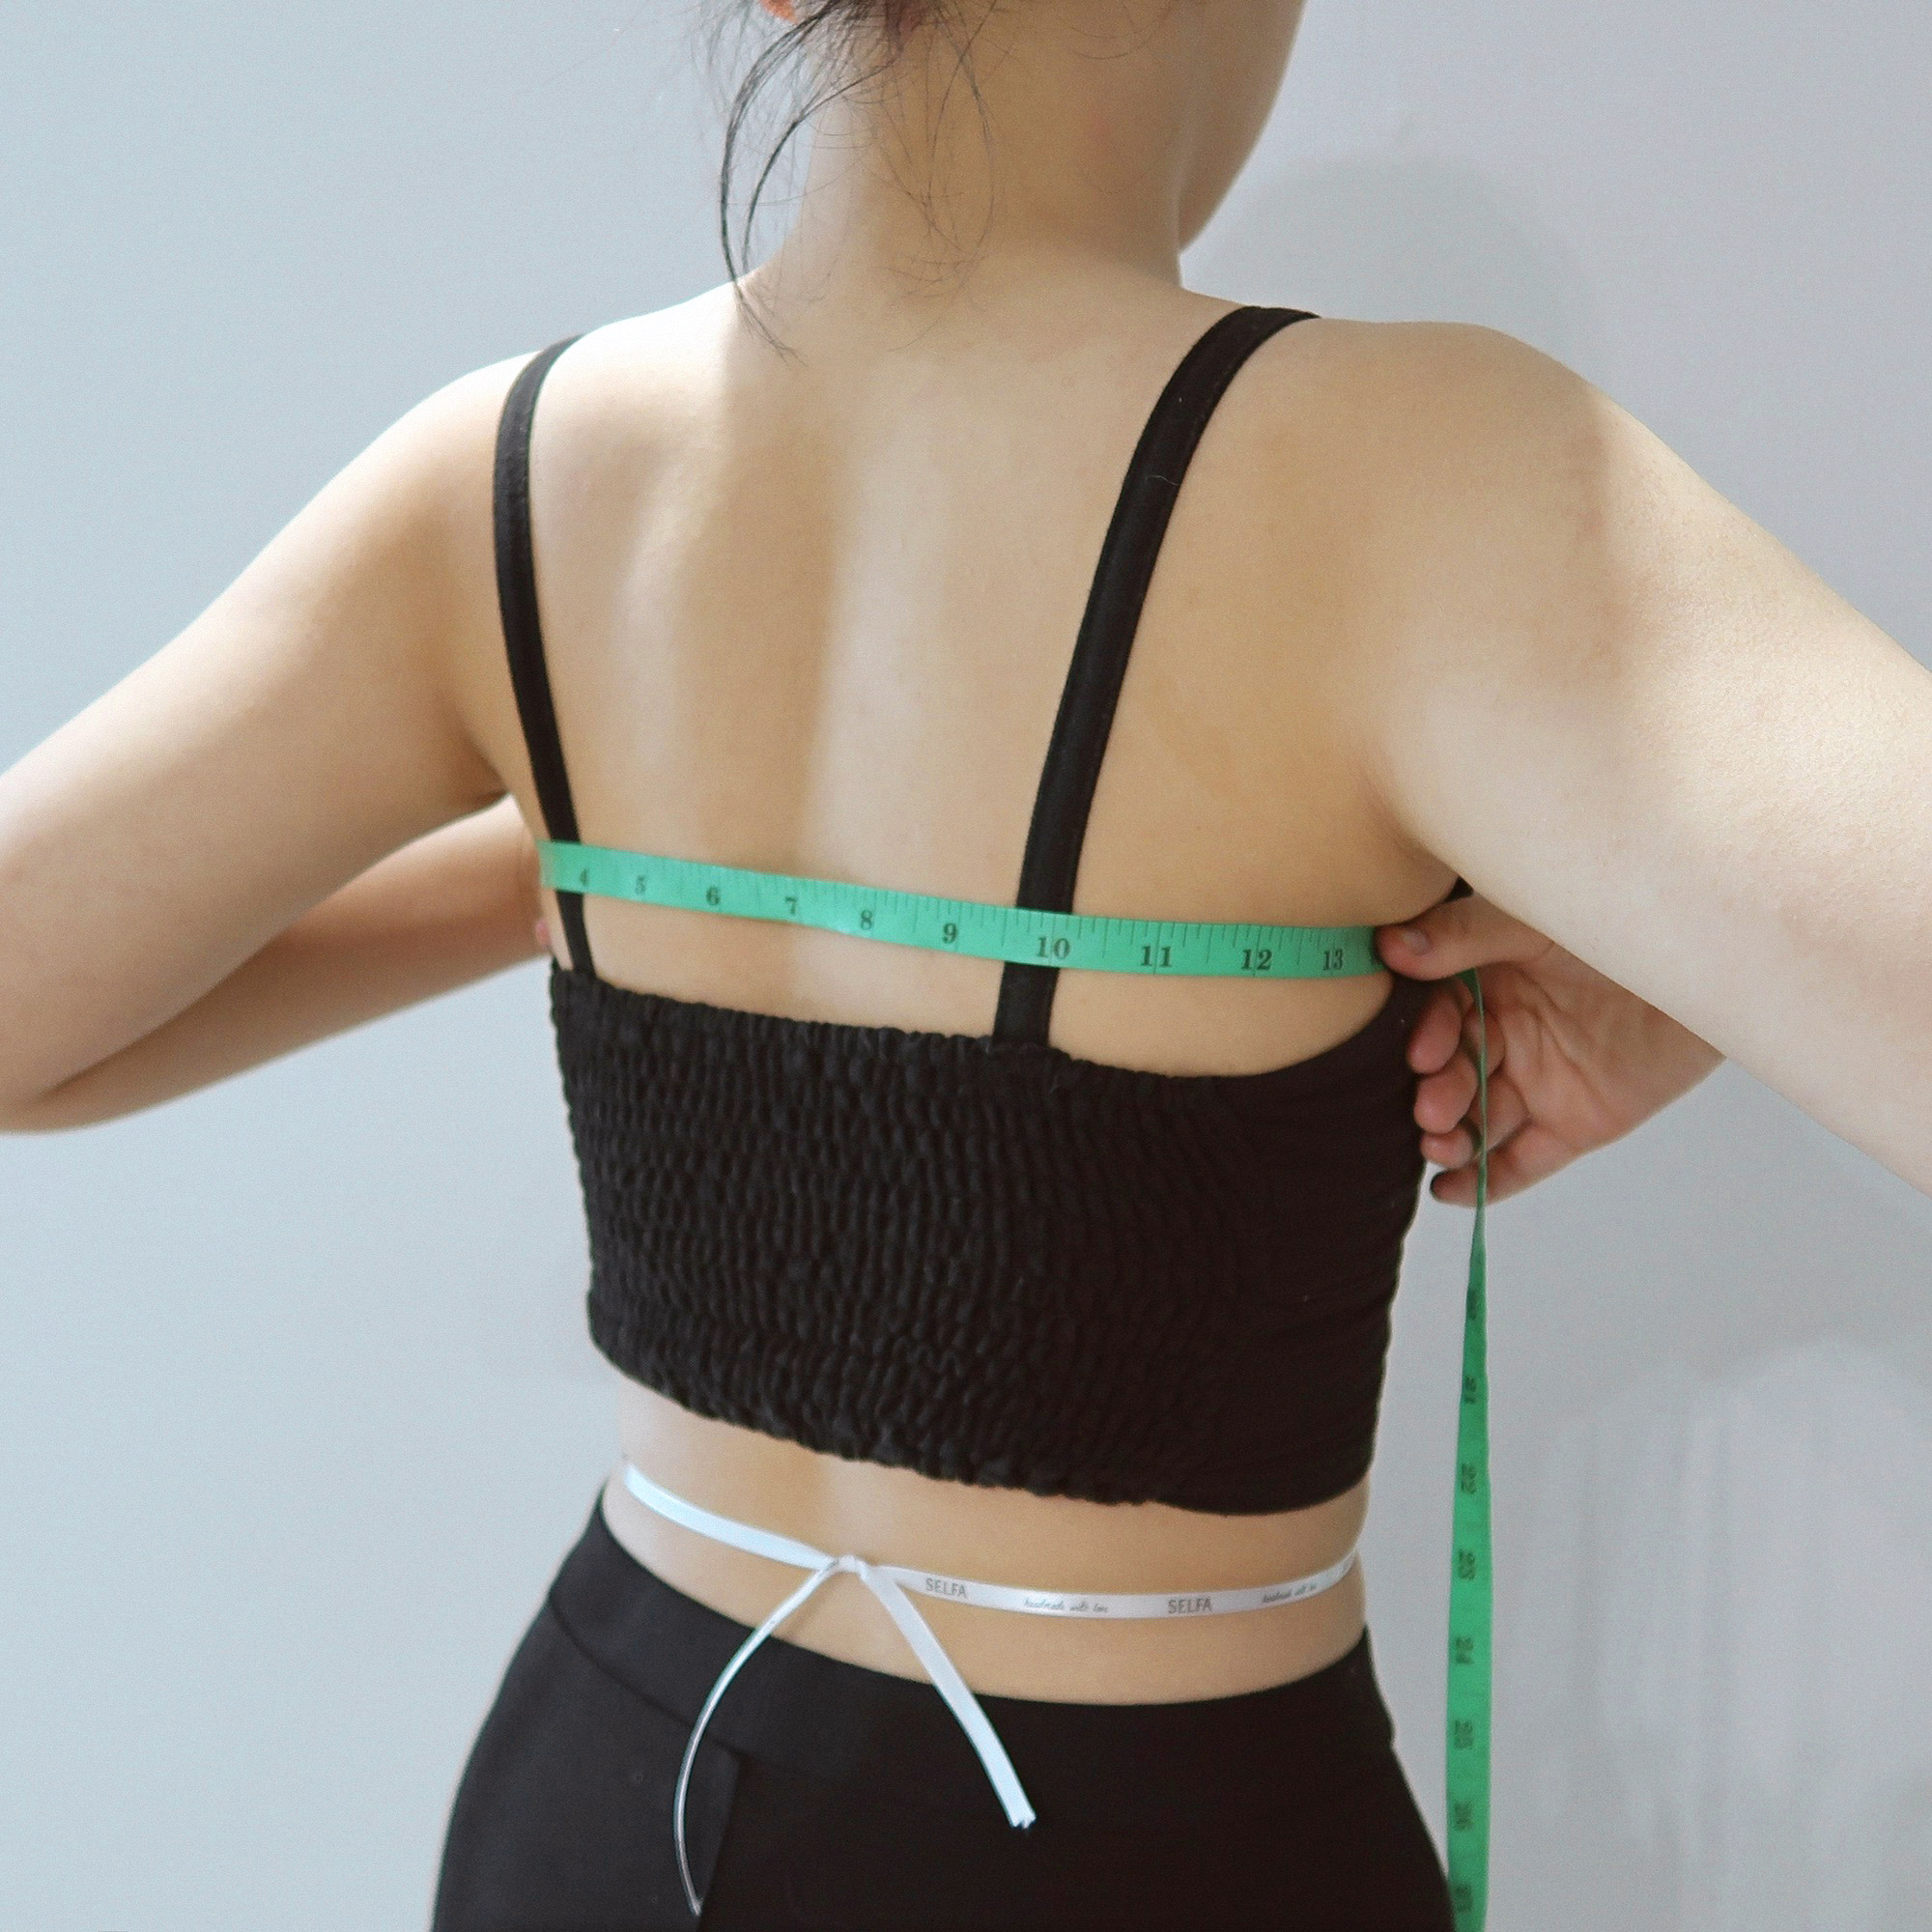
13. Back width
Place the measuring tape parallel to the floor and stretch it across your back from the end of one armpit to the end of the other armpit. Ensure that the endpoints are on the side seams of your casual t-shirt.
14. Armhole
Measure the full circle around your shoulder and armpit. Tip: With the tape measure held in place, move your arm around, rotate it back-forth and up-down. The tape should not be too tight to restrict the movement of your arm.
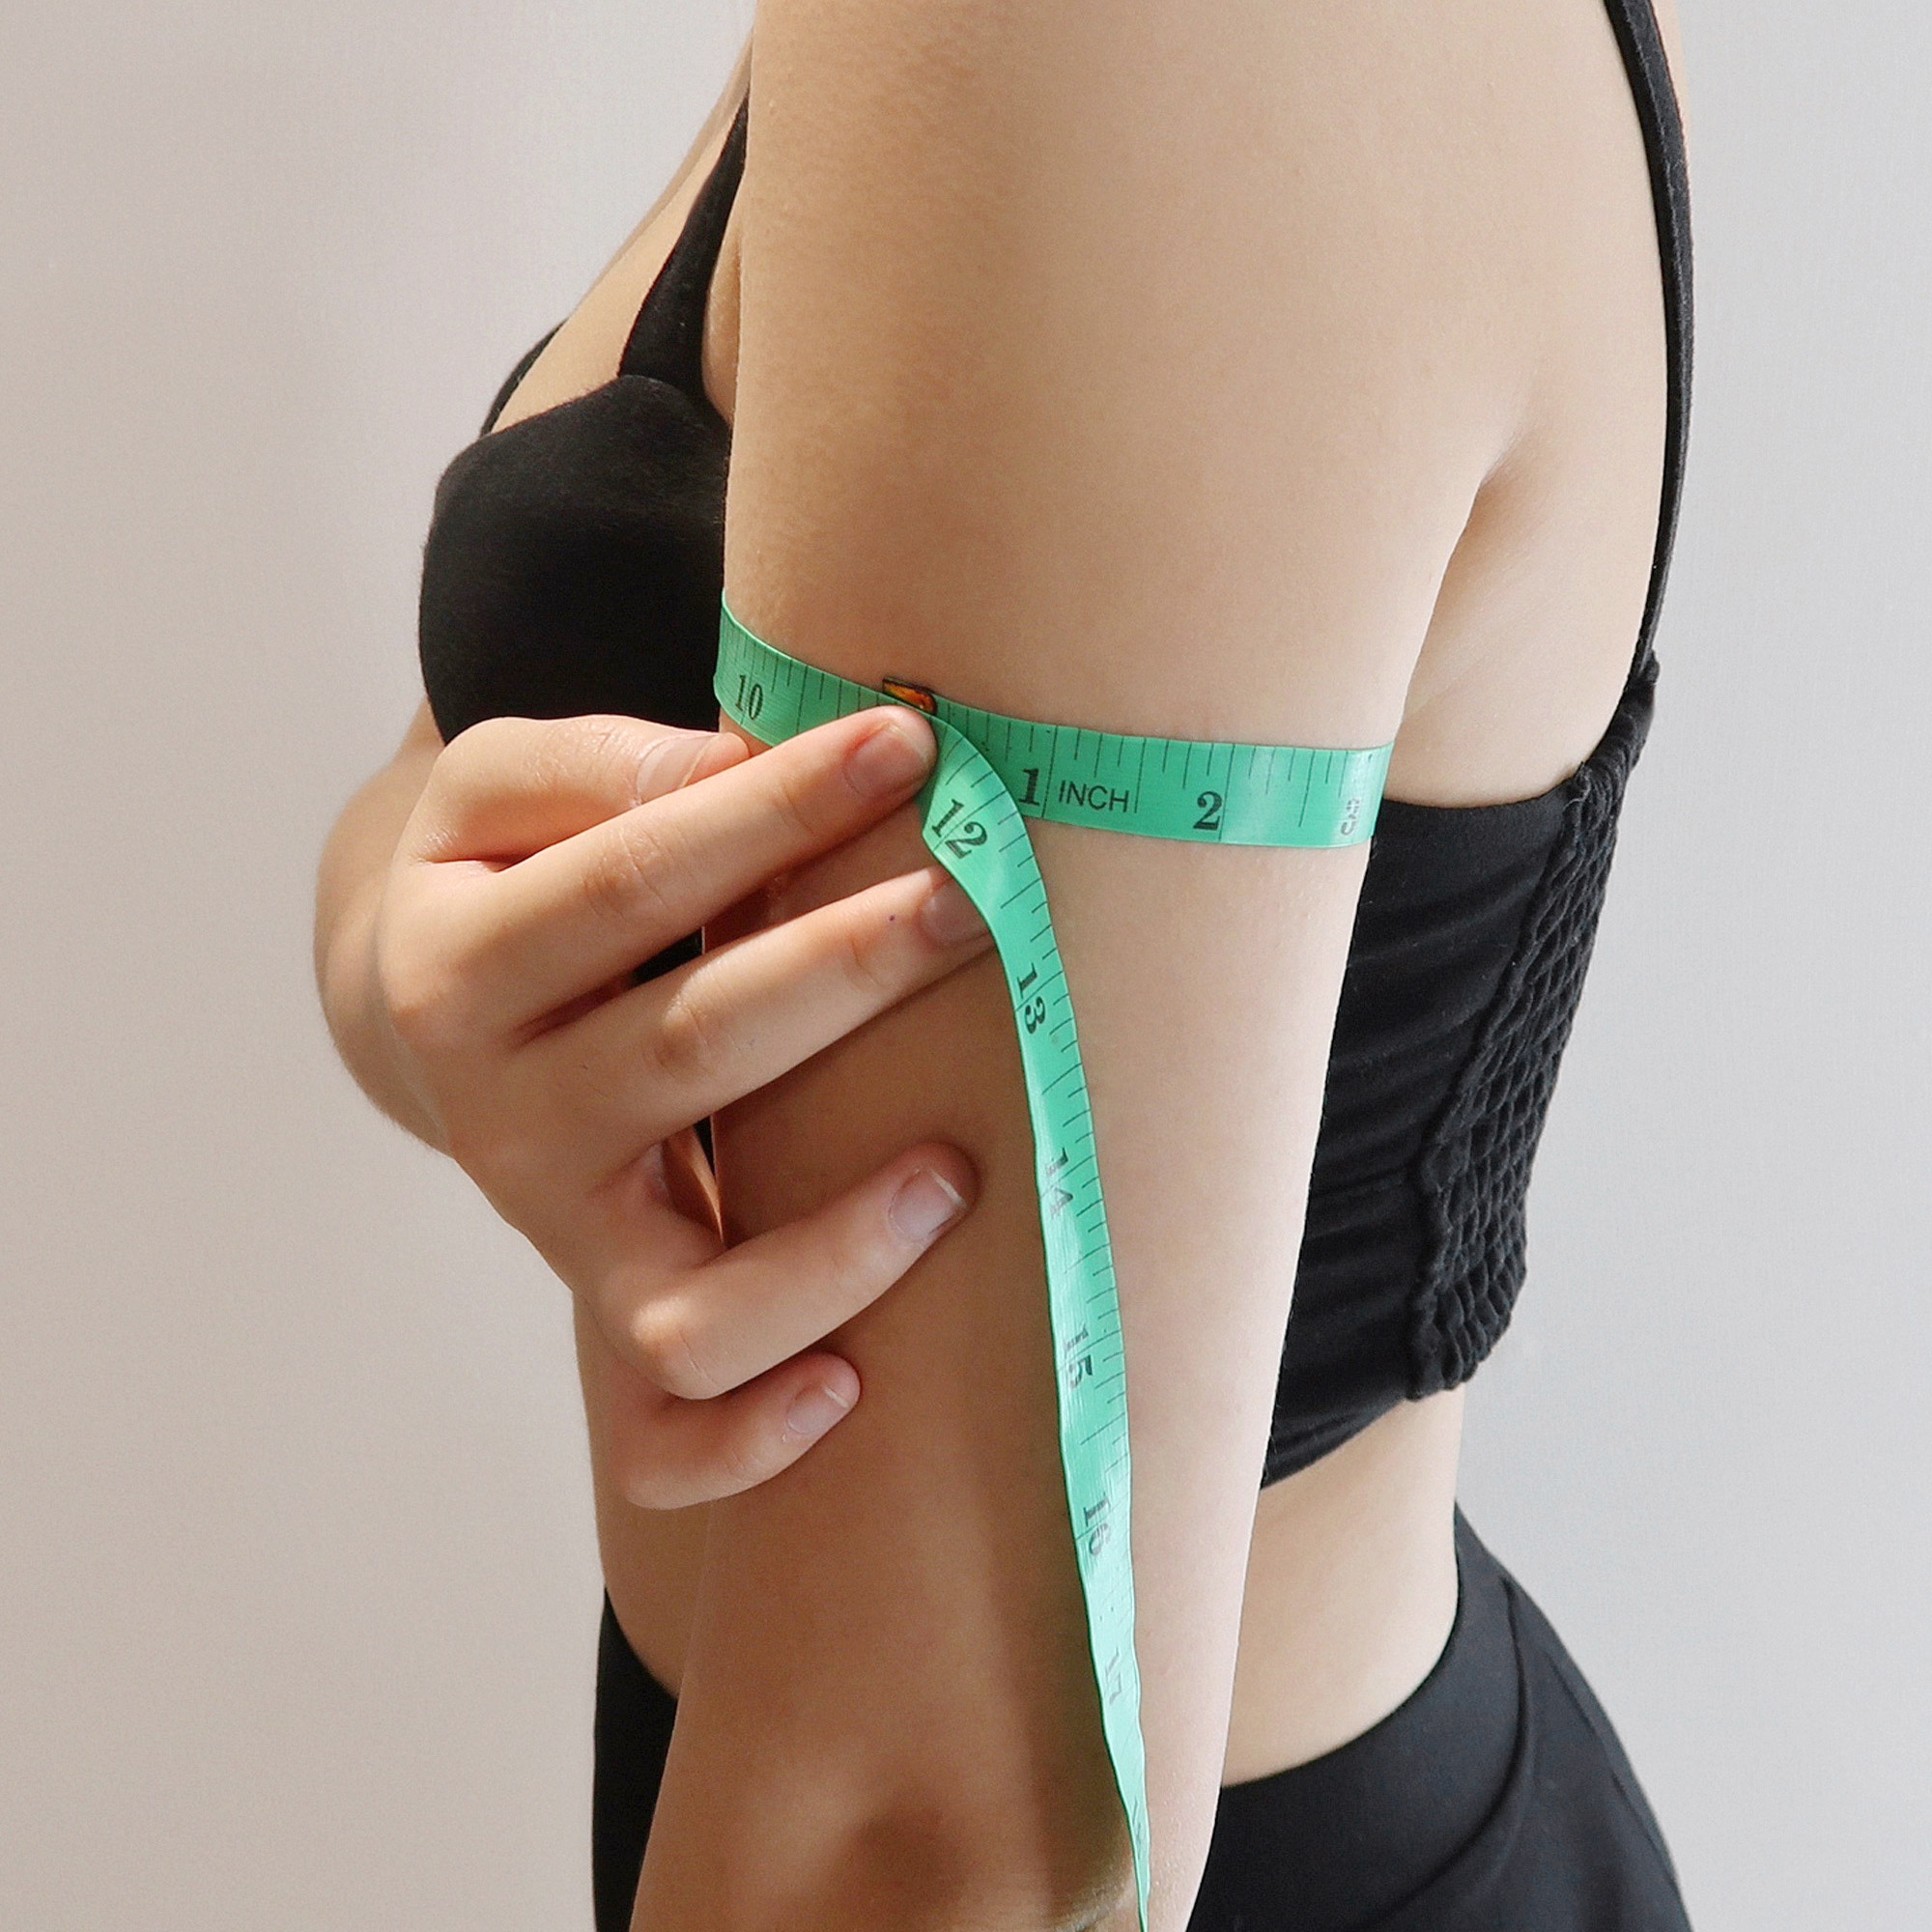
15. Bicep
Measure around your bicep (or upper arm) at its fullest point. It is normally close to your armpit.
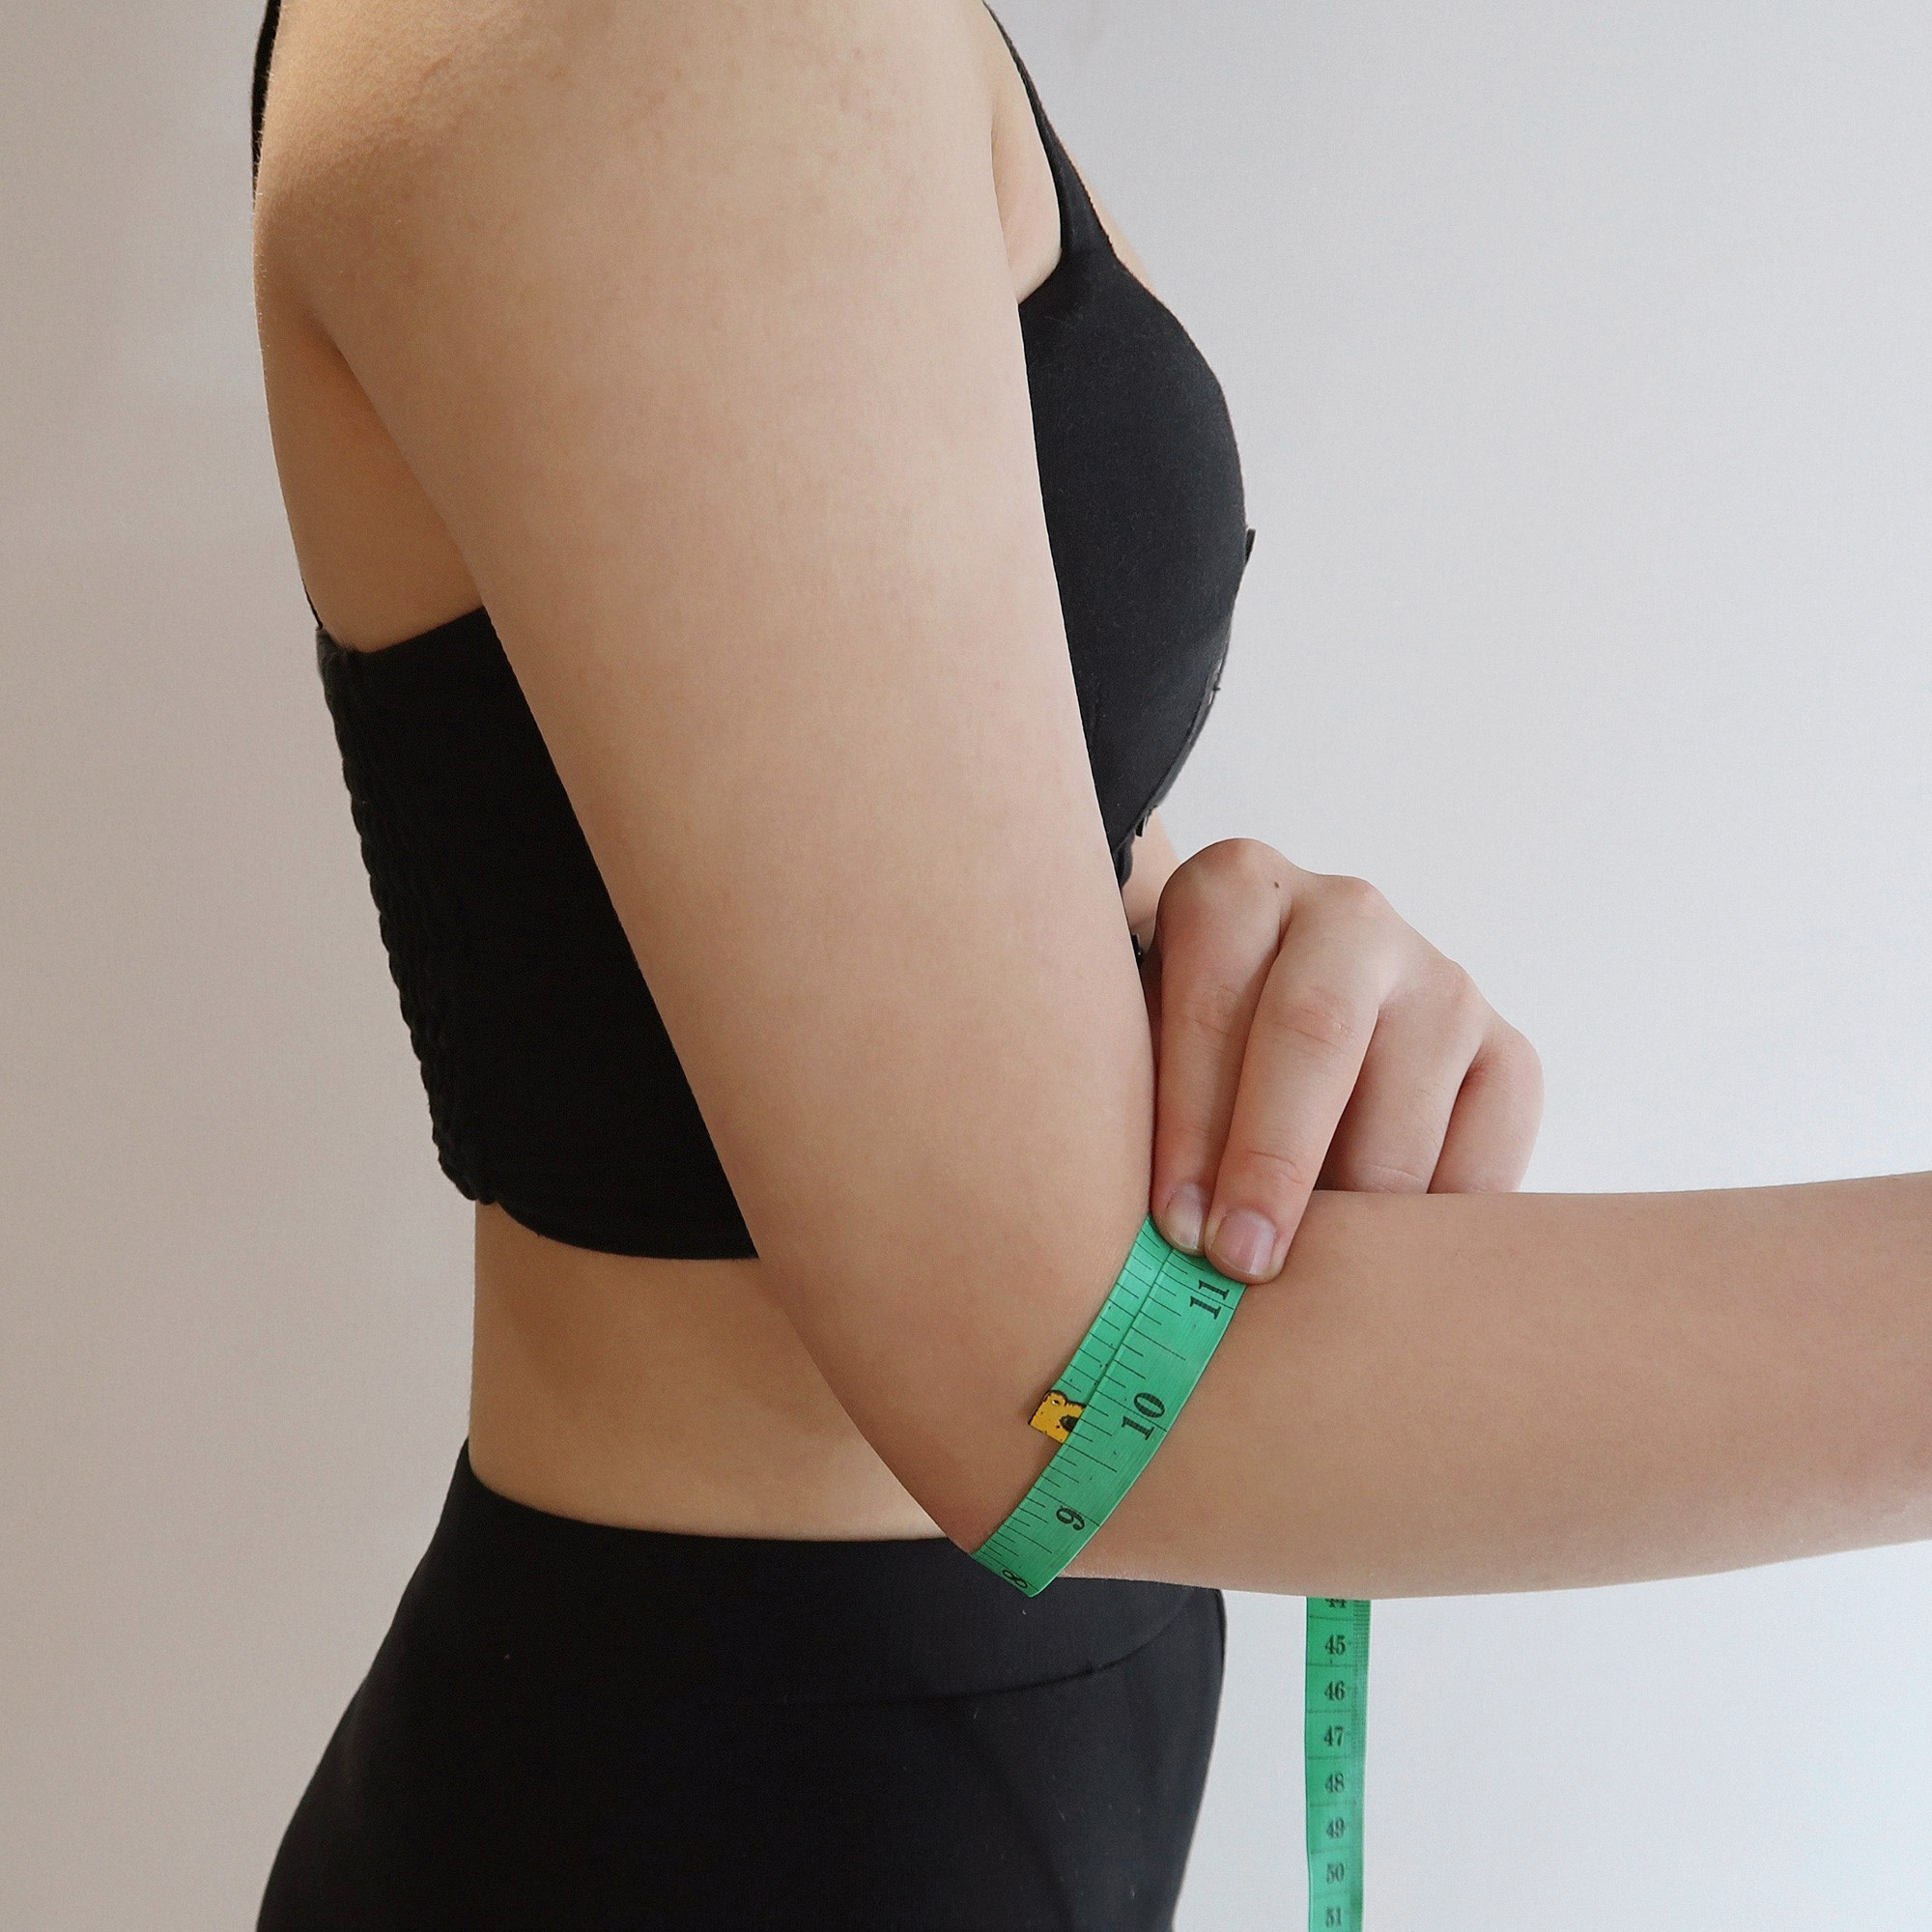
16. Elbow
Bend your forearm parallelly with the floor. Circle the tape around the elbow bone at its widest part to measure.
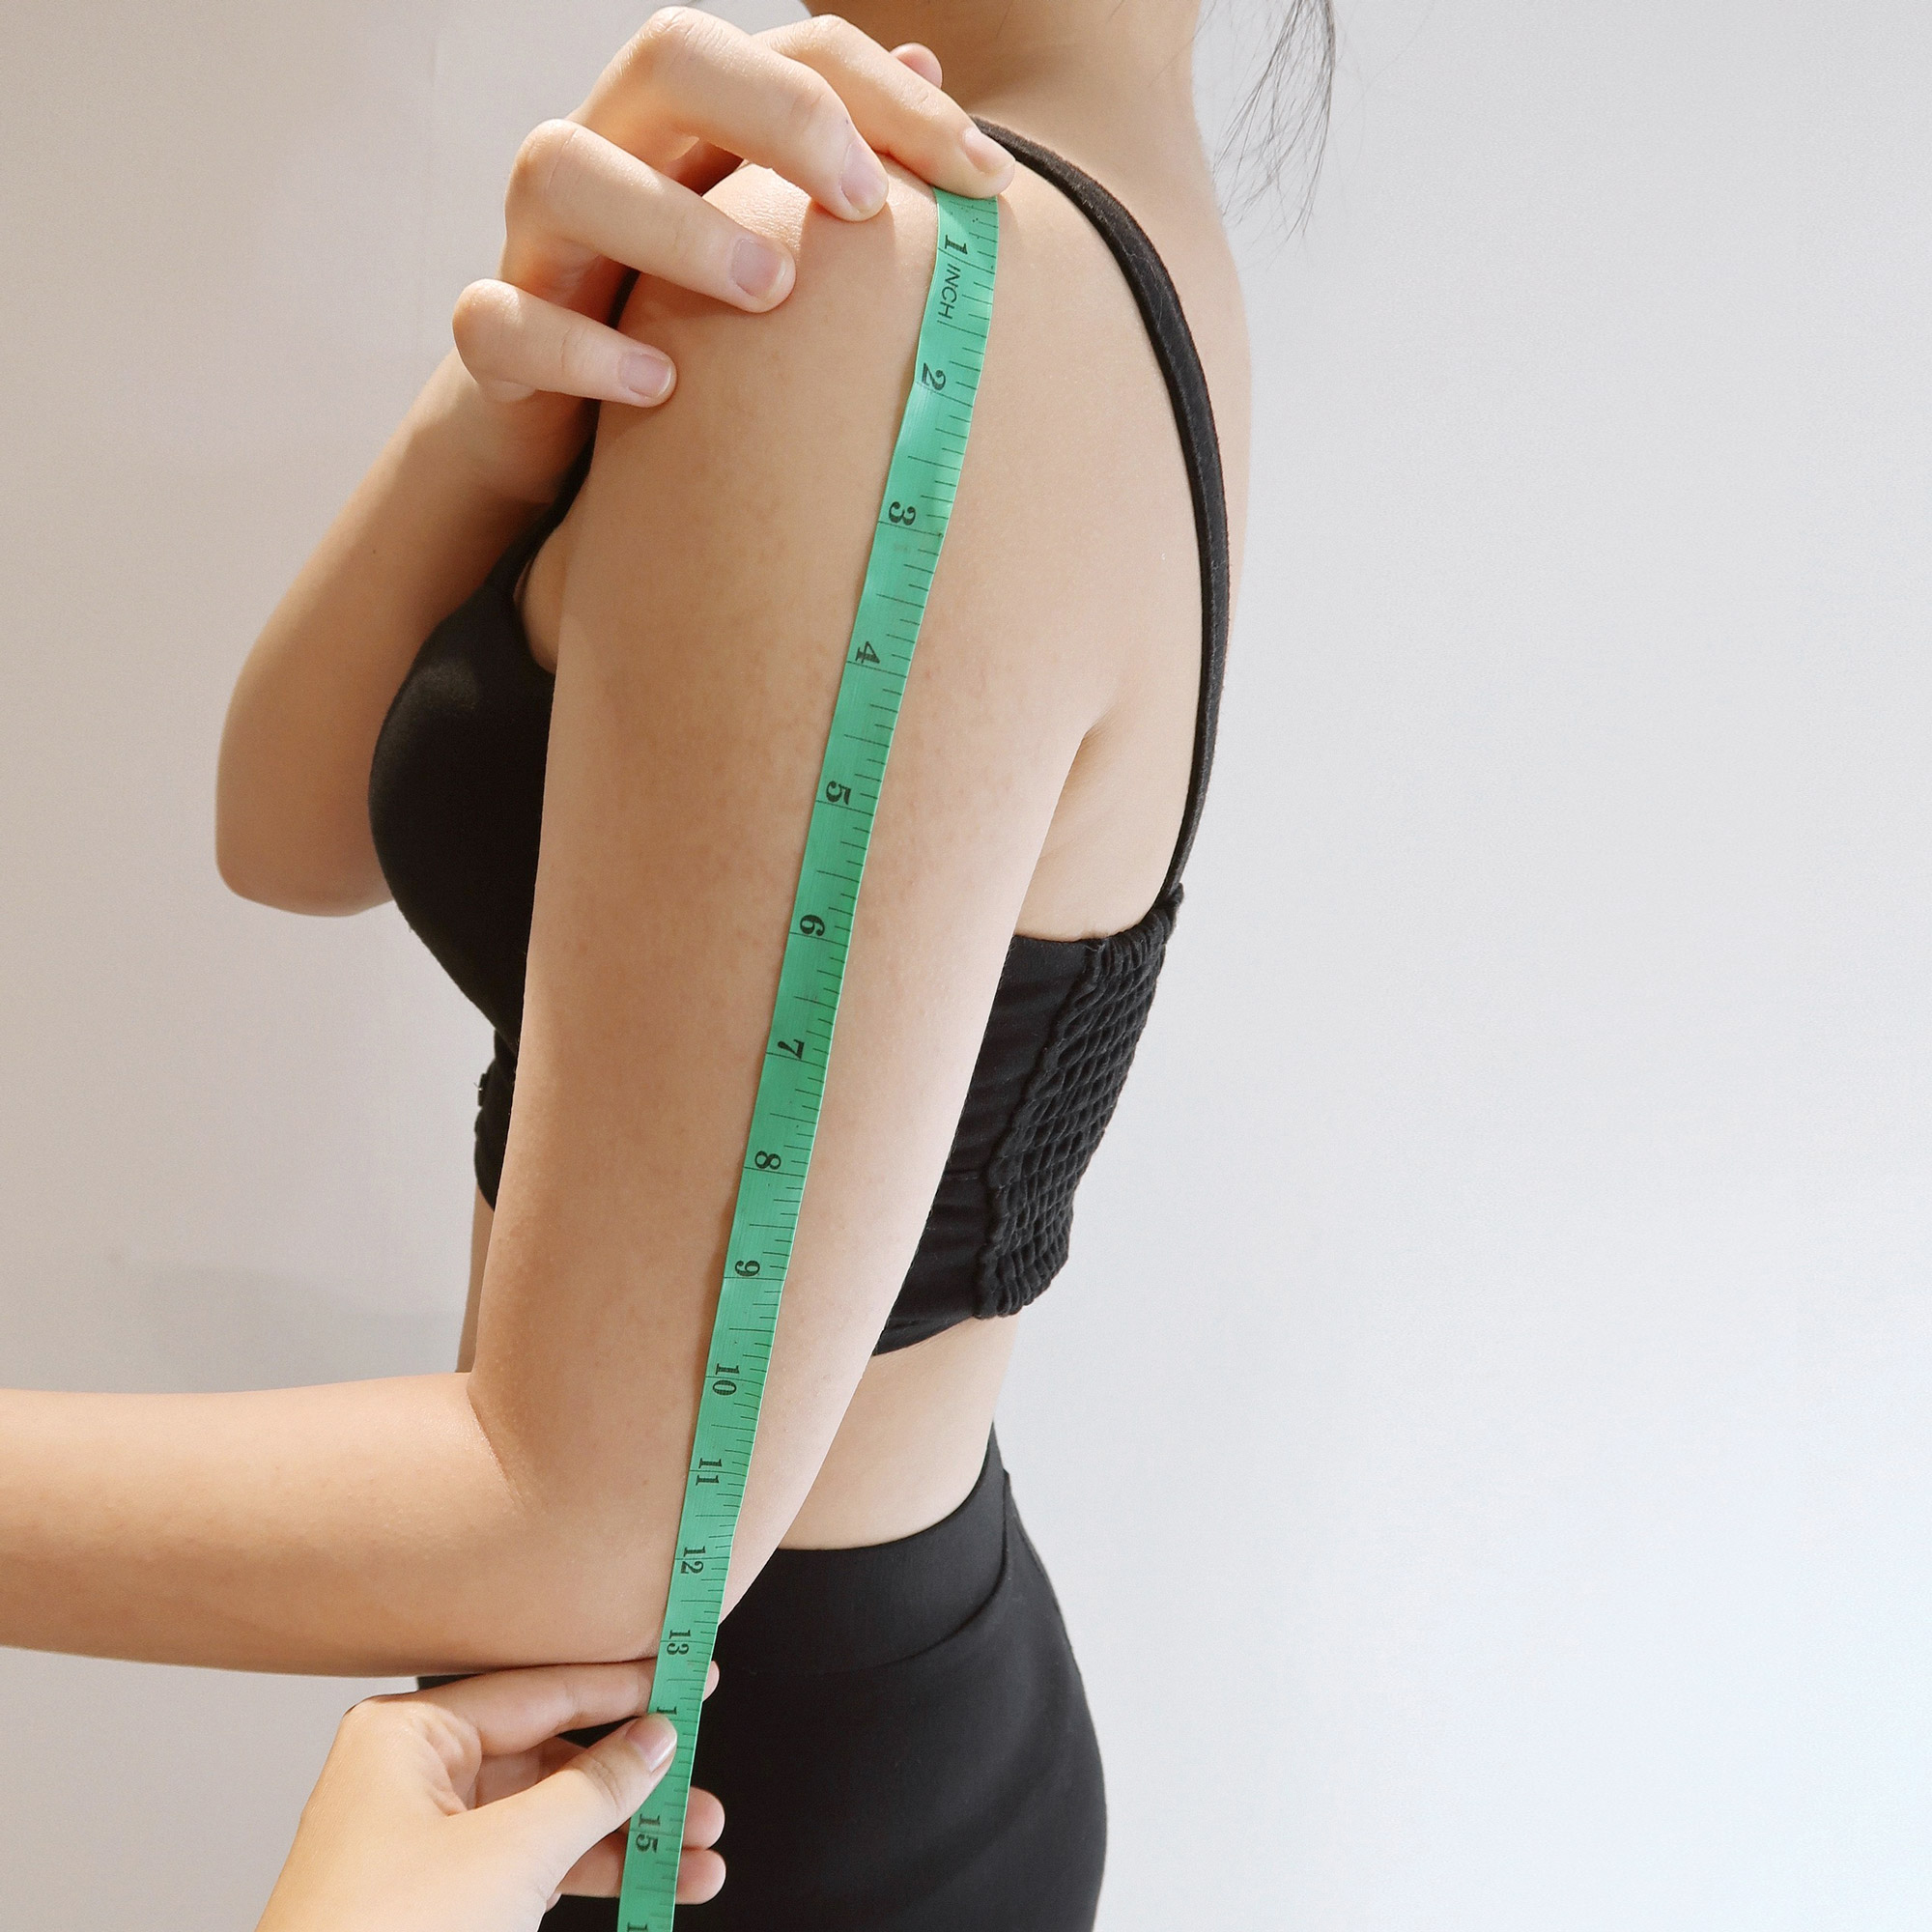
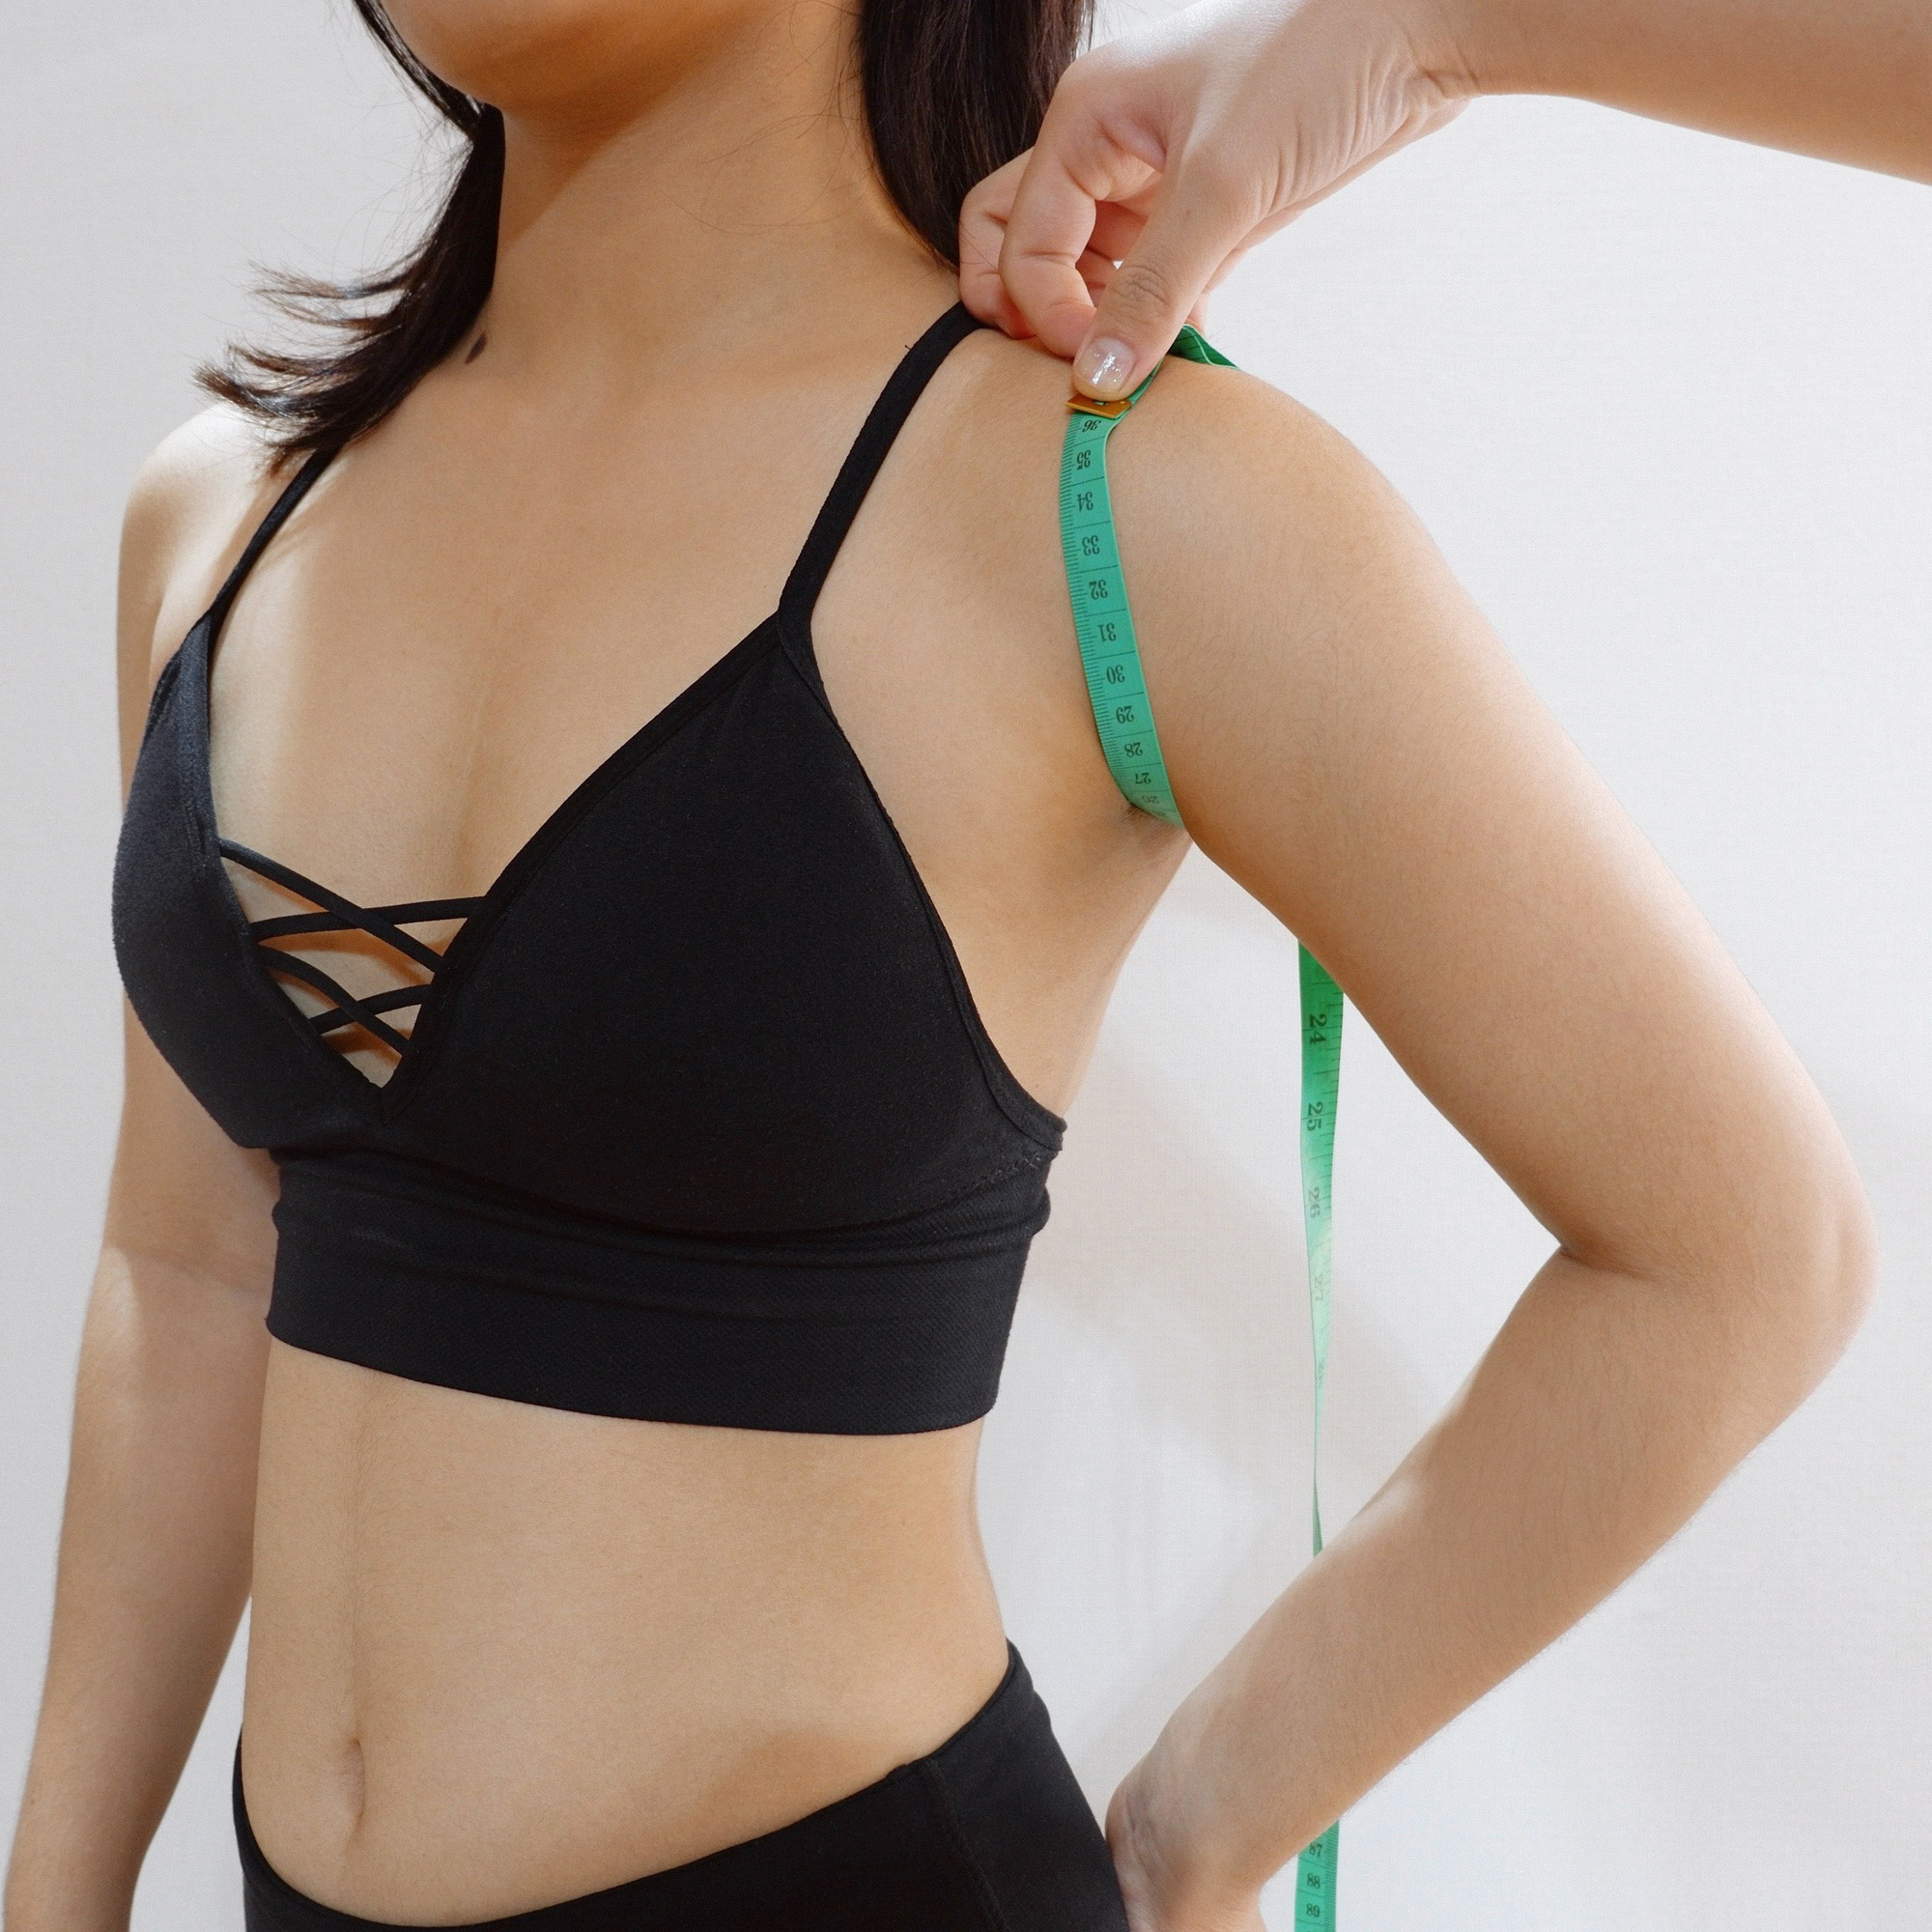
17. Shoulder to elbow
Measure vertically from the tip of your shoulder down the arm to elbow bone.
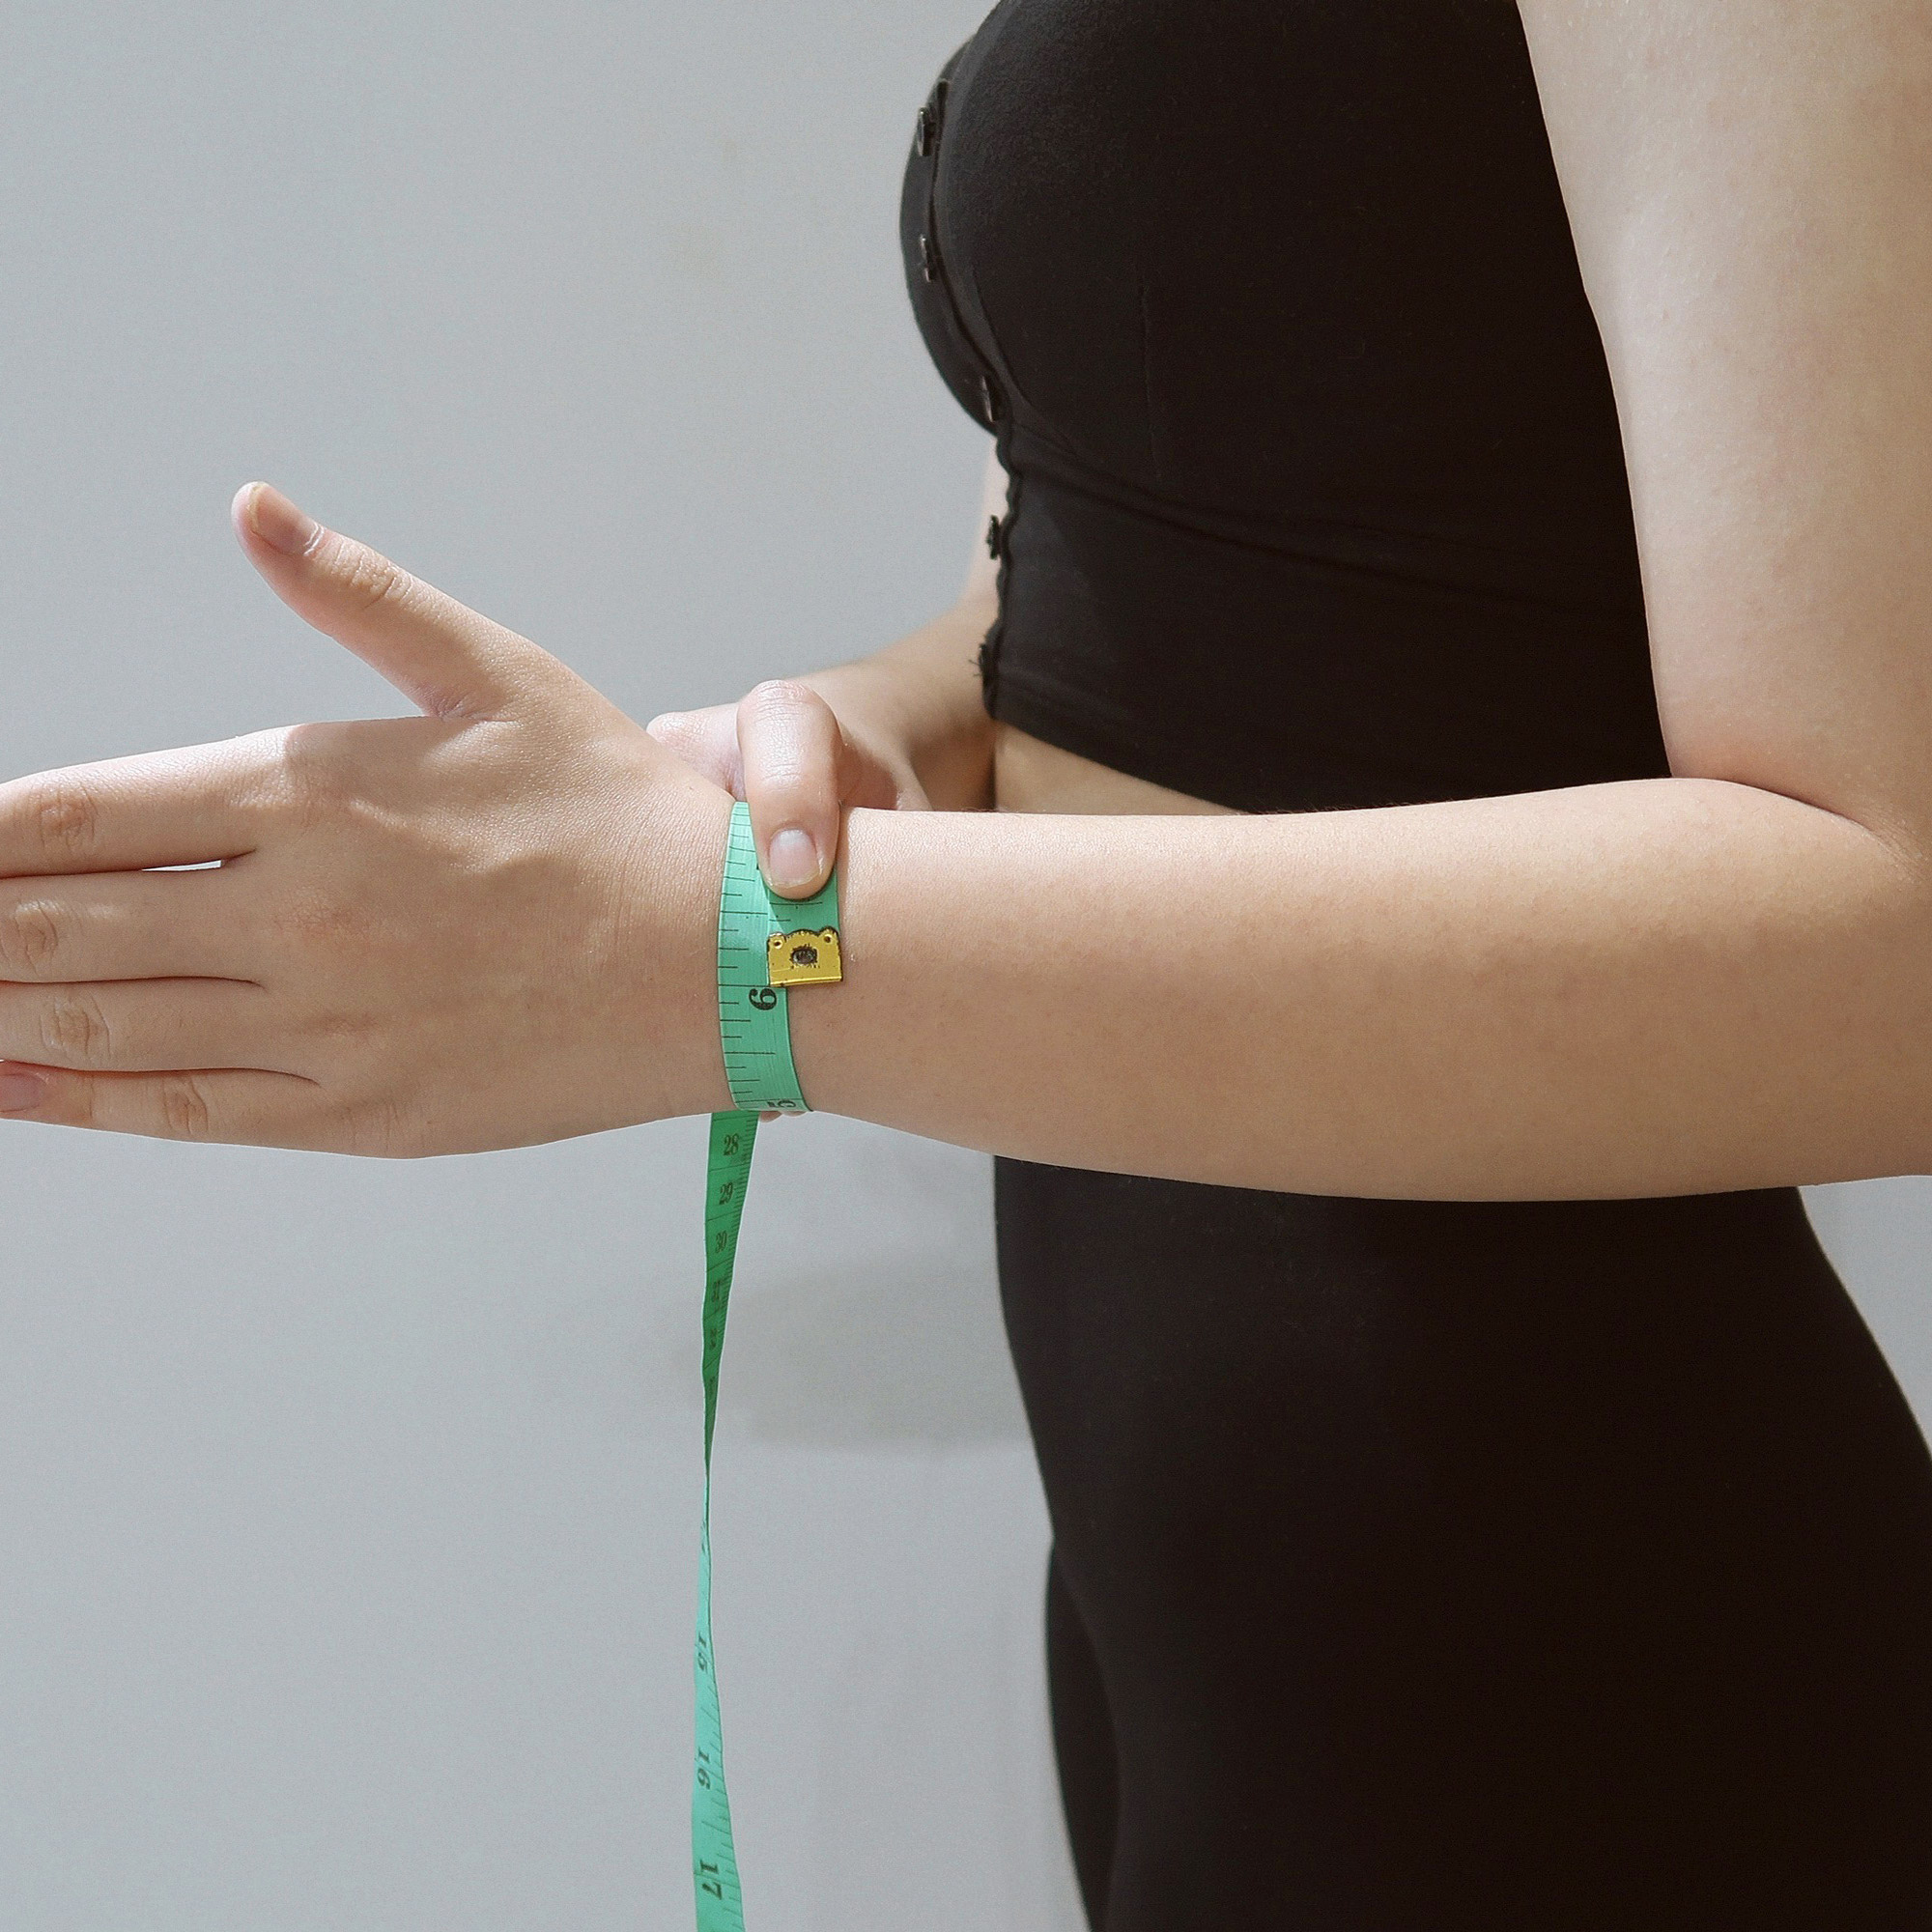
18. Wrist
Wrap the measuring tape around your wrist while keeping your arm bent at a 90-degree angle and your palm open. If your dress has half, or 3/4 sleeves, measure in the same way at the desired ending point of your sleeve.
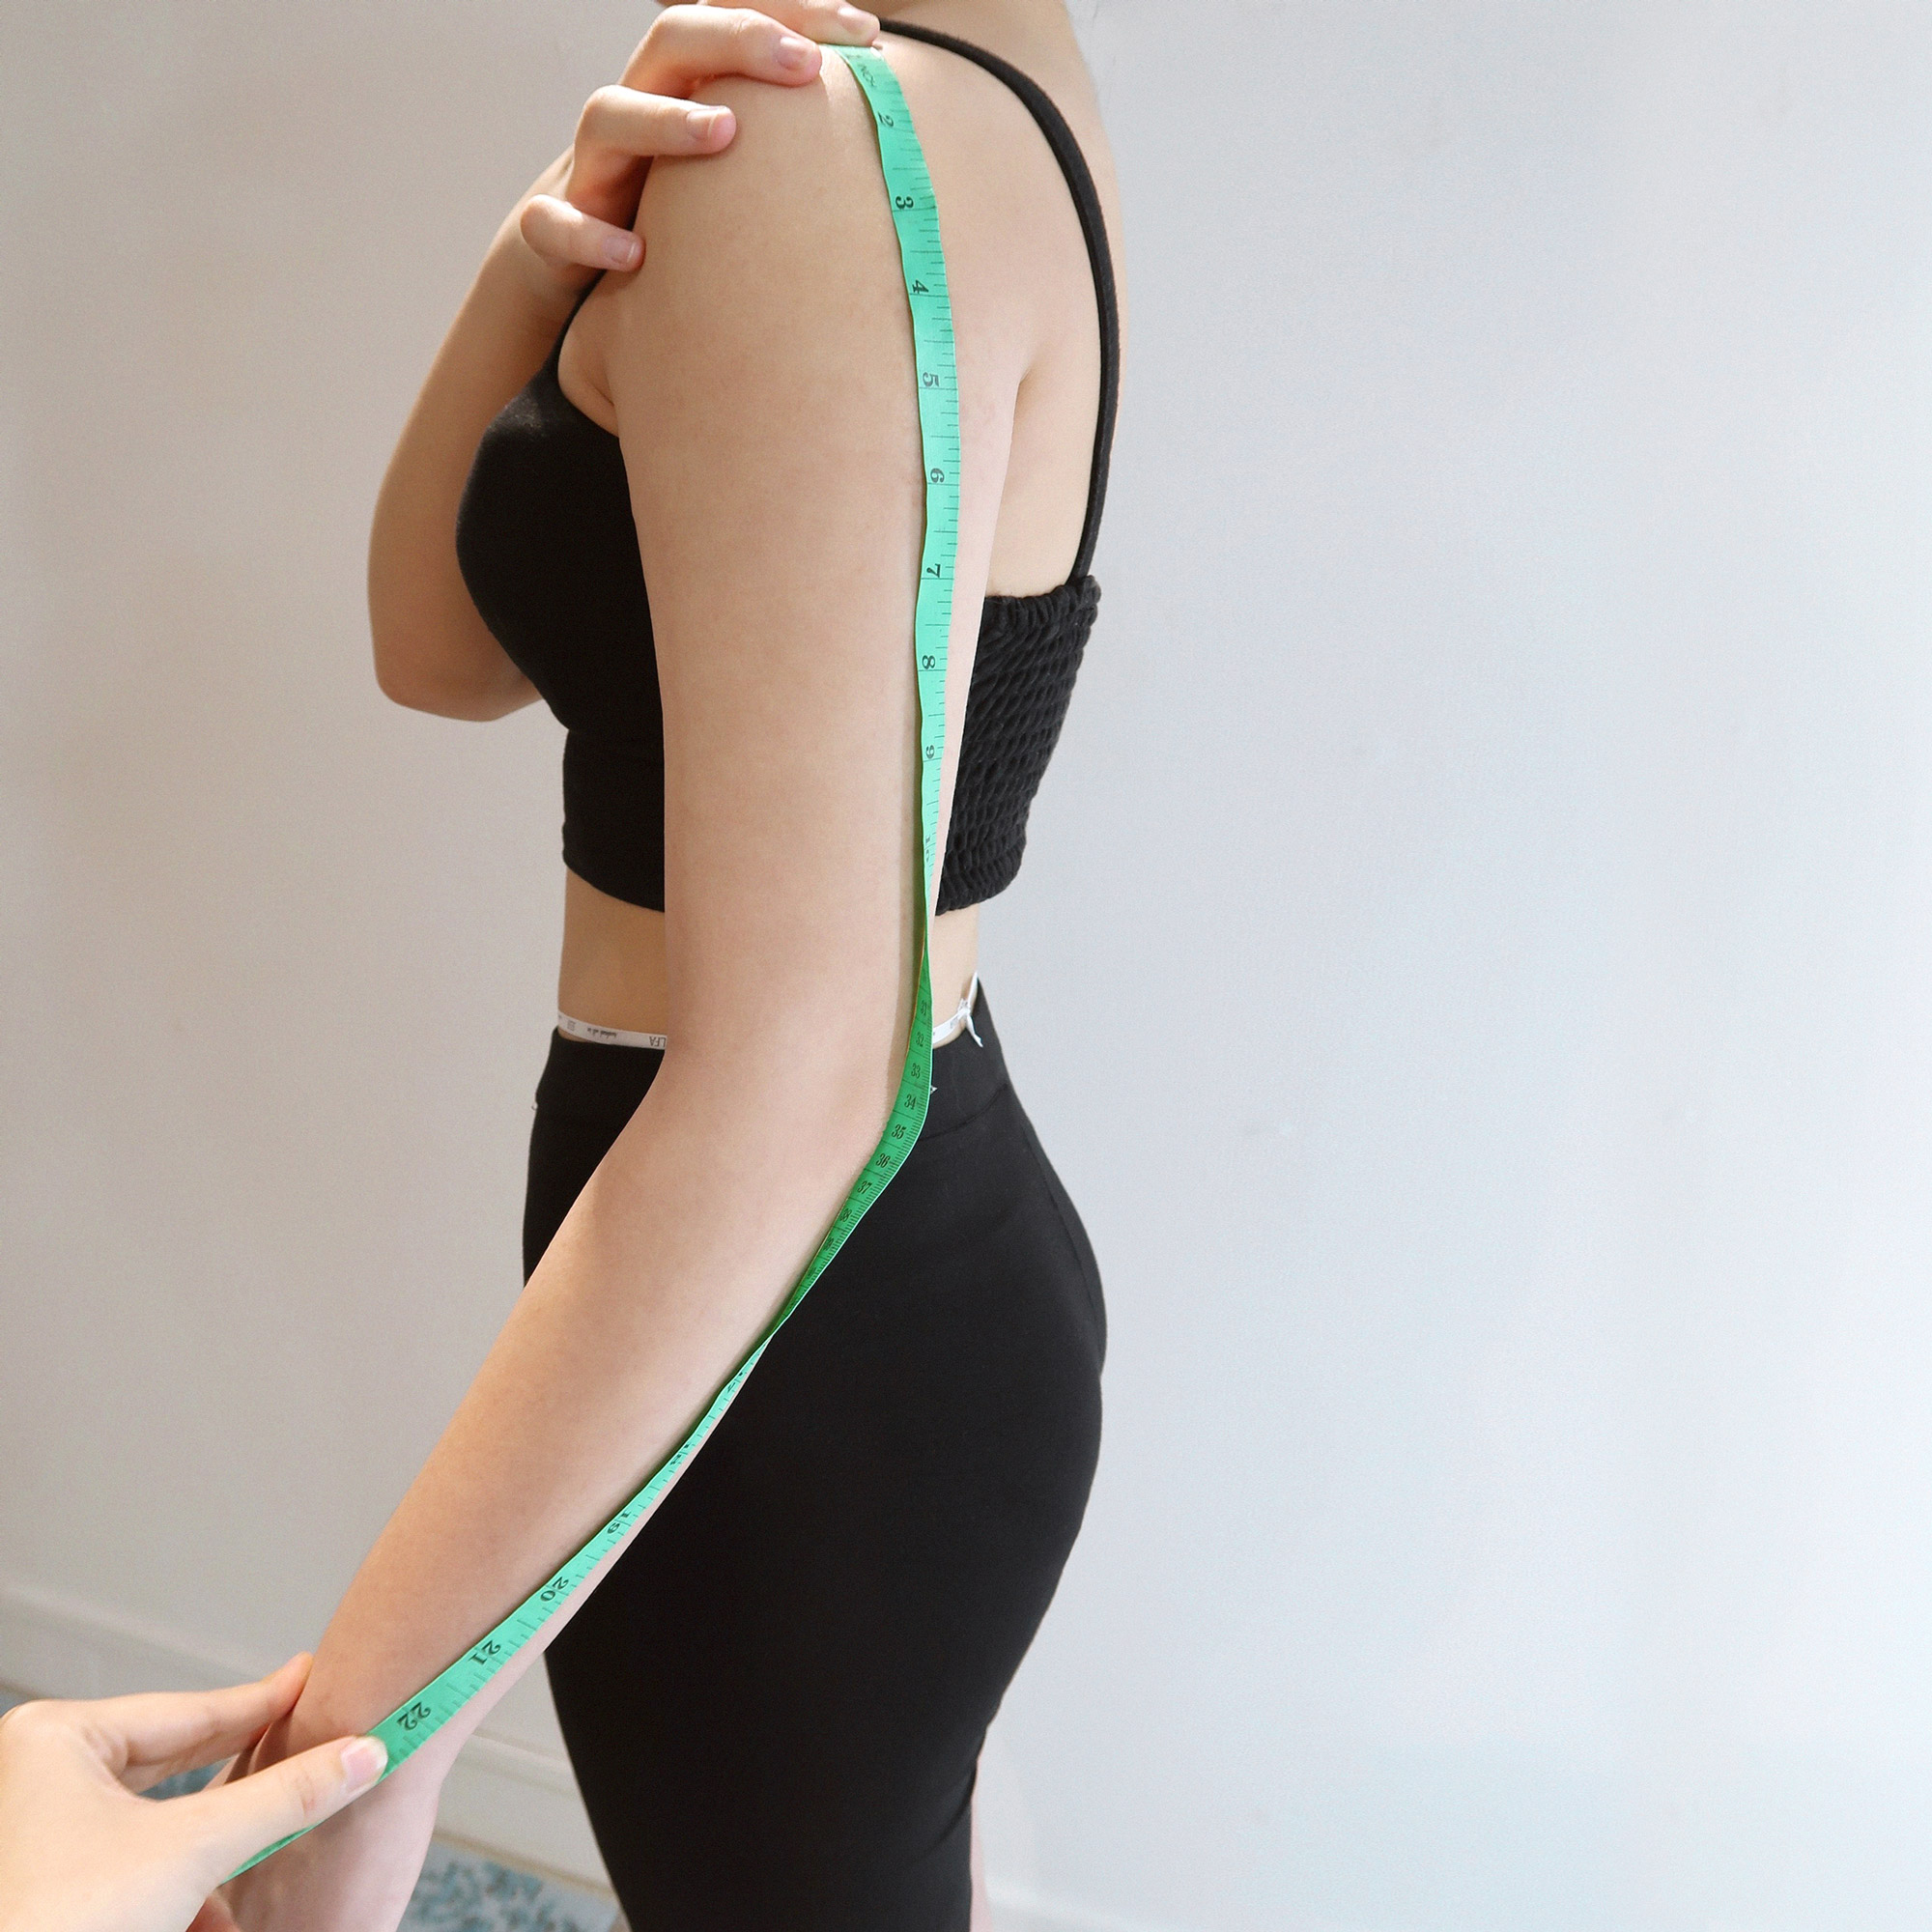
19. Sleeve length
Bend your elbow slightly (no more than 90 degrees). Measure from the tip of your shoulder down to your elbow bone, then continue measuring down to where you measured your wrist circumference. If your dress has off-shoulder sleeves, measure in the same way from your bicep down to your wrist.
20. Overarm
With your arms relaxed down by your sides, place the measuring tape around the fullest part of your chest and arms. Make sure that the tape is parallel to the floor.
21. Hip depth
Measure vertically from the defined waistline (at the ribbon) to the fullest part of your bottom where you took measurement 6.
22. Waist to the flare (mermaid dress)
Measure vertically from the defined waistline down towards your knee, but stop at the point where you want the flared part of the mermaid dress to begin (normally above knee).
23. Upper thighs
Stand relaxed with your legs together and straight, then measure the circumference of both thighs at the fullest part under your buttocks. Make sure that the tape is parallel to the floor. Do not press your thighs together tightly.